7
Before Beginning Assembly
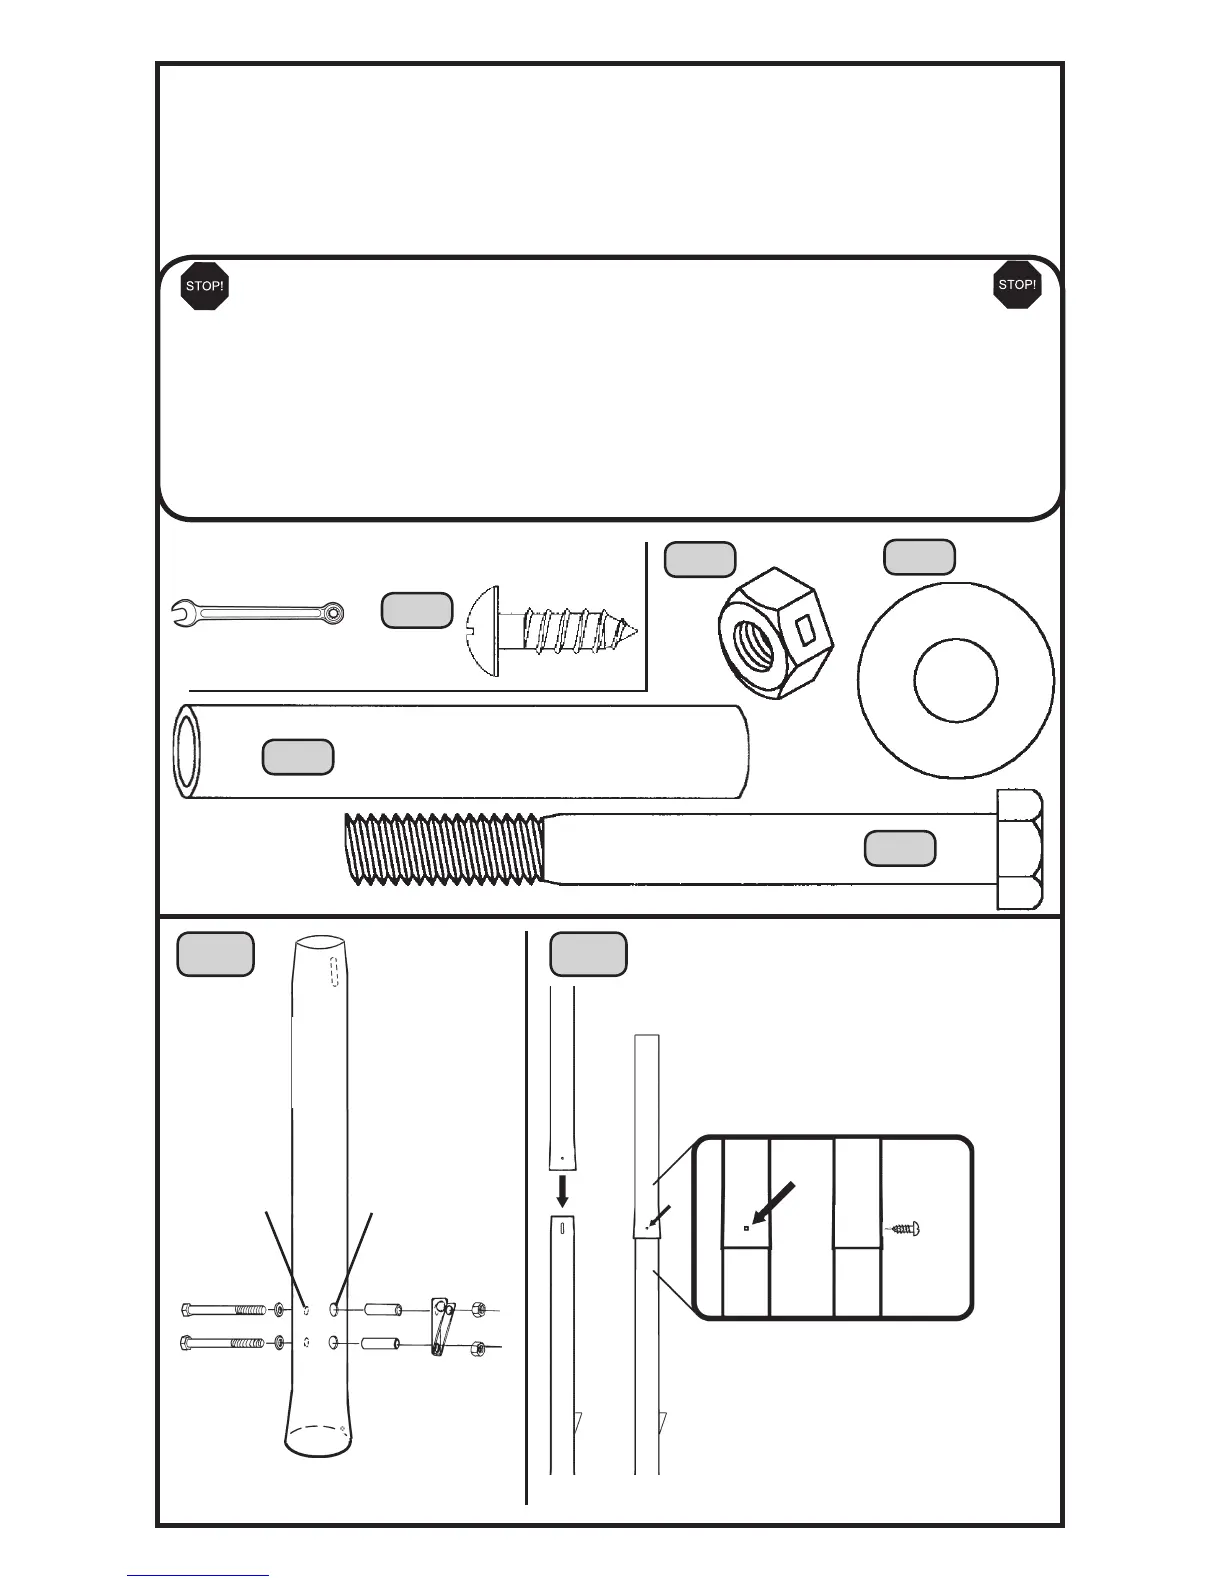
A. Keep the hardware bags and their contents separate. If any parts
are missing, call our Customer Service Department.
B. Test t all Bolts by inserting them into their respective holes. If
necessary, carefully scrape away any excess powder coating buildup
from inside the holes. Do not scrape away all of the powder coating.
Bare metal may rust. You may need to pound some Bolts into place
with a hammer or mallet.
MM
MN MS ML
Large holes
Small
holes
AT
MP
Required For This Page:
9/16” Wrenches
Screwdriver
1 2
ML
MM
MS
(2)
(2)
(2)
MN
(2)
1024989
Completely tighten the Nuts.
TP
MP
JA
Align the hole in the Top Pole (TP)
with the slot in the Middle Pole (MP)
and slide the Top Pole over the
Middle Pole.
The Screw will spin freely once installed.
Insert a 1/4” x 3/4” Screw (JA)
through the small hole in the Top
Pole and into the Middle Pole.
Do not jam the poles
together until instructed.
JA
(1)
HH03200
 Loading...