EasyManua.ls Logo

Lifetime IN-GROUND POWER LIFT 90962 User Manual

Lifetime IN-GROUND POWER LIFT 90962
48 pages
To Next Page IconTo Next Page
Page #1 background imageLoading...
Page #1 background image
Icon Legend................................4
Notices....................................5
Initial Set Up..............................6
Pole Assembly..........................12
Backboard to Rim Assembly.......16
Backboard to Pole Assembly.......22
Parts Identifi er..........................i - iv
Handle Assembly.......................26
Final Assembly..........................32
Maintenance Instructions..........38
Warning Sticker........................39
Registration........................40
Warranty................................41
TOOLS REQUIRED TABLE OF CONTENTS
Requires at least 493 lb (224 kg) of cement mix to fi ll a
volume of 3.7 ft
3
(0.105 m
3
).
Requires 3+ days for concrete to cure, plus 3-4 hours
to complete assembly steps.
3+ people recommended for setup.
Pour le français, voir la page 2. Para el español, ver la página 3.
ASSEMBLY INSTRUCTIONS
MODEL #60091
IN-GROUND
POWER LIFT
BASKETBALL SYSTEM
MODEL 90962
SAVE THIS INSTRUCTION IN THE EVENT THAT THE MANUFACTURER
HAS TO BE CONTACTED FOR REPLACEMENT PARTS.
BEFORE ASSEMBLY:
CONTACT LIFETIME CUSTOMER SERVICE:
Call: 1-800-225-3865
7:00 am–5:00 pm (Monday–Friday) MST
and 9:00 am–1:00 pm Saturday MST
QUESTIONS?
Model Number: 90962
Product ID:
For Customer Service in Mainland
Europe and the United Kingdom,
E-mail: cs@lifetimeproducts.eu
Live Chat:
www.lifetime.com
Video Instructions:
www.youtube.com/lifetimeproducts
7/16" (11 mm)
(x2)
(x1)
(x1)
(x1)
1/2" (13 mm)
(x2)
(x1)
9/16" (14 mm)
(x2)
3/4" (19 mm)
(x2)
(x1)
(x1)
Cement Mix
(493 lb)(224 kg)
(3’)
Rebar
(x1)
(x1)
(x1)
(x1)
Question and Answer IconNeed help?

Do you have a question about the Lifetime IN-GROUND POWER LIFT 90962 and is the answer not in the manual?

Lifetime IN-GROUND POWER LIFT 90962 Specifications

General IconGeneral
BrandLifetime
ModelIN-GROUND POWER LIFT 90962
CategorySports & Outdoors
LanguageEnglish

Summary

Icon Legend

Safety Instructions

Initial Set Up

Initial Set Up: Hardware Requirements

Lists the hardware necessary for the initial setup of the basketball system.

Initial Set Up: Parts Requirements

Lists the specific parts needed for the initial setup of the basketball system.

Initial Set Up: Tool Requirements

Lists the tools required to perform the initial setup of the basketball system.

Digging the Pole Hole (1.1)

Details on digging the correct size hole for the basketball pole base.

Pole Preparation and Concrete Mixing (1.2, 1.3)

Instructions for marking the pole and mixing the concrete for the base.

Inserting and Aligning the Pole in Concrete (1.4, 1.5)

Guidance on inserting the pole into the concrete and ensuring proper alignment.

Adding Rebar and Checking Pole Alignment (1.6)

Steps for adding rebar and verifying the pole's vertical alignment.

Filling the Hole with Concrete (1.7)

Procedure for filling the hole with concrete to secure the pole base.

Safety Warnings During Pole Installation

Important safety precautions to follow during the pole installation process.

Pole Assembly

Pole Assembly: Hardware Requirements

Lists the hardware necessary for assembling the basketball pole sections.

Pole Assembly: Parts Requirements

Lists the specific parts needed for assembling the basketball pole sections.

Pole Assembly: Tool Requirements

Lists the tools required to assemble the basketball pole sections.

Attaching Pole Bracket to Top Pole (2.1)

Instructions for securing the pole bracket to the top section of the pole.

Connecting Top and Middle Pole Sections (2.2)

Guidance on joining the top and middle pole sections together.

Seating and Securing Pole Sections (2.3, 2.4)

Steps for properly seating and securing the assembled pole sections.

Backboard to Rim Assembly

Rim Assembly: Hardware Requirements

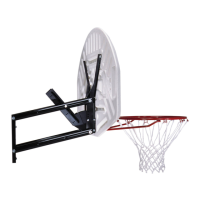
Lists the hardware necessary for assembling the backboard to the rim.

Rim Assembly: Parts Requirements

Lists the specific parts needed for assembling the backboard to the rim.

Rim Assembly: Tool Requirements

Lists the tools required to assemble the backboard to the rim.

Attaching Backboard Brackets (3.1)

Instructions for attaching the backboard brackets to the backboard.

Installing Rim Pivot Bracket Bolts (3.2)

Guidance on inserting bolts through the rim pivot bracket for assembly.

Axle and Push Nut Installation (3.3, 3.4)

Steps for installing the axle and securing it with a push nut.

U-Bolt and Rim Connection (3.5, 3.6)

Instructions for connecting the rim and plastic guard to the backboard using a U-bolt.

Spring and Jam Nut Installation (3.7, 3.8)

Steps for installing compression springs and securing with jam nuts.

Attaching Rim Cover Plate (3.9)

Procedure for attaching the rim cover plate to the rim assembly.

Backboard to Pole Assembly

Pole Attachment: Hardware Requirements

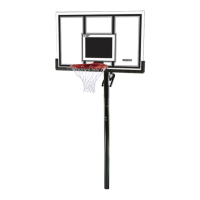
Lists the hardware necessary for attaching the backboard to the pole.

Pole Attachment: Parts Requirements

Lists the specific parts needed for attaching the backboard to the pole.

Pole Attachment: Tool Requirements

Lists the tools required to attach the backboard to the pole.

Attaching Short Extension Arms (4.1)

Instructions for attaching the short extension arms to the backboard brackets.

Attaching Long Extension Arms (4.2)

Instructions for attaching the long extension arms to the backboard brackets.

Connecting Extension Arms to Pole (4.3)

Guidance on connecting the extension arms to the main pole assembly.

Backboard Holding Caution

Important safety note requiring an adult to hold the backboard during assembly.

Handle Assembly

Handle Assembly: Hardware Requirements

Lists the hardware necessary for assembling the handle mechanism.

Handle Assembly: Parts Requirements

Lists the specific parts needed for assembling the handle mechanism.

Handle Assembly: Tool Requirements

Lists the tools required to assemble the handle mechanism.

Gas Spring Cover and Assembly (5.1, 5.2)

Steps for preparing and attaching the gas spring cover and assembly.

Handle Trigger and Release Pin Installation (5.3, 5.4)

Instructions for assembling the handle trigger and inserting the release pin.

Connecting Handle to Gas Spring and Pole (5.5, 5.6)

Guidance on connecting the handle assembly to the gas spring and pole.

Lifter Arms and Greasing Release Pin (5.7, 5.8)

Steps for attaching lifter arms and lubricating the release pin.

Handle Mechanism Safety Warning

Warning regarding the load capacity of the handle mechanism.

Final Assembly

Final Assembly: Hardware Requirements

Lists the hardware necessary for the final assembly of the system.

Final Assembly: Parts Requirements

Lists the specific parts needed for the final assembly of the system.

Final Assembly: Tool Requirements

Lists the tools required for the final assembly of the system.

Attaching Frame Pads to Backboard (6.1, 6.2)

Instructions for attaching frame pads to the backboard.

Connecting Middle and Bottom Pole Sections (6.3, 6.4, 6.5)

Steps for joining the middle and bottom pole sections securely.

Attaching Net and Height Sticker (6.6, 6.7)

Guidance on attaching the net and applying the height adjustment sticker.

Maintenance

Preventive Maintenance Measures

Details on regular checks for loose hardware, wear, corrosion, and necessary actions.

Warning Sticker Information

Warranty Information

Warranty Terms and Conditions

Covers warranty exclusions, liability limitations, usage restrictions, and legal rights.

Related product manuals