EasyManua.ls Logo

Lifetime SLAM-IT RIM COMBO 90087 User Manual

Lifetime SLAM-IT RIM COMBO 90087
16 pages
To Next Page IconTo Next Page
Page #1 background imageLoading...
Page #1 background image
TOOLS REQUIRED TABLE OF CONTENTS
2+ people recommended for setup.
ASSEMBLY INSTRUCTIONS
MODEL #60091
MODEL 90087
Save this instruction in the event that the manufacturer has
to be contacted for replacement parts.
BEFORE ASSEMBLY:
CONTACT LIFETIME
®
CUSTOMER SERVICE:
Call: 1-800-225-3865
7:00 am–5:00 pm (Monday–Friday) MST
and 9:00 am–1:00 pm Saturday MST
QUESTIONS?
MODEL# AND PRODUCT ID
(you will need both when contacting us)
Model Number: 90087
Product ID:
For Customer Service in Mainland
Europe and the United Kingdom,
E-mail: cs@lifetimeproducts.eu
Live Chat: www.lifetime.com
(click on “Ask An Expert” tab)
Video Instructions:
www.youtube.com/lifetimeproducts
SLAM-IT RIM
®
COMBO
BASKETBALL SYSTEM
(2)
1/2" (13 mm)
Icon Legend................................2
Notices....................................3
Backboard to Rim Assembly.......4
Maintenance Instructions..........10
Registration........................10
Warranty................................11
(1)
(1)
COPY
Question and Answer IconNeed help?

Do you have a question about the Lifetime SLAM-IT RIM COMBO 90087 and is the answer not in the manual?

Lifetime SLAM-IT RIM COMBO 90087 Specifications

General IconGeneral
BrandLifetime
ModelSLAM-IT RIM COMBO 90087
CategorySports & Outdoors
LanguageEnglish

Summary

Assembly Instructions

Before Assembly

Recommendations and advice before starting the assembly process.

Tools Required

Lists the essential tools for assembling the basketball system.

Icon Legend

Explains the meaning of symbols used throughout the assembly instructions.

Safety Instructions

General Safety Warnings

Crucial safety precautions to prevent injury and property damage during assembly and use.

Backboard to Rim Assembly

Hardware Required

Lists all hardware components needed for the backboard to rim assembly.

Parts Required

Lists all physical parts needed for the backboard to rim assembly.

Tools Required

Lists tools specific to this assembly step.

Step 1.1: Rim Attachment

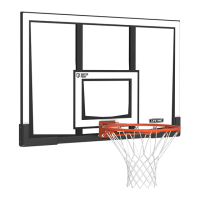
Attaching the rim to the backboard using tap bolts, washers, and nuts.

Step 1.2: U-Bolt to Bracket

Assembling the U-bolt to backboard brackets and inserting into the backboard.

Step 1.3: Rim & Guard Connection

Connecting the rim and plastic guard to the backboard using jam nuts.

Step 1.4: Spacers & Nuts

Attaching steel spacers and nylock flange nuts to tap bolts on the backboard underside.

Step 1.5: Spring & Retainer Plate

Installing compression springs and retainer plate onto the U-bolt.

Step 1.6: Carriage Bolts

Inserting carriage bolts into the backboard for subsequent steps.

Step 1.7: Bracket Securing

Bending and securing backboard brackets to the carriage bolts.

Step 1.8: Center Frame Pad

Attaching the center frame pad to the backboard.

Step 1.9: Corner Frame Pads

Attaching the corner frame pads to the backboard.

Step 1.10: Net Attachment

Attaching the basketball net to the rim.

Mounting the System

Mounting Kit Overview

Information on the universal mounting kit for various installation types.

Maintenance and Registration

Maintenance Instructions

Guidelines for system upkeep to ensure longevity and safety.

Product Registration

Benefits and process of registering the product for customer service.

Warranty Information

5-Year Limited Factory Warranty

Details the terms, conditions, and coverage of the product warranty.

Enhance Your Purchase

Accessories & Other Products

Information on purchasing additional accessories and Lifetime products.

Related product manuals