EasyManua.ls Logo

Lifetime MAMMOTH 90964 - User Manual

Lifetime MAMMOTH 90964
60 pages
Print Icon
To Next Page IconTo Next Page
Loading...
TOOLS REQUIRED TABLE OF CONTENTS
BEFORE ASSEMBLY:
Requires at least 1680 lb (762 kg) of concrete mix to fi ll a
volume of 12.25 ft
3
(0.5 yd
3
).
Requires, at least, 3 days for concrete to cure, plus 3–4
hours to complete assembly steps.
At least 6 people required for setup. At least 3 adults
are needed for the assembly steps at all times, with
some steps requiring 6 or more adults.
Pour le français, voir la page 2. Para el español, ver la página 3.
ASSEMBLY INSTRUCTIONS
MAMMOTH
BASKETBALL SYSTEM
MODEL 90964
CONTACT LIFETIME CUSTOMER SERVICE:
Dial 1-800-225-3865
7:00 am–5:00 pm (M–F) MST
and 9:00 am–1:00 pm (Sat) MST
QUESTIONS?
Model Number: 90964
Product ID:
For Customer Service in Mainland
Europe and the United Kingdom,
E-mail: cs@lifetimeproducts.eu
Live Chat:
www.lifetime.com/customerservice
(Click on the "LIVE CHAT" tab)
Icon Legend................................4
Warnings and Notices..................5
Initial Setup...............................6
Extension Arms Assembly...........13
Handle Assembly......................17
Backboard-to-Pole Assembly......26
Parts Identifi er.........................i–iv
Pole-to-J-Bolt Template
Assembly...............................30
Rim-to-Backboard Assembly......37
Maintenance..........................43
Replacing the Backboard...........44
Warning Sticker........................47
Registration.........................52
Warranty................................53
(x1)
15/16" (≈24 mm)
(x2)
(x1)
(x1)
(x1)
9/16" (≈14 mm)
(x2)
Concrete Mix
0.5 yd
3
or 80 lb bag
(x 21)
(x1)
(x1)
(x1)
(x4)36" (≈.9 m)
Rebar
(x6)
(x1)
(x1)
(x2, included)
3/16" (≈5 mm)
IMPORTANT, RETAIN FOR FUTURE REFERENCE: READ CAREFULLY
Save this instruction in the event that the manufacturer has to be contacted for replacement parts.
Scan the code, or visit go.lifetime.com/
90964playlist
OR WATCH THE HOW-TO ON YOUTUBE
3D ANIMATION
OF THE FULL ASSEMBLY
WATCH
SCAN THE
CODE
OR SEARCH
1213388
YouTube
®
and the YouTube logo are trademarks of Google, LLC.
Question and Answer IconNeed help?

Do you have a question about the Lifetime MAMMOTH 90964 and is the answer not in the manual?

Overview

This document describes the Lifetime Mammoth Basketball System, Model 90964, a residential basketball hoop designed for outdoor use.

Function Description

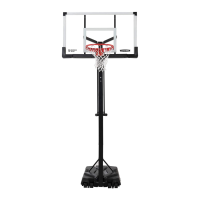
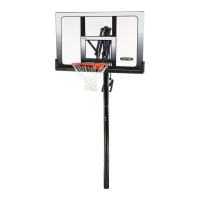
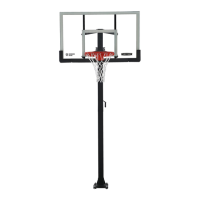
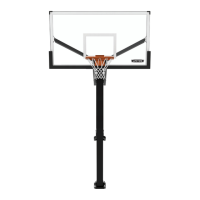
The Lifetime Mammoth Basketball System is a complete basketball hoop system designed for home use, allowing users to play basketball. It features an adjustable height mechanism, a backboard, a rim, and a pole that is anchored into the ground with concrete. The system is designed for durability and ease of use, with features that facilitate height adjustment and provide stability during play.

Important Technical Specifications

Dimensions and Weight

The system requires a significant amount of concrete for installation: 762 kg (1680 lb) of concrete mix, which translates to 0.35 m³ (12.25 ft³). This substantial concrete base ensures the stability of the pole.

Components

The system includes various hardware components for assembly, categorized into different sections of the manual. Key hardware includes:

  • Section 1 (Initial Setup): Bolts (AEO), coupling pins (CYV), nuts (AER), rebar (AEZ), and a template (AKT). Tools required include a 15/16" (24 mm) wrench, carpenter's level, shovel, tape measure, and concrete mix.
  • Section 2 (Extension Arms Assembly): Bolts (GDN), washers (GDO, GFA, GEV), coupling pins (GEX, GIB), and extension arms (AKE, AKD, ALG). A 3/16" (5 mm) hex key and rubber mallet are recommended tools.
  • Section 3 (Handle Assembly): Bolts (GDN), washers (GDO, GFI, GFK, AEH, GFA), coupling pins (GEZ, GFM, GFJ, GFL, GEX, GFG), and handle components (AKI, ALS, GFE, GFF). A 3/16" (5 mm) hex key and rubber mallet are recommended.
  • Section 4 (Backboard to Pole Assembly): Bolts (GDN), washers (GDO, AEH, AEG), and backboard (AJI). Tools include 3/4" (19 mm) and 15/16" (24 mm) wrenches, and a 3/16" (5 mm) hex key.
  • Section 5 (Pole to J-Bolt Template Assembly): USS washers (BIP), hex nuts (ADL), lock washers (CUA), nylon caps (AMS), and J-bolts (AEI). Tools include a 15/16" (24 mm) wrench, carpenter's level, and a 3/16" (5 mm) hex key.
  • Section 6 (Rim to Backboard Assembly): Hex bolts (CHQ), flat washers (AAF), hex nuts (ABB), and rim (ALX). Tools include a 9/16" (14 mm) wrench, flathead screwdriver, tape measure, and ladder.

Safety Features

The manual emphasizes several safety warnings:

  • Installation: Requires at least six adults for assembly and warns against serious injury or property damage if instructions are not followed.
  • During Play: Users should not hang from the rim, avoid dunk-type activities that cause player's face to come into contact with the backboard, rim, or net. Do not slide, climb, or play on the pole.
  • Adjustment: Keep hands and fingers away from moving parts when adjusting the system. Do not allow children to move or adjust the system.
  • Maintenance: Keep the area under the system free of organic material. Check the pole and all metal parts for rust monthly. Inspect the system before each use for loose hardware, rust, and instability.

Warranty

The product comes with a 5-year limited factory warranty, covering defects in material or workmanship for five years from the date of original retail purchase. It does not cover defects due to improper installation, alteration, or accident, or damage caused by vandalism, rust, or "acts of nature." The warranty is non-transferable and applies only to the original purchaser.

Usage Features

Assembly Process

The assembly is divided into six main sections:

  1. Initial Setup: Involves digging a hole, placing rebar, and pouring concrete. This step requires a minimum of 72 hours (3 days) for the concrete to cure before proceeding.
  2. Extension Arms Assembly: Attaching the lower and upper extension arms to the pole using various bolts, washers, and coupling pins.
  3. Handle Assembly: Assembling the handle mechanism, including gas springs and lift arms, which are crucial for height adjustment.
  4. Backboard to Pole Assembly: Securing the backboard to the pole using bolts and washers.
  5. Pole to J-Bolt Template Assembly: Attaching the pole to the J-bolt template, which is embedded in the concrete. This step requires at least six adults for support.
  6. Rim to Backboard Assembly: Attaching the rim and net to the backboard.

Height Adjustment

The system features an adjustable height mechanism, likely operated via the handle assembly. The manual includes a "Height Adjustment Sticker" (AKP) to mark different heights (10, 9.5, 9, 8.5, 8, 7.5 feet). The instructions emphasize firmly grasping the adjustment handle to raise or lower the goal.

User Requirements

  • Assembly: Requires at least six adults for certain steps, particularly during the initial setup and pole assembly, due to the weight and complexity of the components.
  • Curing Time: The concrete base needs a minimum of 72 hours (3 days) to cure before the assembly can proceed to subsequent steps. In humid or wet weather, additional time may be required.

Maintenance Features

General Maintenance

  • Rust Prevention: Monthly inspection of the pole and all metal parts for rust. If rust is found, it should be removed and repainted with exterior enamel.
  • Hardware Check: Before each use, the system should be checked for loose hardware, signs of rust, and instability.
  • Cleanliness: Keep the area under the system free of organic material (grass, weeds, etc.) to prevent rust and fall.
  • Net Replacement: If the net is worn or damaged, it should be replaced immediately.

Backboard Replacement

The manual includes an appendix on "Replacing the Backboard." This process involves:

  • Disassembling the system in reverse order, starting with the backboard.
  • Removing nylon caps and flat washers from J-bolts.
  • Carefully lowering the system to the ground with at least six adults.
  • Removing hardware attaching extension arms to the backboard.
  • Removing the rim and all hardware from the backboard.
  • Reassembling the system with a new backboard by following sections 4-6 of the manual.

Customer Support

Lifetime provides customer service for parts replacement and general inquiries. Contact information is provided for phone support and online resources (www.lifetime.com). Customers are encouraged to register their product online to receive notifications and promotions.

Lifetime MAMMOTH 90964 Specifications

General IconGeneral
BrandLifetime
ModelMAMMOTH 90964
CategorySports & Outdoors
LanguageEnglish

Related product manuals