7
TOOLS AND HARDWARE REQUIRED / OUTILS ET QUINCAILLERIE REQUIS / HERRAMIENTAS Y HERRAJE REQUERIDOS
SECTION 1 (CONTINUED) / SECTION 1 (SUITE) / SECCIÓN 1 (CONTINUACIÓN)
DXZ (x1)
BTS (x1)
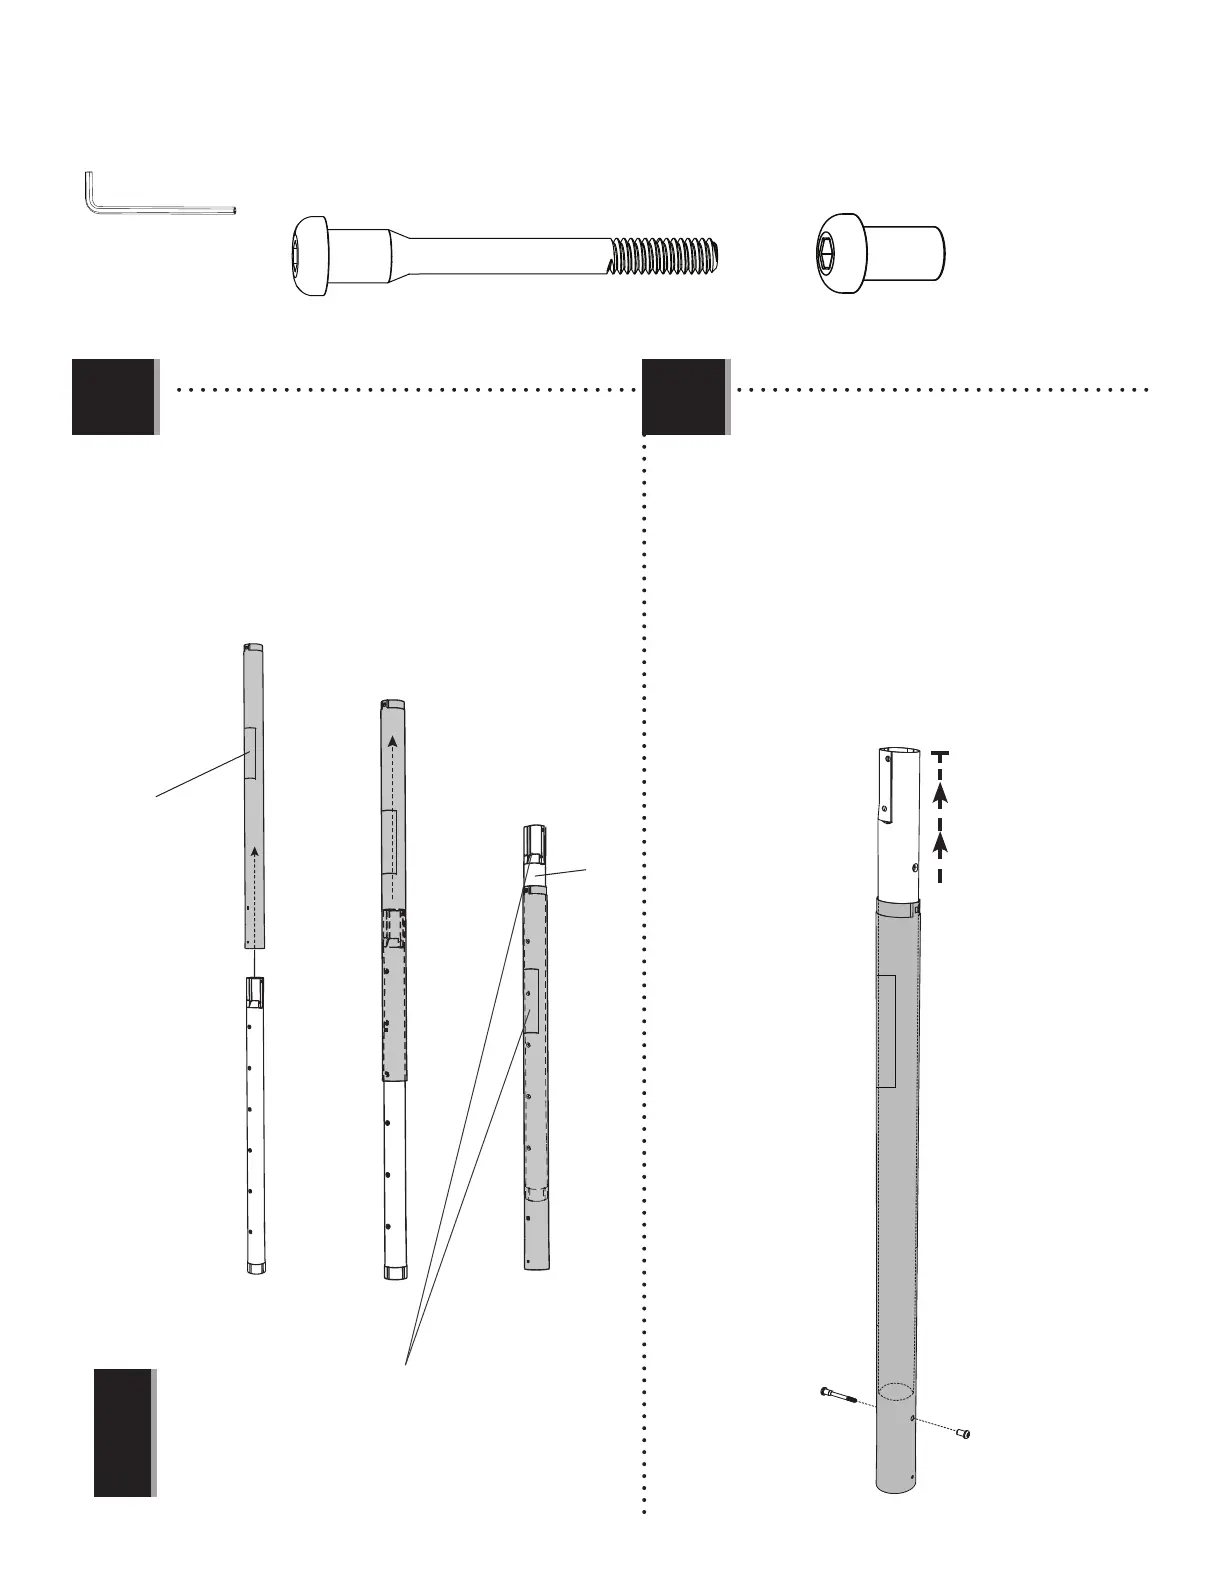
• Slide the Top Pole (ALH) far enough out of the Bottom
Pole (ALE) so that it does not obstruct the holes at
the bottom of the Bottom Pole. Then attach the
hardware shown in the location indicated.
• Tirez l’extrémité du poteau supérieur (ALH) du poteau
inférieur (ALE) suffi samment éloignée pour que
n’obstrue pas de trous à l’extrémité inférieure du
poteau inférieur. Ensuite, attachez la quincaillerie
indiquée à l’endroit indiqué.
• Tire el extremo del poste superior (ALH) por el poste
inferior (ALE) apenas lo sufi ciente para que no
obstruya los agujeros al extremo inferior del poste
inferior. Entonces, sujete el herraje indicado a la
ubicación indicada.
1.1 1.2
• Slide the Top Pole (ALH) up through the bottom of
the Bottom Pole (ALE), making sure the Poles are
oriented as shown.
• Faites glisser le poteau supérieur (ALH) à travers la partie
inférieure du poteau inférieur (ALE), en vous assurant que
les poteaux sont orientés comme illustré.
• Deslice el poste superior (ALH) por la parte inferior del
poste inferior (ALE), asegurándose de que los postes estén
orientados como se muestra.
Warning Sticker
Autocollant d’avertissement
Etiqueta de advertencia
ALH
ALE
ALH
ALE
ALH
ALE
• Make sure the crimped side of the Top Pole is on the same side as the
Warning Sticker on the Bottom Pole.
• Assurez-vous que le côté ondulé du poteau supérieur est sur le même côté de
l’autocollant d’avertissement dans le poteau inférieur.
• Asegúrese de que el lado corrugado del poste superior esté en el mismo lado que
l’etiqueta de advertencia en el poste inferior.
!
ALH
ALE
DXZ
BTS
3/16" (4.8 mm)
(2)