12
TOOLS AND HARDWARE REQUIRED / OUTILS ET QUINCAILLERIE REQUIS / INSTRUMENTAL Y HERRAJE REQUERIDOS
SECTION 2 (CONTINUED) / SECTION 2 (SUITE) / SECCIÓN 2 (CONTINUACIÓN)
HHI
HHI
HHR
HHR
HHT
HHT
HHT
HHT
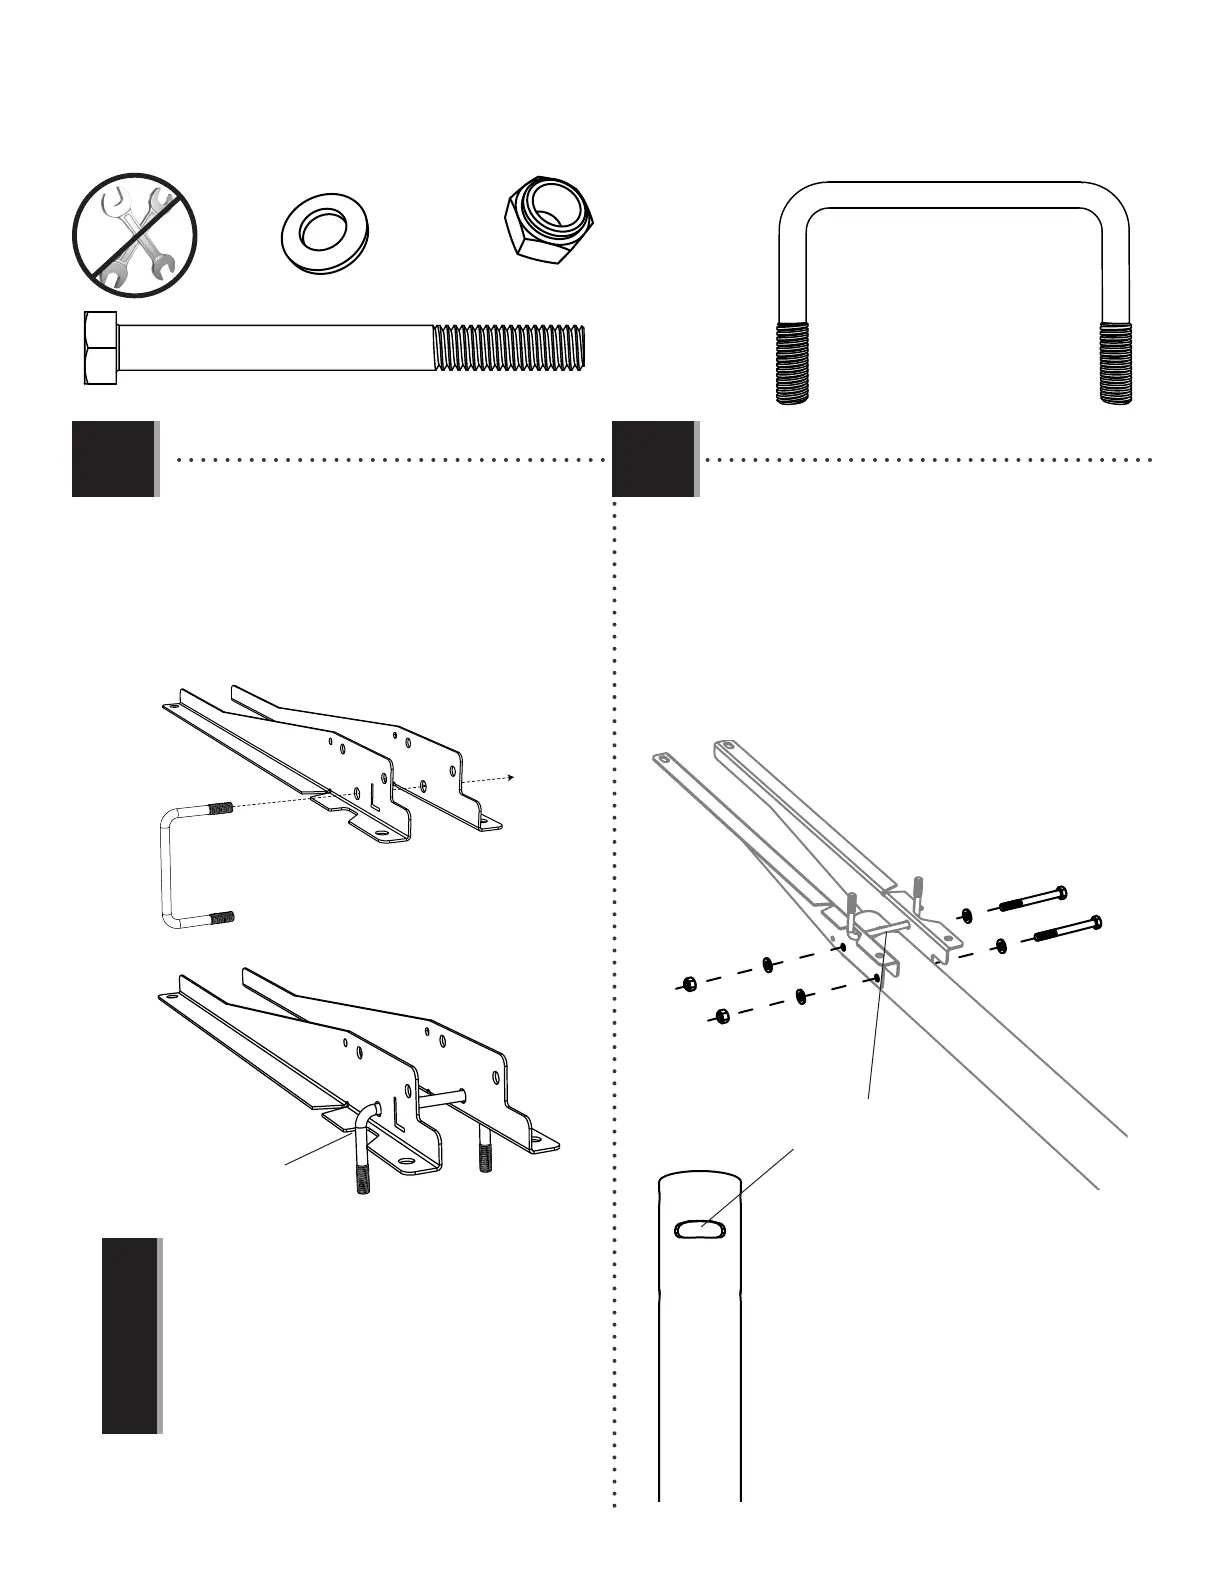
2.1 2.2
• Set the U-bolt into the oblong hole. Secure the left and
right backboard brackets to the pole with the
hardware shown. Tighten only be hand at this time.
• Mettre le boulon en « U » dans le trou oblong. Attacher les
supports de tableau droit et gauche au poteau à
l’aide de la quincaillerie indiquée. Serrer uniquement à
la main en ce moment.
• Colocar el perno en «U» en el agujero oblongo. Sujetar los
soportes de tablero derecho e izquierdo al poste
usando el herraje indicado. Apretar el herraje solo a mano
en este momento.
•
Oblong hole
•
Trou oblong
•
Agujero oblongo
HHS
HHZ
HHY
Notch
Encoche
Muesca
HHR (x2)
• The U-bolt (HHS) must rest in the notches of the left
and right backboard brackets (HHZ and HHY) as indicated.
• Le boulon en « U » (HHS) doit rester dans les encoches
des supports de panneau gauche et droit (HHZ et HHY) comme
indiqué.
• El perno en «U» (HHS) debe quedarse en las muescas
de los soportes de tablero izquierdo y derecho (HHZ y HHY)
como se indica.
HHT (x4)
HHI (x2)
HHS (x1)
• The backboard brackets are designed to be bent by hand. Do not
try to bend them before attaching the backboard and rim to the
pole (2.5).
• Les supports de tableau sont conçus pour être pliés à la main. Ne
pas essayer de les plier avant d'attacher le panneau et l'anneau
au poteau (2.5) .
• Los soportes de tablero está deseñados para ser doblados a
mano. No intentar doblarlos antes de sujetar el tablero y el aro al
poste (2.5).
!