Do you have a question about the LIGHT MY BRICKS LEGO Winter Village Post Office 10222 and is the answer not in the manual?
Lists kit components and provides general installation advice.
Guidance on routing cables without damaging LEGO bricks.
Correctly inserting connectors into expansion board ports.
How to properly connect cables to strip lights.
Connecting micro cables to micro expansion board ports.
Positioning bit lights correctly under LEGO elements.
Disassemble truck sections and prepare headlights for installation.
Disconnect and disassemble headlight sections of the truck.
Install micro bit lights into the truck's headlights.
Repeat headlight installation for the other side.
Route cables and test headlights using the battery pack.
Connect battery pack and test headlights.
Attach the battery pack underneath the truck.
Disconnect rear wheel section for rear light installation.
Install micro bit lights into the truck's rear lights.
Route rear light cables and connect to expansion board.
Tidy cables, reassemble truck, and test lights.
Prepare the gazebo for light installation by removing roof sections.
Install flashing bit lights on the front of the gazebo.
Thread cables through the gazebo roof for the front lights.
Connect front gazebo lights to a 6-port expansion board.
Install flashing bit lights on the rear of the gazebo.
Connect battery pack and test the flashing gazebo lights.
Install a flashing bit light onto the gazebo's star.
Reassemble the star piece after light installation.
Route the star light cable down the back of the gazebo.
Connect the star light cable to a white strip light on the roof.
Stick a strip light underneath the gazebo roof.
Connect all gazebo roof lights to the 6-port expansion board.
Stick expansion boards onto the gazebo roof panels.
Move the gazebo to its final position next to the post office.
Disassemble the lamp post to install a light.
Install a bit light into the lamp post assembly.
Reconnect the lamp post to the main set.
Lift and remove the second level of the post office building.
Route the lamp post cable across and under a stud.
Connect the lamp post bit light to a 6-port expansion board.
Remove roof sections of the second level for light installation.
Disassemble the lower roof section to access studs.
Install flashing bit lights onto the lower roof section.
Install bit lights into the front window section.
Thread multiple bit light cables through a hole.
Connect flashing bit light cables to a 6-port expansion board.
Turn on the battery pack to test the front level lights.
Connect a strip light to a 6-port expansion board.
Stick a strip light to the top of the left roof panel.
Place a bit light just over the top of the front door frame.
Push the bit light into the stud hole and secure the second level.
Connect the front door bit light cable to the second level expansion board.
Secure the strip light cable underneath a brown plate and fold roof panels.
Connect the second level expansion board cable to the ground floor board.
Reconnect the two roof pieces above the front door lights.
Place a bit light in the centre, underneath the second floor base plate.
Bring all internal cables together and secure them to the wall.
Remove sections surrounding the top of the left side of the post office.
Continue removing components from the left section.
Remove sections to access the fireplace area for light installation.
Place bit lights over the brown studs in the fireplace area.
Pull bit light cables out to each side before reconnecting the chimney.
Twist chimney bit light cables together and connect them.
Connect bit lights and cables to the flicker effects board.
Connect a strip light to the front window section.
Stick the strip light underneath the front window section.
Connect the strip light cable and test the strip and flickering lights.
Locate and disassemble the front window light section.
Install flashing bit lights into the front window section.
Connect flashing bit light cables to the 6-port expansion board.
Advice on troubleshooting if lights are not working.
Mount expansion boards in roof panels and on the left side.
Stick the final expansion board to the bottom of the set near the lamp post.
Connect the gazebo's cable to the main expansion board.
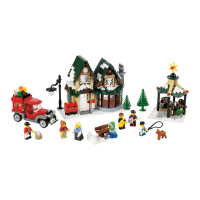
Image of the completed, lit LEGO model.
Lists kit components and provides general installation advice.
Guidance on routing cables without damaging LEGO bricks.
Correctly inserting connectors into expansion board ports.
How to properly connect cables to strip lights.
Connecting micro cables to micro expansion board ports.
Positioning bit lights correctly under LEGO elements.
Disassemble truck sections and prepare headlights for installation.
Disconnect and disassemble headlight sections of the truck.
Install micro bit lights into the truck's headlights.
Repeat headlight installation for the other side.
Route cables and test headlights using the battery pack.
Connect battery pack and test headlights.
Attach the battery pack underneath the truck.
Disconnect rear wheel section for rear light installation.
Install micro bit lights into the truck's rear lights.
Route rear light cables and connect to expansion board.
Tidy cables, reassemble truck, and test lights.
Prepare the gazebo for light installation by removing roof sections.
Install flashing bit lights on the front of the gazebo.
Thread cables through the gazebo roof for the front lights.
Connect front gazebo lights to a 6-port expansion board.
Install flashing bit lights on the rear of the gazebo.
Connect battery pack and test the flashing gazebo lights.
Install a flashing bit light onto the gazebo's star.
Reassemble the star piece after light installation.
Route the star light cable down the back of the gazebo.
Connect the star light cable to a white strip light on the roof.
Stick a strip light underneath the gazebo roof.
Connect all gazebo roof lights to the 6-port expansion board.
Stick expansion boards onto the gazebo roof panels.
Move the gazebo to its final position next to the post office.
Disassemble the lamp post to install a light.
Install a bit light into the lamp post assembly.
Reconnect the lamp post to the main set.
Lift and remove the second level of the post office building.
Route the lamp post cable across and under a stud.
Connect the lamp post bit light to a 6-port expansion board.
Remove roof sections of the second level for light installation.
Disassemble the lower roof section to access studs.
Install flashing bit lights onto the lower roof section.
Install bit lights into the front window section.
Thread multiple bit light cables through a hole.
Connect flashing bit light cables to a 6-port expansion board.
Turn on the battery pack to test the front level lights.
Connect a strip light to a 6-port expansion board.
Stick a strip light to the top of the left roof panel.
Place a bit light just over the top of the front door frame.
Push the bit light into the stud hole and secure the second level.
Connect the front door bit light cable to the second level expansion board.
Secure the strip light cable underneath a brown plate and fold roof panels.
Connect the second level expansion board cable to the ground floor board.
Reconnect the two roof pieces above the front door lights.
Place a bit light in the centre, underneath the second floor base plate.
Bring all internal cables together and secure them to the wall.
Remove sections surrounding the top of the left side of the post office.
Continue removing components from the left section.
Remove sections to access the fireplace area for light installation.
Place bit lights over the brown studs in the fireplace area.
Pull bit light cables out to each side before reconnecting the chimney.
Twist chimney bit light cables together and connect them.
Connect bit lights and cables to the flicker effects board.
Connect a strip light to the front window section.
Stick the strip light underneath the front window section.
Connect the strip light cable and test the strip and flickering lights.
Locate and disassemble the front window light section.
Install flashing bit lights into the front window section.
Connect flashing bit light cables to the 6-port expansion board.
Advice on troubleshooting if lights are not working.
Mount expansion boards in roof panels and on the left side.
Stick the final expansion board to the bottom of the set near the lamp post.
Connect the gazebo's cable to the main expansion board.
Image of the completed, lit LEGO model.
| Brand | LIGHT MY BRICKS |
|---|---|
| Model | LEGO Winter Village Post Office 10222 |
| Category | Lighting Equipment |
| Language | English |