LIGHT4ME HYPNO PAR
Instrukcja obsługi / User Manual
17
Never stand directly below the device when mounting, removing, or servicing the device from ceiling,
or set on a flat level surface (see illustration above). Be sure the device is kept at least 0.5 m away
from any flammable materials (decoration etc.).
Always use and install the supplied safety cable as a safety measure to prevent accidental damage
and/or injury in the case the clamp fails.
Mounting points:
Overhead mounting requires extensive experience, including amongst others calculating working load
limits, a fine knowledge of the installation material being used, and periodic safety inspection of all
installation material and the device. If you lack these qualifications, do not attempt the installation your-
self. Improper installation can result in body injury. Be sure to complete all rigging and installation
procedures before connecting the main power cord to the appropriate wall outlet.
Clamp mounting:
The LIGHT4ME HYPNO PAR provides a unique mounting bracket assembly that integrates the bottom
of the base, and the safety cable rigging point in one unit (see the illustration above). When mounting
this fixture to truss be sure to secure an appropriately rated clamp to the included omega bracket using
a M10 screw fitted through the center hole of the handle. As an additional safety measure be sure to
attach at least one properly rated safety cable to the fixture using the safety cable rigging point inte-
grated in the base assembly.
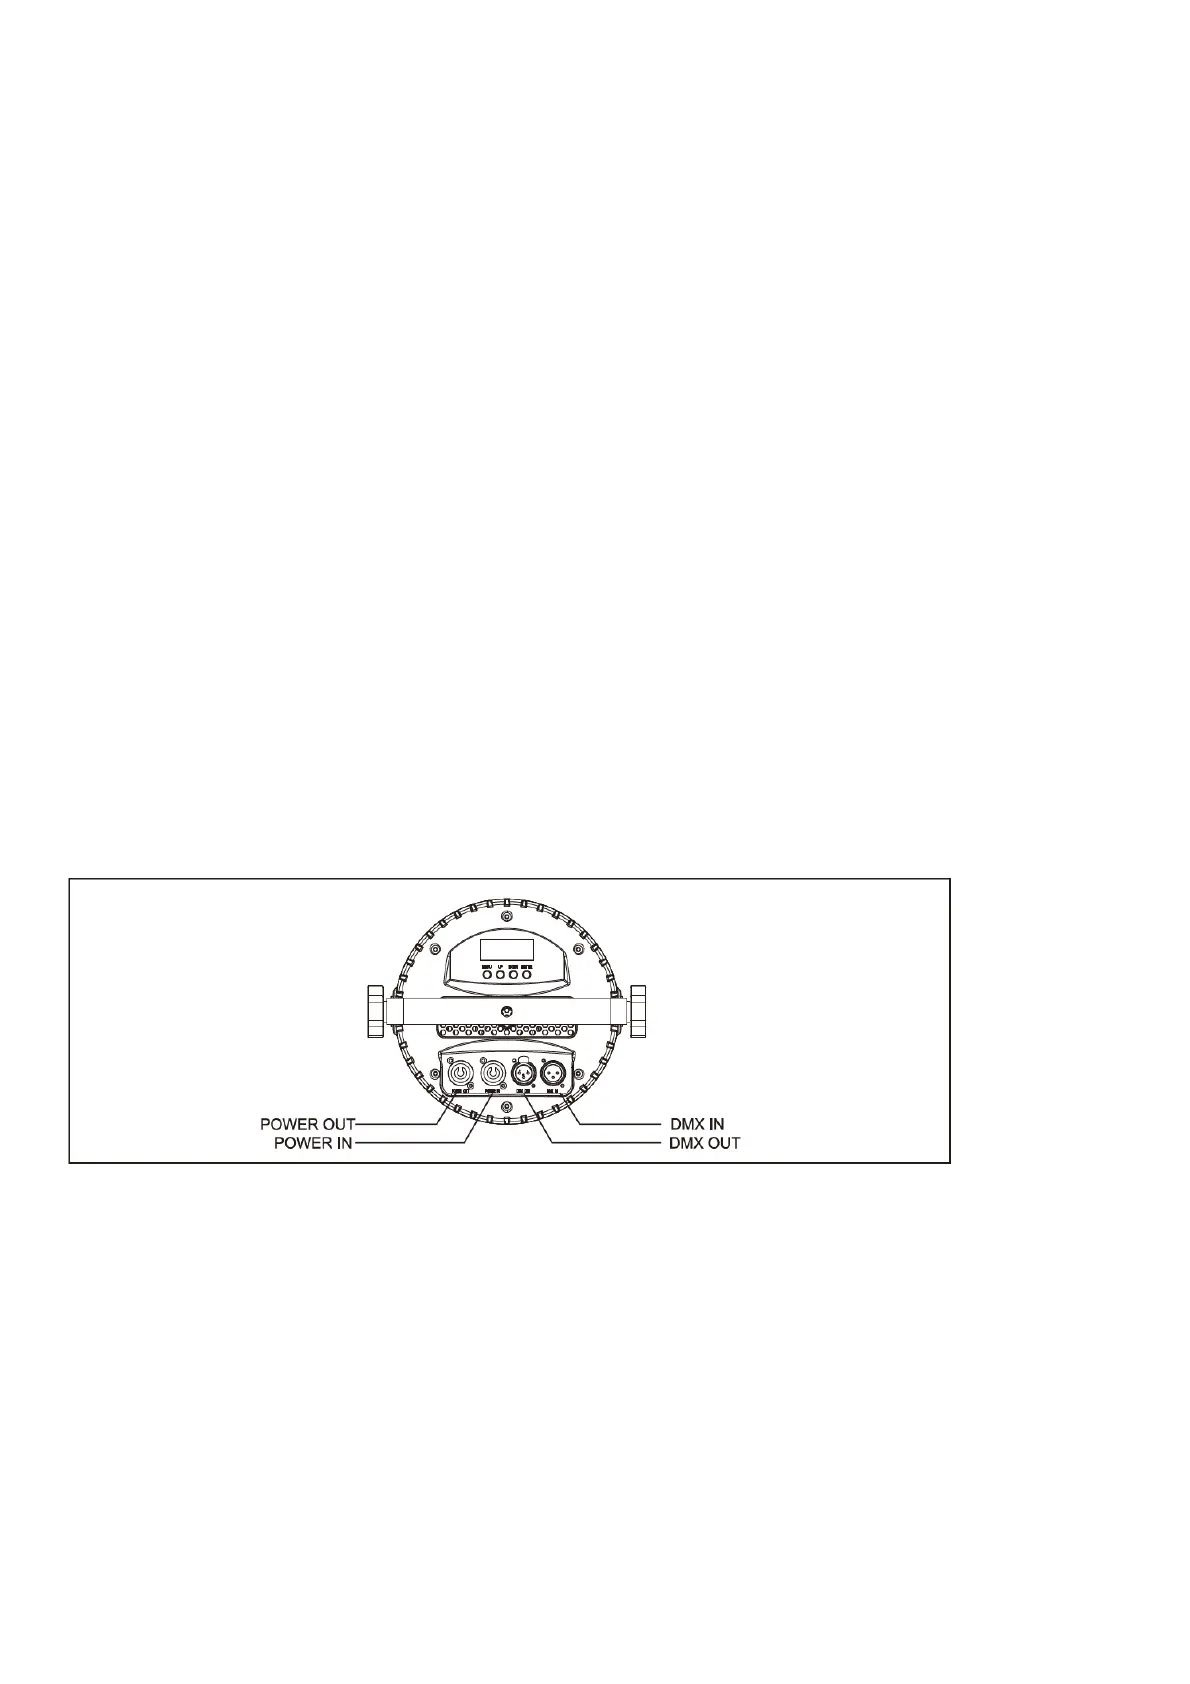
Control connection
Connect the provided XLR cable to the female 3-pin XLR output of your controller and the other side
to the male 3-pin XLR input of the moving head. You can chain multiple moving heads together through
serial linking. The cable needed should be two core, screened cable with XLR input and output con-
nectors. Please refer to the diagram below. DMX-512 connection with DMX terminator.
For installations where the DMX cable has to run a long distance or is in an electrically noisy environ-
ment, such as in a discotheque, it is recommended to use a DMX terminator. This helps preventing
corruption of the digital control signal by electrical noise. The DMX terminator is simply an XLR plug
with a3 resistor connected between pins 2 and 3, which is then plugged in to the output XLR socket of
the last fixture in the chain. Please see illustration below.
 Loading...