-3-
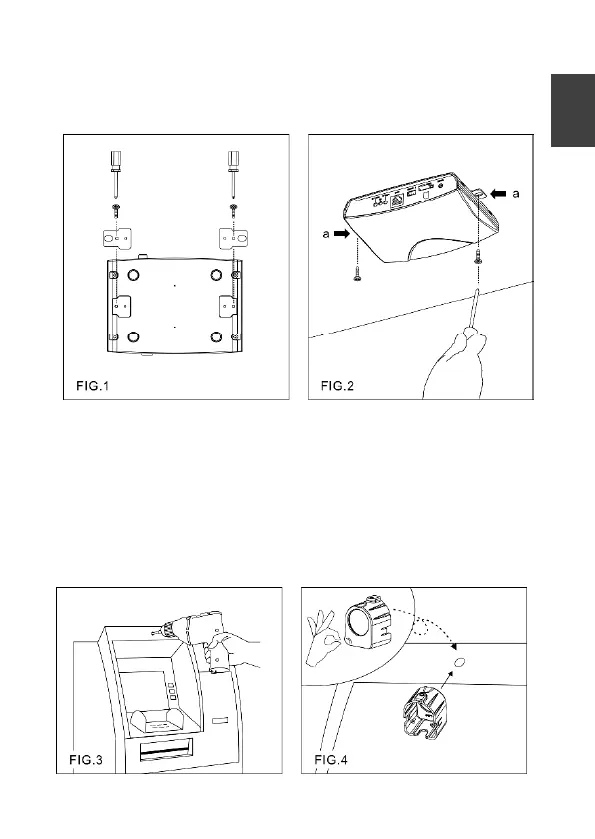
(FIG.1), insert the provided screws (M4.0 x 25, wooden screw)
through the holes marked as "a," and secure the main unit to the
desired position (FIG.2).
Image Sensor Unit Installation
1. Drill a 5mm hole in the panel or on the wall (FIG.3).
2. Pull off the protector and attach the mounting bracket to the
panel (FIG.4).
3. Insert the sensor unit into the bracket (FIG.5), and secure the
unit with the screw. Ensure that the cone of the sensor unit is
flush with the panel (FIG.6).