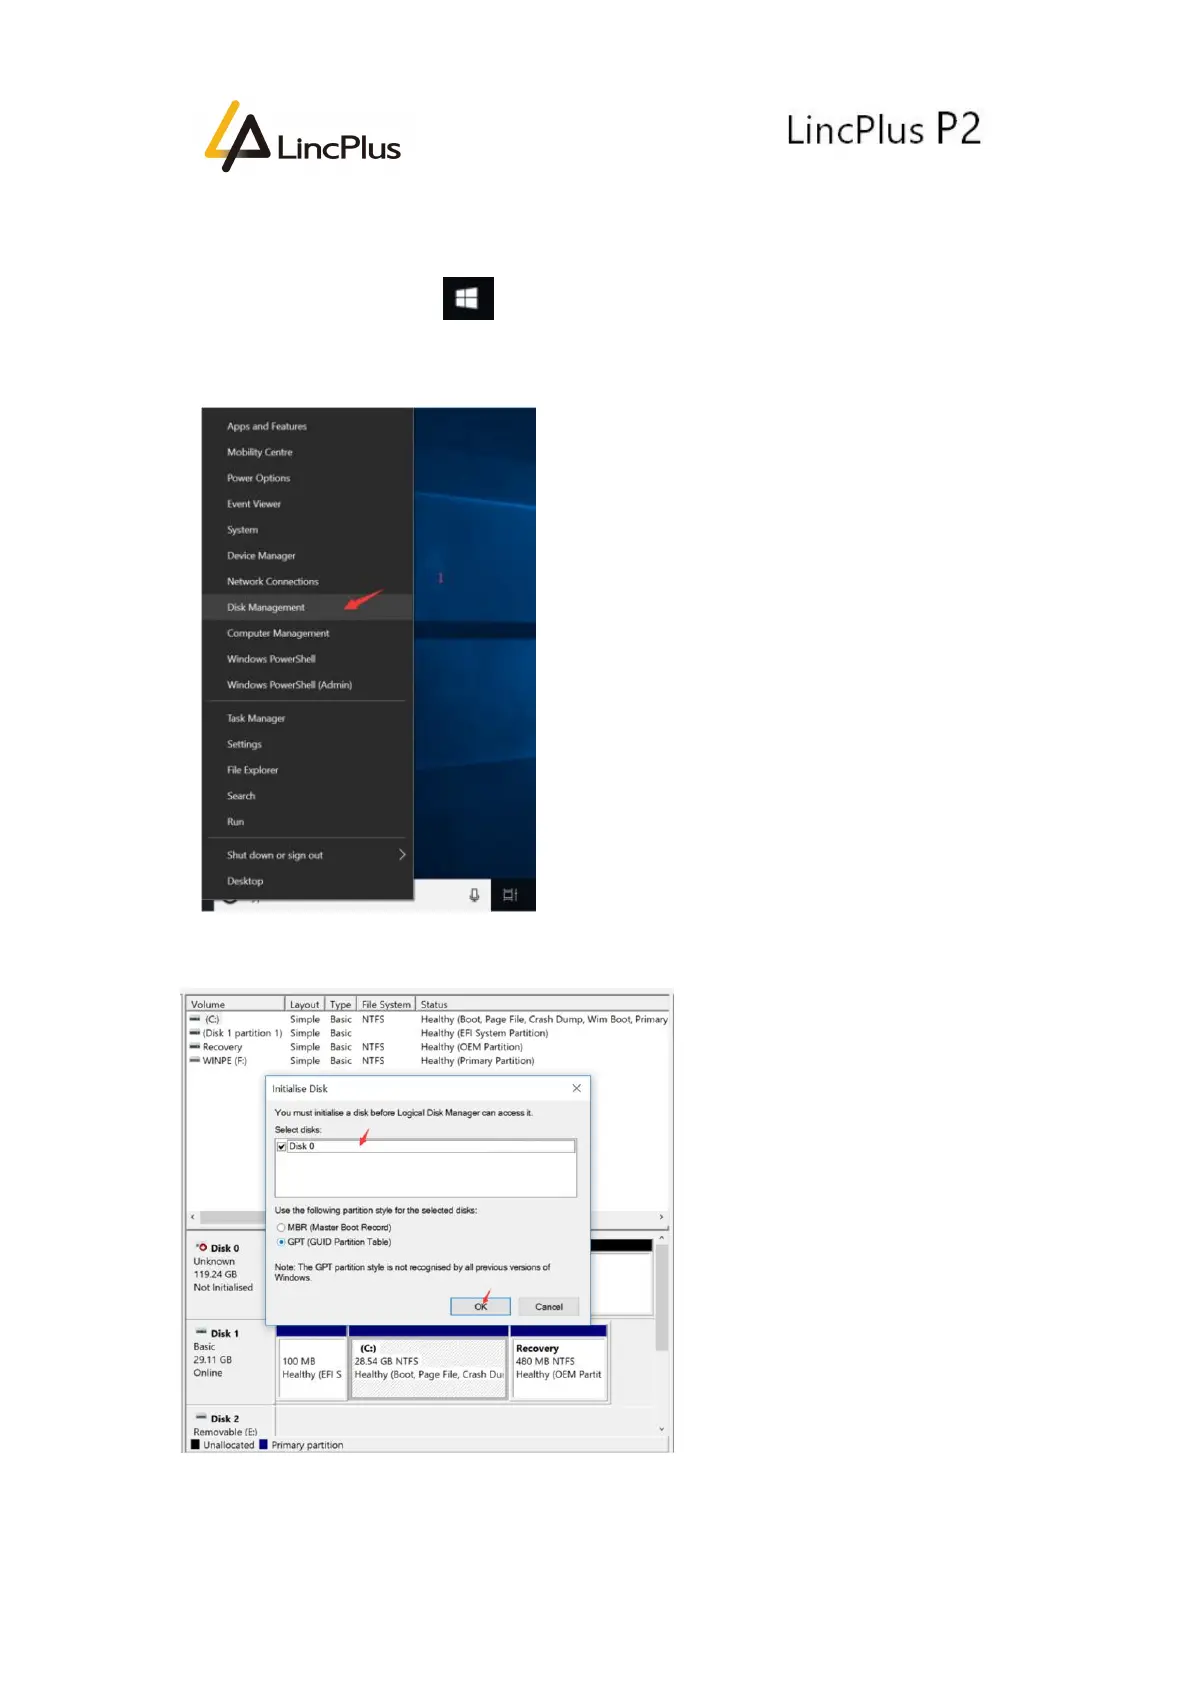
3. After finishing assembly, turn on the laptop.
4. Find the Windows icon, (in the left bottom corner) right click it, and choose
“Disk Management” to manage the new disk. Please see the following picture:
5. And then you can see the following picture appear on the screen. Please click “OK”: