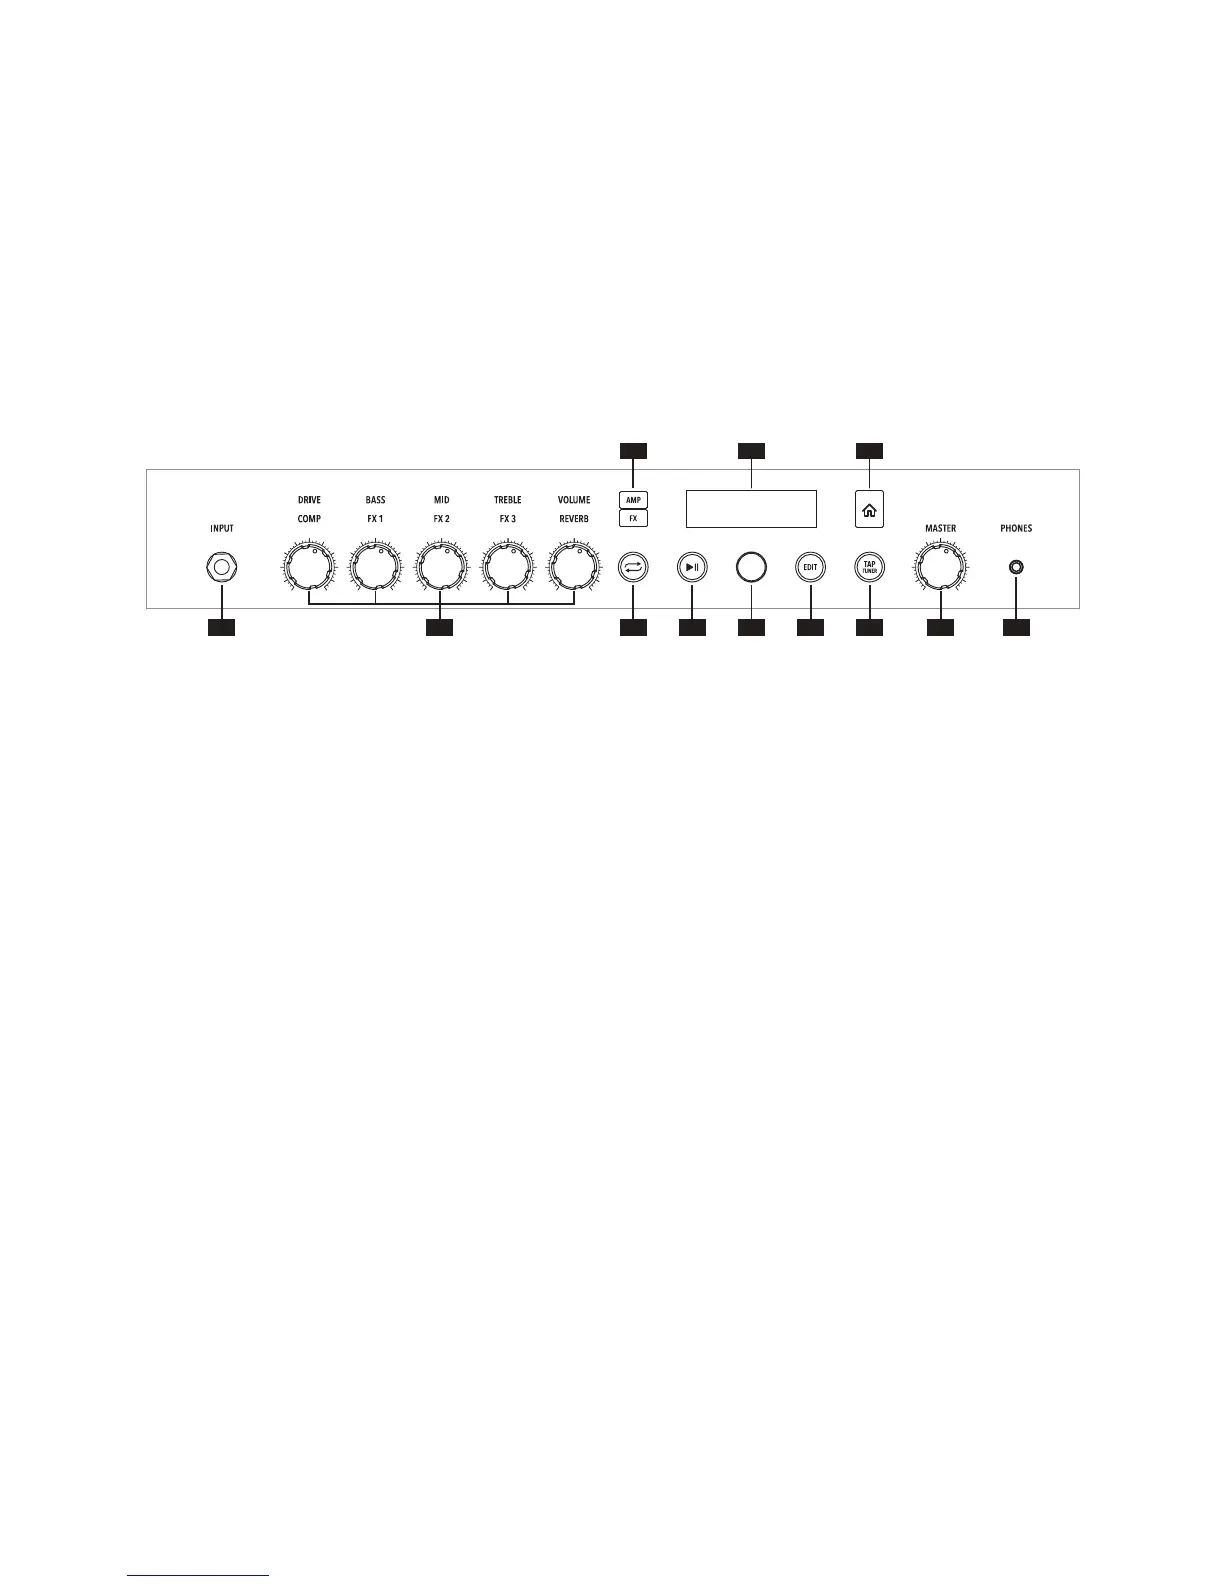
1. INPUT Jack – Plug in your guitar here. A RELAY G10T can be
recharged by inserting it into the input jack on SPIDER V*.
2. AMP/FX Knobs – AMP LAYER - DRIVE is like the volume or gain
knob on other amps; controls how much “dirt” or “distortion” you get
in your sound. BASS, MID and TREBLE controls are customized for
each Amp Model to give you optimal tone control. When you turn any
of these knobs while the Amp Layer is active, the display will briey
show the DRIVE, BASS, MID, TREBLE, and VOLUME settings.
FX LAYER - FX1, FX2, and FX3 are the assignable Smart FX with
colors: Yellow for Distortion or Compression; Blue for Modulation;
Green for Delay; Purple for Pitch and Synth. COMP can be used as a
volume booster or leveler. REVERB can be turned up/down to taste
and there is a variety of models to choose from. These eects can be
assigned from the Edit Menu or by using the SPIDER Remote app.
When you turn any of these knobs while the FX Layer is active, the
display will briey show the amount of the associated eect being
applied to your sound.
3. Quick Loop Button* – Press to enter/exit Quick Looper Mode.
4. Play/Pause Button – Start and Stop Metronome/Drum Loops or
Guitar Demo Ris.
5. Rotary/Push Button Knob – While in preset view, this knob is used
for controlling the current preset. Press and Hold to save the current
preset. While in Edit mode, use this knob to scroll the parameter list
and press to select a parameter for editing. Turn the knob to change
the parameter value and press again to return to scrolling. While the
Playback Screen is open, use it to select dierent drum loops, demo
ris, or playback parameters.
6. EDIT Button – Press to open a preset and display its eect blocks
and parameters for editing.
7. TAP/TUNER Button – Press and hold to engage the Tuner. Press
again to exit. Tap this button in time with the music to set the tempo
of delay and modulation eects.
8. MASTER Volume Knob – Set overall volume of the amplier and
headphone output (when connected).
9. PHONES Output – Connect a pair of stereo headphones here. The
speakers are muted when headphones are connected. This jack also
doubles as a direct output. Use a stereo TRS cable to connect to a
mixer or recording device.
10. AMP and FX Buttons – Press either to select the AMP Layer or FX
Layer.
11. LCD Display – Displays the current preset, knob positions, Smart FX
values and the editor parameters.
12. Home Button – Pressing this button will return the LCD display to
the Home Screen from any other menu.
Front Panel Controls
1
7 8 9
10
12
4 6
11
3 52
 Loading...