Rev: 02.24.20 Page 3 CCD-0001445
Programming
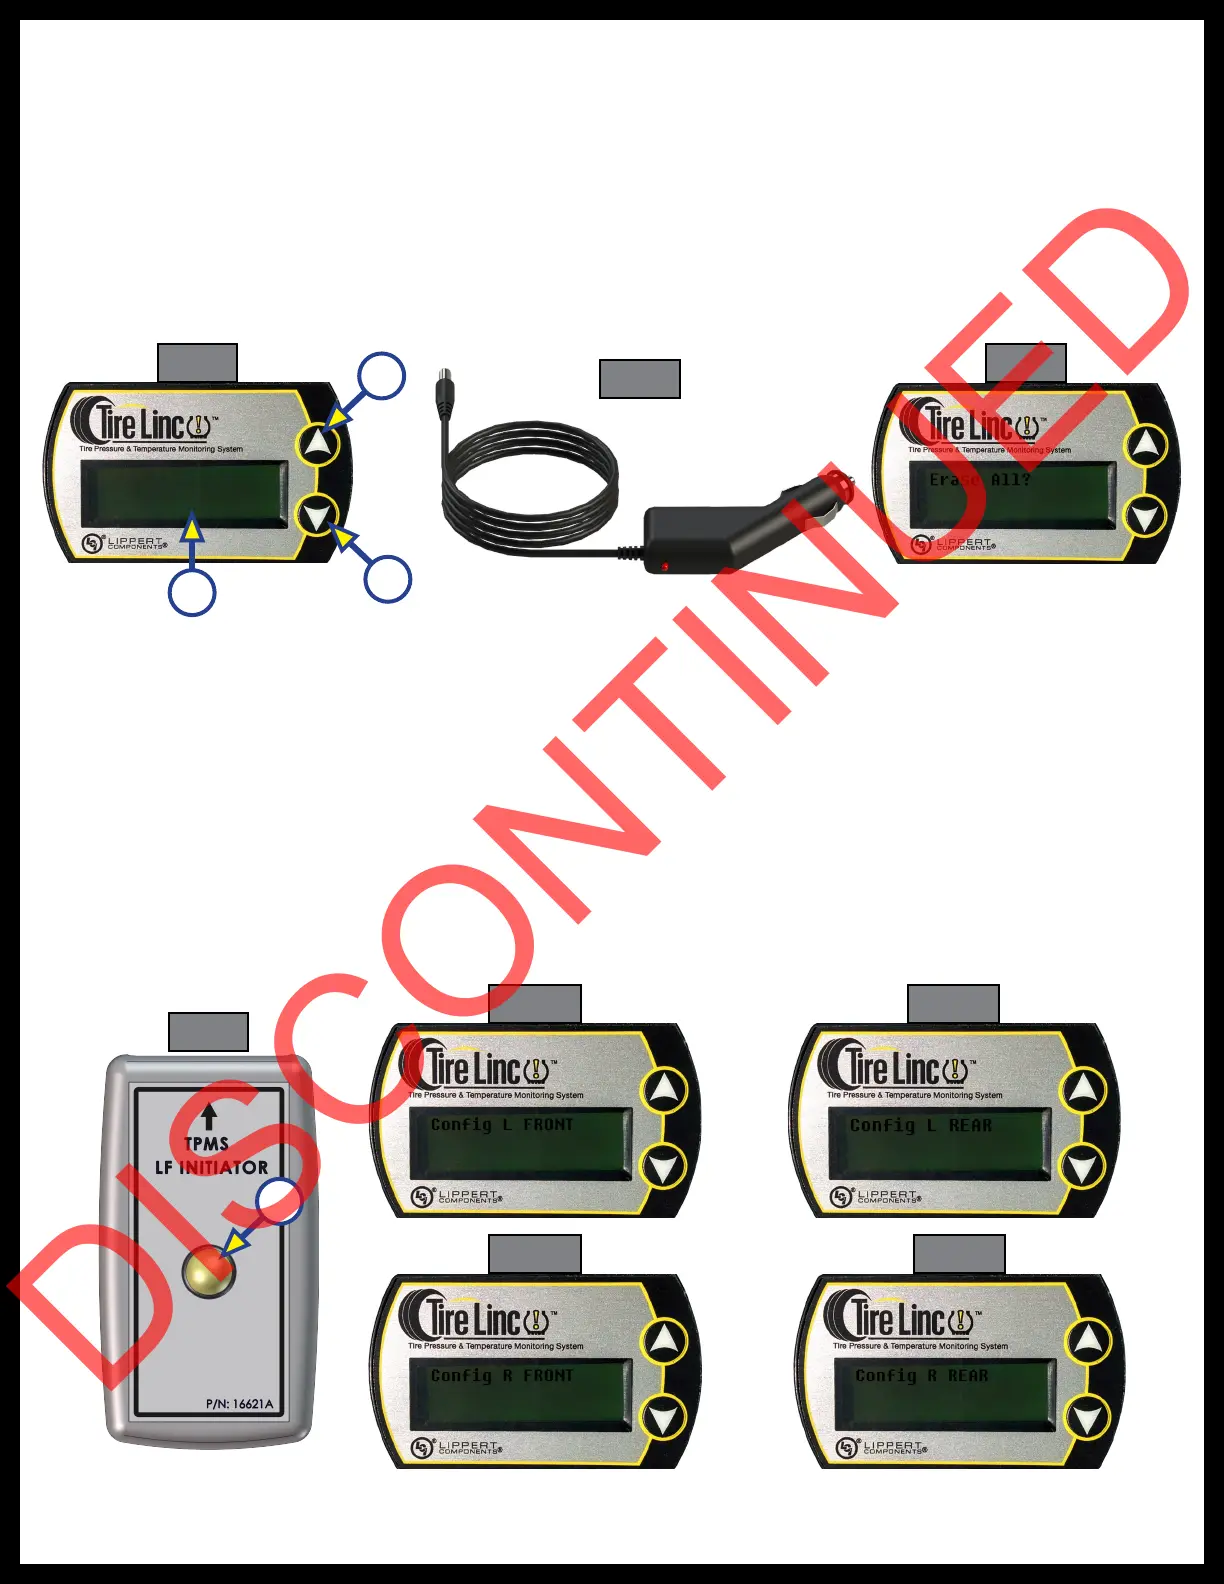
1. On the receiver (Fig. 6) remove protective plastic film from display area (Fig. 6A) and connect to 12-volt
power supply (Fig. 7).
2. With the receiver plugged in, the display should show “Erase All?” and provide the choice to answer
yes or no (Fig. 8) by pressing the corresponding up or down arrow buttons (Fig. 6B, 6C).
3. If the display does not show "Erase All," press and hold both the up and down arrows (Fig. 6B, 6C)
simultaneously for 5-7 seconds until the display reads “Erase all” and provides the choice to answer yes
or no (Fig. 8) by pressing the corresponding up or down arrow buttons (Fig. 6B, 6C).
4. Select “Yes.” The user will be asked to input the number of tires to sync. Press corresponding up or
down arrow until desirable number is displayed. The receiver should then display "Config L Front" (Fig.
10).
NOTE: If the Tire Linc LF Initiator (Fig. 9) is in use, follow step number 5; if not, use the Alternate
Programming Procedure on page 4 in place of step number 5.
5. Using the Tire Linc LF Initiator (Fig. 9), go to the left front tire (roadside front) and press and hold the button
(Fig. 9A) for 3 seconds on the initiator to sync the left front sensor to the receiver. The receiver (Fig. 6) will
then display “config L REAR” (Fig. 11). Repeat process to configure left rear tire (roadside rear). The receiver
will then display “config R FRONT” (Fig. 12). Repeat process to configure right front tire (curbside front). The
receiver will then display “config R REAR” (Fig. 13). Repeat process to configure right rear tire (curbside rear).
Fig. 6
Fig. 7
Fig. 8
Fig. 9
Fig. 10 Fig. 11
Fig. 12 Fig. 13
A
B
C
A

 Loading...