page 6
5. Fan Assembly. (cont.)
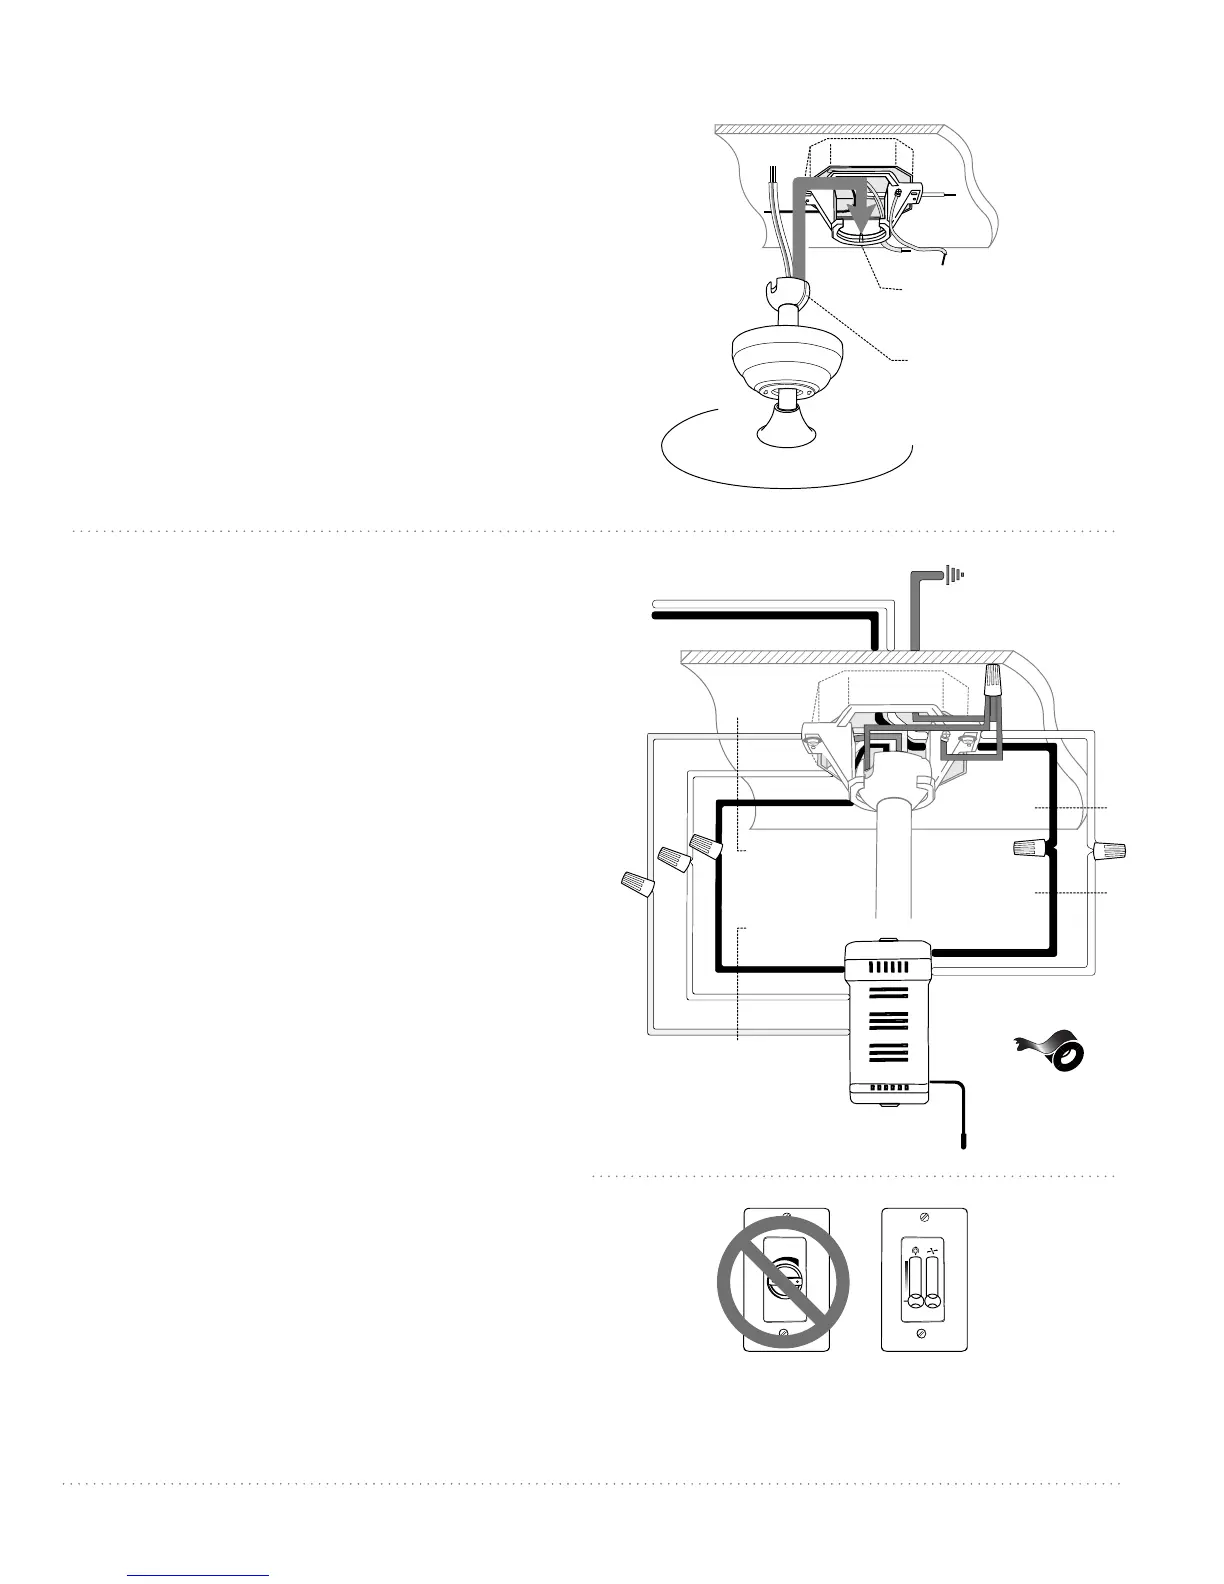
With the hanging bracket secured to the outlet
box and able to support the fan, you are now ready
to hang your fan. Grab the fan firmly with two
hands. Slide downrod through opening in hanging
bracket and let hanging ball rest on the hanging
bracket. Turn the hanging ball slot until it lines up
with the hanging bracket tab.
Tip: Seek the help of another person to hold the
stepladder in place and to lift the fan up to you
once you are set on the ladder.
hanging ball slot
hanging bracket tab
6. Wiring.
CAUTION: Be sure outlet box is properly
grounded and that a ground wire (GREEN or
Bare) is present.
Make sure all electrical connections comply with
Local Codes or Ordinances and the National
Electrical Code. If you are unfamiliar with
electrical wiring or if the house/building wires
are different colors than those referred to in the
diagram to the right, please use a qualified
electrician.
Wire the receiver with wire connectors
provided as shown in diagram at right.
Tip: While you are wiring, keep in mind that
wires must not obstruct receiver from sliding
into hanging bracket.
* Wrap each wire connector separately with
electrical tape as an extra safety measure.
Gently insert receiver (flat side up) into
hanging bracket and carefully push taped
wire connectors into outlet box. Let antenna
rest outside of hanging bracket.
IMPORTANT: Using a full range dimmer
switch to control fan speed will cause a loud
humming noise from fan. To reduce the risk of
fire or electrical shock, do NOT use a full range
dimmer switch to control fan speed.
black
black
black
from receiver
from fan
from ceiling
from receiver
white
white
blue
blue
black supply wire
ground (green
or bare)
white supply wire
white
AC IN N
AC IN L
receiver
*
black
white
antenna
ground (green
or bare)
1
2
3
Dimmer
Switch
Speed
Switch
For illustrative purposes only--not
intended to cover all types of controls
(wiring for receiver)


 To Next Page