23
RAKE REMOVAL, CLEANING & REINSTALLATION
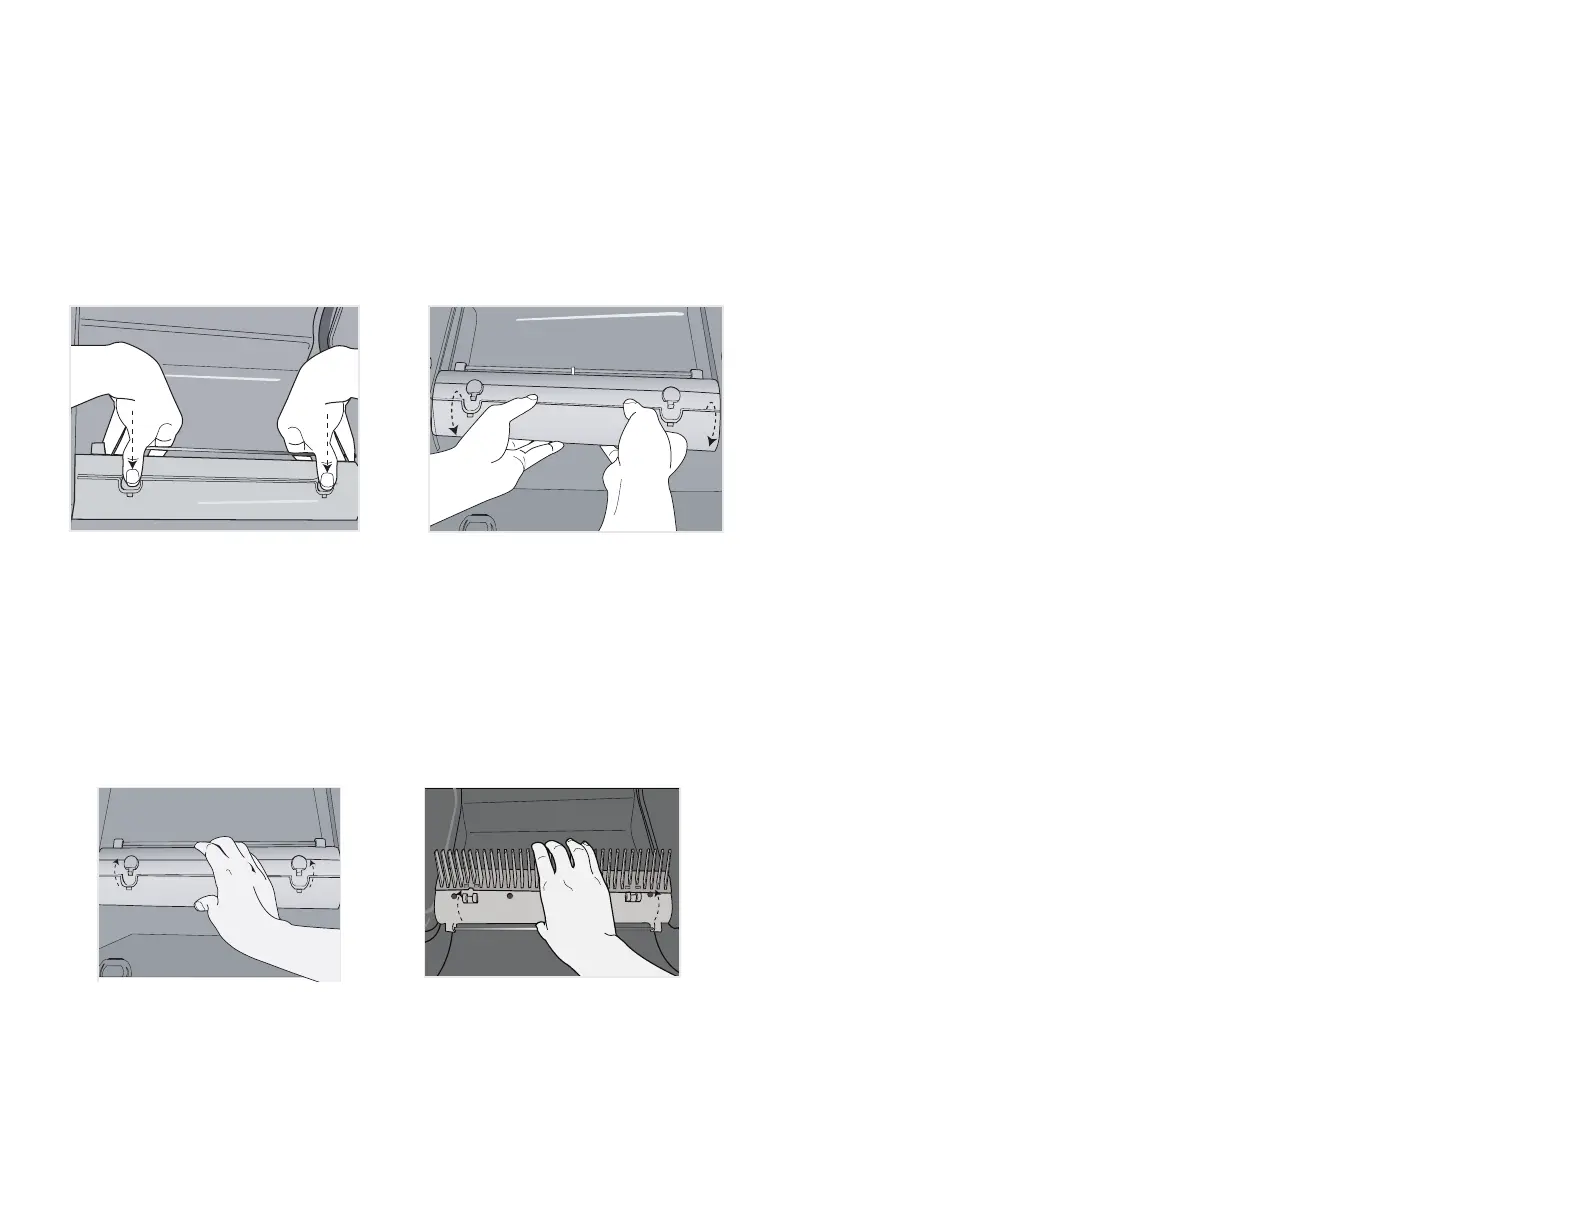
Removing the rake:
Important: We recommend wearing rubber or latex gloves when handling
the soiled rake.
• Press the On/Off button and hold it for 3 seconds, the LED will start blinking fast.
• Rake will move forward and stop at the dumping position.
• With two thumbs, press the two buttons on the motor housing to release rake
(Fig. 12).
• Pull rake out (Fig. 13).
Important: Do not operate without the rake
Cleaning rake:
• Use the LitterMaid
®
scoop and rake cleaner to quickly clean rake.
• Wash rake with a soft cloth using warm water and mild detergent.
Note: Do not use scouring pads or harsh and abrasive chemicals.
• Dry the rake.
Reinstalling rake:
• Hold rake with both hands and align the two indentations on the rake with the
two buttons on the motor housing (Fig. 14).
• Push rake into the motor housing until it snaps into place both on top and on
the bottom of the rake (Fig. 14 and 15).
• Press On/Off button and hold it for 3 seconds, the LED stops blinking and
motor housing returns to home position.
Note: The motor housing will automatically return to the home position, 5 minutes
after activating the cleaning cycle.
• Unit is now ready for normal operation.
CAUTION: MOTOR STARTS AUTOMATICALLY WITHOUT WARNING. KEEP HANDS, CLOTHING AND CHILDREN CLEAR OF UNIT.
RE
AD INS
T
RUCT
I
ON M
A
N
U
AL BE
F
O
RE
U
S
I
N
G.
Fig. 14
CAUTION: MOTOR STARTS AUTOMATICALLY WITHOUT WARNING.
Fig. 12
CAUTION: MOTOR STARTS AUTOMATICALLY WITHOUT WARNING. KEEP HANDS, CLOTHING AND CHILDREN CLEAR OF UNIT.
READ
IN
ST
R
UC
TION M
A
NUA
L
B
E
FO
RE USING.
Fig. 13
Fig. 15
NOTAS / NOTES
24
 Loading...