EasyManua.ls Logo

Little Giant PP-1 - User Manual

Little Giant PP-1
2 pages
Print Icon
To Next Page IconTo Next Page
Loading...
LITTLE GIANT
POTENT PUMP
INTRODUCTION
This instruction sheet will provide you with the information required
to safely own and operate your Little Giant pump.
Little Giant pumps are carefully packaged, inspected and tested to
insure safe operation and delivery. When you receive your pump,
examine it carefully to determine that there are no broken or dam-
aged parts that may have occurred during shipment. If damage has
occurred, make notation and notify the firm you purchased the pump
from. They will assist you in replacement or repair if required.
This pump is designed to pump water. Read instructions com-
pletely before operating pump.
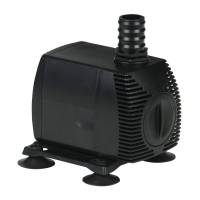
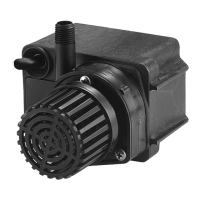
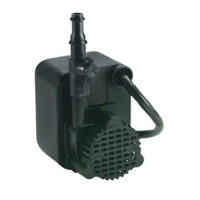
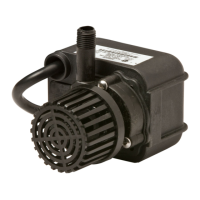
INSTALLATION
Your Little Giant pump is delivered to you completely pre-
assembled and pretested from the factory. It is ready for
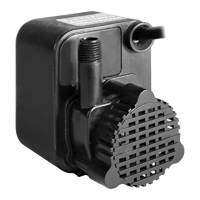
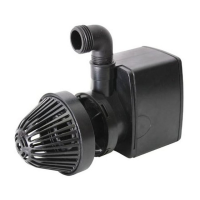
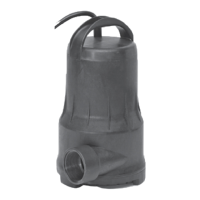
immediate use. These pumps are not submersible, operate the
pumps only in the in-line mode. Do not put the units in liquid.
Keep the pump in as dry a location as possible.
Do not allow pump to run dry. Do not restrict the intake side of the
pump. Connections on the intake side should not be of smaller
inside diameter hose than the intake inside diameter. Do not
restrict the discharge flow to zero. Allowing pump to run dry will
damage pump. Inspect impeller for wear periodically by removing
4 screws on pump front. Pull motor and adaptor assembly away
from pump front and check impeller for wear and pump front for
obstructions. Replace front.
ELECTRICAL CONNECTIONS
1. Check the pump label for proper voltage. Do not connect to
voltage other than that shown.
2. If pump is supplied with a 3-prong electrical plug, the third
plug is to ground the pump to prevent possible electrical shock
hazard. DO NOT REMOVE the third plug from the cord. If the
plug is cut or the cord is shortened, then this action will void
the warranty.
3. If the cord is equipped with stripped lead wires, such as on
230v models, be sure that the lead wires are connected to a
power source correctly. The green/yellow wire is the ground.
The blue (or white) and the brown (or black) are live.
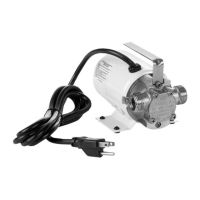
4. To connect model PPS-12 to power source connect the black
battery clamp to the negative (-) pole and the red battery clamp
to the positive (+) pole on a 12 volt D.C. battery. Do not oper-
ate pump with a weak battery. This will cause motor to stall
resulting in motor burning out.
OPERATION
1. CAUTION: TO REDUCE THE RISK OF ELECTRIC SHOCK,
DISCONNECT PUMP FROM POWER SOURCE BEFORE
SERVICING.
2. This pump is designed for intermittent use only (45 minutes on,
15 minutes off).
3. Do not run at heads greater than 35 feet (15 PSIG).
4. Make sure that suction line is airtight, obstruction-free, and well
submerged in fluid to be pumped. Do not allow end of suction
line to lay in bottom sludge, etc. Keep end away from bottom.
5. Make sure discharge hose is placed where fluid is to be
pumped to.
6. Select proper power source and voltage as indicated on pump
label.
7. Energize pump.
8. If fluid is not being pumped through discharge hose within 30
seconds, disconnect pump from power source immediately.
Read and follow “Priming Instructions.”
9. Drain pump after use in freezing weather.
PRIMING INSTRUCTIONS
Should pump not begin to move water within 30 seconds after
being energized, follow priming instructions below:
1. Fill intake hose with water while still connected to the pump.
This may be done by simply pouring water down the intake
hose from the open end.
2. Have an assistant place a finger over the end of the hose and
lower to water source.
3. Immediately energize the pump, releasing finger from the
intake hose simultaneously.
4. Pump should now operate without needing to be primed
again. Repeat steps 1-3 if unit does not begin to pump.
Franklin Electric Co., Inc.
P. O. Box 12010
Oklahoma City, OK 73157-2010
405.947.2511 • Fax: 405.947.8720
www.LittleGiantPump.com
CustomerService-WTS@fele.com
Question and Answer IconNeed help?

Do you have a question about the Little Giant PP-1 and is the answer not in the manual?

Summary

Introduction to Little Giant Potent Pump

Pump Installation and Setup

Electrical Connections for Little Giant Pump

Pump Operation and Safety

Priming Instructions for Potent Pump

Replacement Parts and Accessories

Little Giant Product Warranty Statement

Warranty Void Conditions

Lists conditions that will void the product warranty, such as tampering or improper use.

Overview

The Little Giant Potent Pump is a versatile and robust pump designed for intermittent use, primarily for pumping water. Manufactured by Franklin Electric Co., Inc., this pump is pre-assembled, inspected, and tested at the factory, ensuring safe operation and immediate use upon delivery. It is not submersible and operates exclusively in an in-line mode, requiring it to be kept in as dry a location as possible.

Function Description:

The primary function of the Little Giant Potent Pump is to transfer water. It is designed for intermittent operation, specifically 45 minutes on and 15 minutes off, to prevent overheating and ensure longevity. The pump is capable of handling heads up to 35 feet (15 PSIG). It is crucial to ensure that the suction line is airtight, free of obstructions, and well submerged in the fluid to be pumped, with the end kept away from bottom sludge. The discharge hose should be positioned to direct the fluid to its intended destination.

Important Technical Specifications:

The pump is available in various models, including those operating on 115V, 12V, and 220/240V, as indicated by the pump label. Electrical connections vary by model:

  • Standard Models: Equipped with a 3-prong electrical plug, which serves to ground the pump and prevent electrical shock. It is critical not to remove the third plug or shorten the cord, as this voids the warranty.
  • 230V Models: These models typically come with stripped lead wires. The green/yellow wire is for ground, while the blue (or white) and brown (or black) wires are live. Correct connection to a power source is essential.
  • Model PPS-12: This model is designed for 12V D.C. battery operation. The black battery clamp connects to the negative (-) pole, and the red battery clamp connects to the positive (+) pole. Operating with a weak battery can cause the motor to stall and burn out.

The pump's internal components include a volute, wear plate, cam (available for 115V and 12V models), impeller (also available for 115V and 12V models), and a gasket. The motor type varies based on voltage (115V, 12V with clamps, 220/240V). Motor pads are used for mounting.

Usage Features:

  • Non-Submersible Operation: The pump must not be placed in liquid; it operates in an in-line mode.
  • Intermittent Use: Designed for 45 minutes of operation followed by 15 minutes of rest.
  • Head Limitations: Do not operate at heads greater than 35 feet (15 PSIG).
  • Suction Line Requirements: The suction line must be airtight, obstruction-free, and adequately submerged. The intake side should not be restricted, and connections on this side should not have a smaller inside diameter than the intake itself.
  • Discharge Flow: The discharge flow should not be restricted to zero.
  • Priming Instructions: If the pump does not begin to move water within 30 seconds after being energized, priming is required:
    1. Fill the intake hose with water while it's still connected to the pump, either by pouring water down the open end or by other means.
    2. Have an assistant place a finger over the end of the hose and lower it into the water source.
    3. Immediately energize the pump, simultaneously releasing the finger from the intake hose.
    4. The pump should then operate without needing to be primed again. If not, repeat steps 1-3.
  • Post-Use Care: Drain the pump after use, especially in freezing weather, to prevent damage.
  • Safety Precaution: Always disconnect the pump from the power source before servicing to reduce the risk of electric shock.
  • Ground Fault Circuit Interrupter (GFCI): The National Electric Code requires a GFCI in branch circuits supplying fountain equipment rated above 15 volts. Little Giant Pump Company recommends using a GFCI with each pump.

Maintenance Features:

  • Impeller Inspection: Periodically inspect the impeller for wear and obstructions. This involves removing four screws from the pump front, pulling the motor and adaptor assembly away from the pump front, and then checking the impeller. After inspection, replace the front.
  • Replacement Parts: A comprehensive list of replacement parts and accessories is available, including:
    • PPIK-1 Impeller Replacement Kit (for PP-1 models)
    • PPIK-12 Impeller Replacement Kit (for PP-12 models)
    • Brush & Spring Kit for 115V & 230V motors with white brush caps.
    • Water Eater: A suction hose attachment designed for removing water close to the floor, featuring a built-in strainer to prevent foreign matter from entering the pump.
  • Warranty: The pump comes with a 12-month warranty (90 days for specific models like 1-AA-OM, GKPK-SC, PP-1, PPS-1, PP-12, PPS-12, PP-230, and Cooler King) against defective materials and workmanship from the date of purchase. The warranty does not cover brush wear in Model 35-OM or impeller/cam wear in PP-1, PP-12, and PP-230 models.
  • Warranty Void Conditions: The warranty becomes void if:
    1. The sealed motor housing is opened.
    2. The product is connected to a voltage other than that indicated on the nameplate.
    3. The cord is cut off to a length less than three feet.
    4. The pump is allowed to operate dry (fluid supply cut off).
    5. The pump is used to circulate anything other than fresh water, light oils, or other mild liquids at approximately room temperature.
    6. The product experiences customer abuse.

For parts, repair, or technical assistance, customers can contact Little Giant Pump Company via phone or their website.

Little Giant PP-1 Specifications

General IconGeneral
BrandLittle Giant
ModelPP-1
CategoryWater Pump
LanguageEnglish

Related product manuals