This document is a user manual for the LINK LIFE Gamma Fitness Treadmill, SKU# SPBK200004. It provides instructions for assembly, operation, display monitoring, remote control functions, folding/unfolding, maintenance, and troubleshooting.
Function Description:
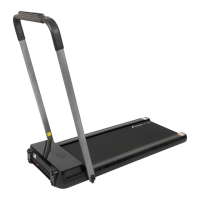
The Gamma Fitness Treadmill is designed for indoor use to facilitate walking and running exercises. It features a display monitor that tracks various metrics such as time, distance, calories, steps, and speed. Users can choose between different operating modes: sports mode, countdown mode (for time, distance, or calories), and preset programs (P01-P12). The treadmill can be controlled via a remote control, which allows users to start/stop, adjust speed, switch display modes, and select preset programs. A "SAFE KEY" button is included for emergency power cut-off. The treadmill is foldable for storage and requires regular lubrication of the running belt.
Important Technical Specifications:
- Product Name: Gamma Fitness Treadmill
- Voltage: 110V
- Frequency: 50-60Hz
- Speed Range: 0.5-6.5mph (0.8-10.5 km/h, as 0.1km speed change is mentioned)
- User Capacity: 200 LBS (approximately 90.7 kg)
- Display Metrics: Time, Distance, Calories, Steps, Speed
- Preset Programs: 12 (P01-P12)
- Time Countdown Range: 5:00 - 99:00 minutes
- Distance Countdown Range: 1 - 99 miles
- Calorie Countdown Range: 20 - 990 calories
- Speed Adjustment Increment: +/- 0.1MPH (or 0.1km, as per remote control section)
- Maximum Speed Limitation: 4MPH when the dashboard is deflected more than 60 degrees from horizontal.
Usage Features:
- Assembly: Involves taking the machine out of the box, unscrewing adjusting knobs, uplifting the handrail, tightening knobs, and connecting the power cord.
- Starting the Machine: Press "start/stop" on the remote control or dashboard. Default speed is 0.8KM/H.
- Speed Adjustment: Use the "+" and "-" buttons on the remote control or dashboard to adjust speed in increments of 0.1MPH/KM. Holding the button for over 0.5 seconds allows continuous increase/decrease.
- Display Modes: The display cycles through TIME/STEP and DISTANCE/CALORIES every 5 seconds. Users can press the "M" button to switch between cyclic display mode and single display mode.
- Countdown Mode: Set a target for time, distance, or calories. The treadmill will stop when the target is reached.
- Preset Programs: Select from 12 pre-programmed workouts (P01-P12) with varying speeds over time. Running time for programs can be set from 5:00 to 99:00 minutes (default 30:00).
- Emergency Stop: The "SAFE KEY" button on the dashboard or "Reset" button on the remote control cuts power instantly.
- Folding/Unfolding: The handle bar can be folded down by unscrewing knobs and laid clockwise, then screwed back to the frame. Unfolding involves loosening the knob, uplifting the handle bar counterclockwise to the desired angle, and tightening the knobs.
- Safety Precautions:
- Do not stand on the running belt when starting.
- Stop immediately if feeling nauseous.
- Increase speed slowly.
- Wear athletic shoes.
- Children, elderly, pregnant women, and patients recovering from injuries/surgery are prohibited from use without doctor consultation.
- Hold rail bars firmly during use.
- Place on flat ground, avoid slanted surfaces, outdoors, noisy places, or direct sunlight/heat sources.
- Avoid unstable power supply; do not share sockets with high-power appliances.
- Be cautious of children/objects when folding/unfolding.
- Keep away from wet objects.
- Unplug after use, when moving, or changing parts.
- Do not place objects on the machine.
- Do not disassemble without professional supervision.
- Ensure running belt is fastened before use.
Maintenance Features:
- Silicone Oil Application: Apply silicone oil to the running board by pulling the running belt up tightly. Run the machine for 3 minutes without use after application. Recommended every 30 hours of use to extend belt lifetime.
- Belt Adjustment:
- Deviation to Left: Run at 1-3KM/H, turn the screw clockwise with an Allen wrench until the belt is centered.
- Deviation to Right: Run at 1-3KM/H, turn the screw counterclockwise with an Allen wrench until the belt is centered.
- Belt Stuck: Turn screws 180 degrees on both left and right sides with an Allen wrench.
- Daily Maintenance:
- Switch off and unplug before checking or cleaning.
- Clean the belt and dial plate at least once a week after use.
- Do not hang clothes or other objects on the machine.
- Troubleshooting: The manual provides a table of error codes (Err(or E00), E2, E4, E5, E6, E7, E8) with their meanings, potential problems, and solutions, including checking safety key placement, replacing control boards, checking motor connections, and ensuring user weight capacity is not exceeded.