1
3
4
2
SET UP
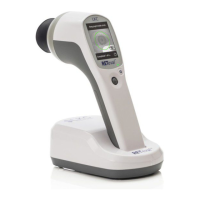
1. Unpack device and press the power buon near the
boom right of the screen.
• TIP: Only press the power buon once shortly. Do not
hold down.
2. Connect the Sensor Strip lead as shown below (cable
towards the top of device).
3. Navigate using the joysck to “Sengs” and select your
“Language” and “Date/Time.”
CONFIGURE DEVICE FOR TESTING
1. Choose the tesng protocol you’d like to use:
• Go to “Protocol” then “Change”
• Choose a protocol from the list, then press “Save”
• TIP: Candela protocols (ending in – cd) should be used
with DILATED paents. Troland protocols (ending in -td)
can be used with either NON-DILATED or DILATED
paents.
2. Select “New Test” on the main menu.
3. Use the joysck or paent data barcode applicaon (www.
lkc.com/download) to enter the paent ID and birthdate.
4. Conrm that the protocol, paent ID, and birthdate are
correct. Select “Next” to proceed, or select “Change
Protocol” to choose a dierent protocol if needed.
5. If using Sensor Strip electrodes, scan the Sensor Strip
barcode from packaging. Choose “Select electrode” to pick
a dierent electrode type.
PREP PATIENT
1. Apply a pea-sized amount of Nuprep
®
Gel on a clean pad
and using gentle circular moon clean below each eye and
temple area where the electrode will be placed. Remove
any remaining Nuprep Gel prior to applying the Sensor
Strip.
PLACE SENSOR AND CONNECT CLIP
1. Hold the LKC Sensor Strip by the electrode connecon tab
while placing it as follows:
• Narrow end of Sensor Strip should line up with
middle of pupil
• Sensor Strip should be about 2 mm below the lower
eyelid lash line
• Avoid hair and eyelashes when applying the Sensor
Strip
• TIP: The Sensor Strip should be visible on the RETeval
screen during tesng. If it’s not, the electrode placement
is likely too far below the eye.
QUICK REFERENCE GUIDE
Quesons? We are here for you. Send us an email
support@lkc.com or call +1(301) 840-1992
TOO INFERIORTOO NASAL TOO TEMPORAL
CORRECT:
INCORRECT:
ELECTRODE
CONNECTION TAB