To install supplementary rolls, proceed as follows:
1. Remove top cover.
2. Remove rear section of top plate. This will expose the extended shafts on which the rolls are to
be mounted.
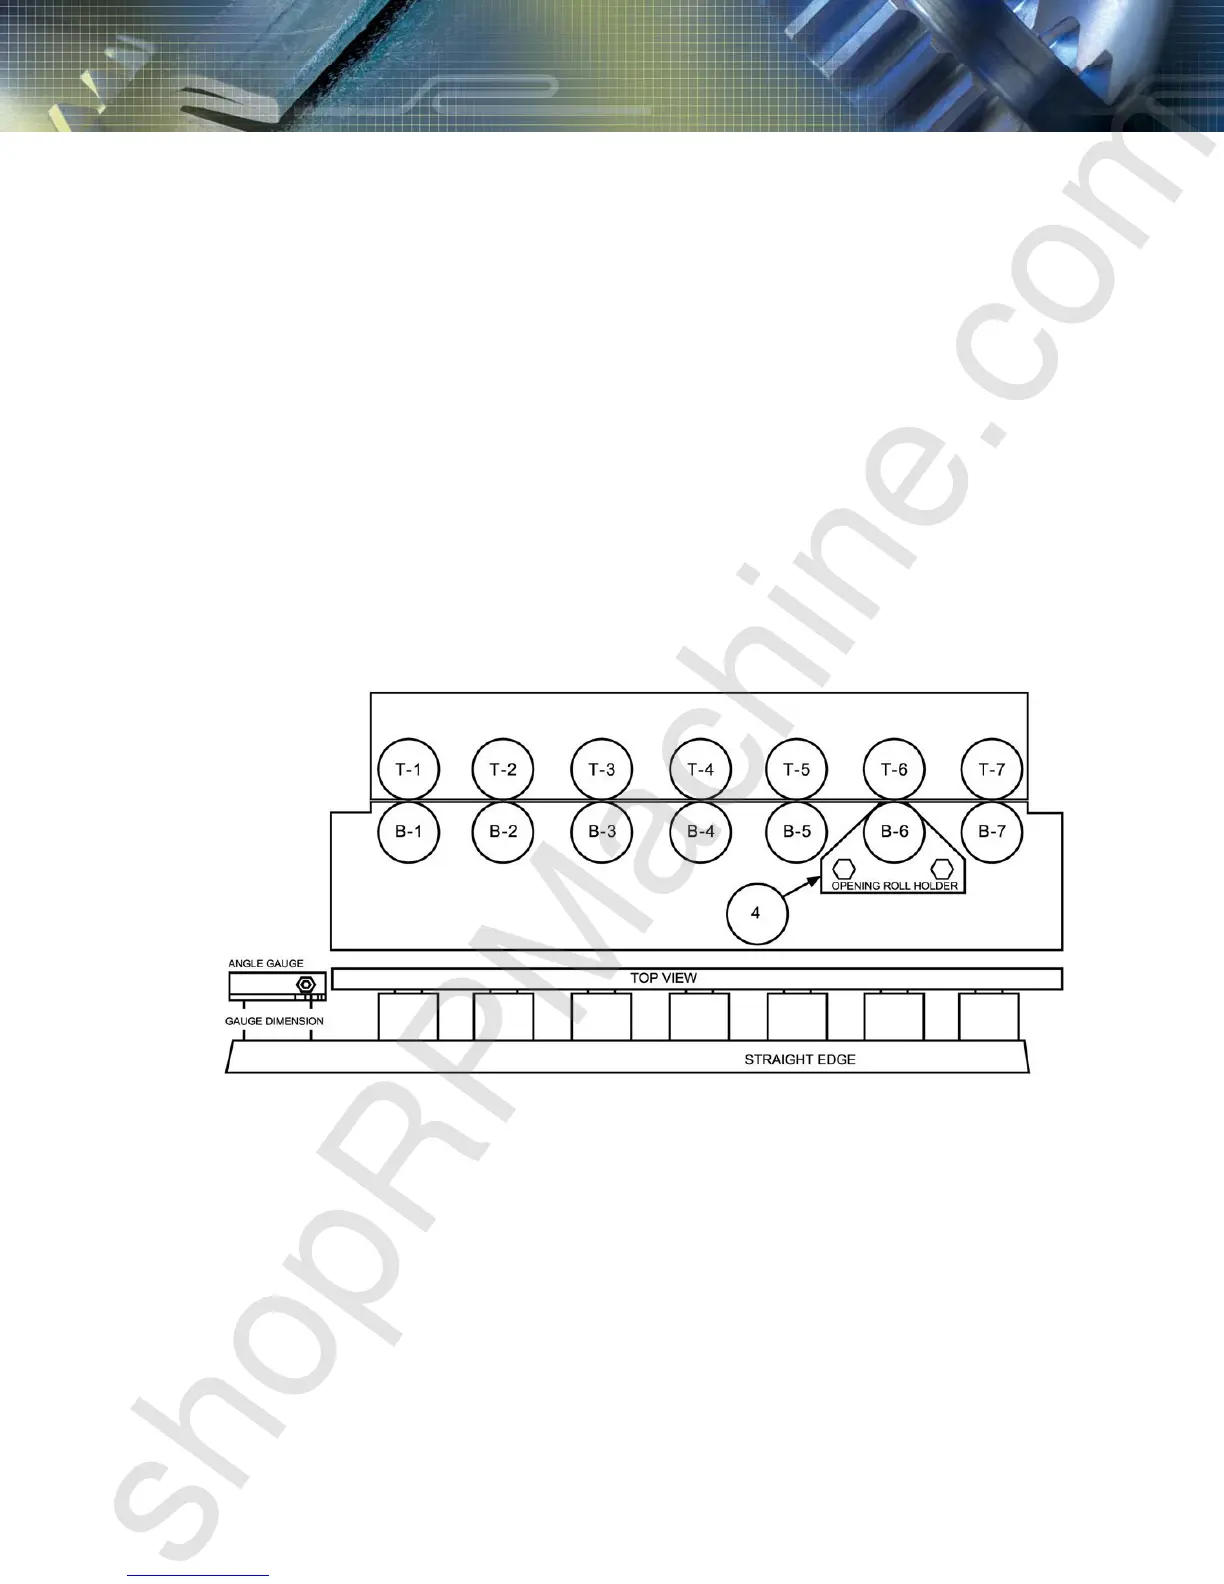
3. Select the first pair of rolls, which are marked “T1” and “B1” and slip them on the shafts at the left,
or feed side of the machine, placing “T1” on the upper shaft and “B1” on the lower. Repeat this
procedure with rolls T2 and “B2”, ‘T3” and “B3” etc., until all rolls have been mounted. All rolls
marked “T” should be mounted on the top shafts and “B” rolls on the bottom shafts, in numerical
order, reading from left to right, facing the shafts. NUMBERED SIDE MUST FACE OUTWARDS.
4. Install keys and fasten rolls to shafts with capscrews and special washers which are provided.
5. Mount entrance and exit gauges onto stand using slotted holes provided in stand table top. Set
entrance gauge by placing a straight edge along the outer edge of the auxiliary rolls, Measure in
from this straight edge to the extreme ends of entrance gauge bar the required amount. See
Sketch (1). When using the Drive Cleat Rolls the straight edge is placed along the entrance
gauge and the measurement is made from the distance between the straight edge and the
number one and seven roll stations.
SKETCH No.1
LKF Pittsburgh 16 Gauge
shopRPMachine.com