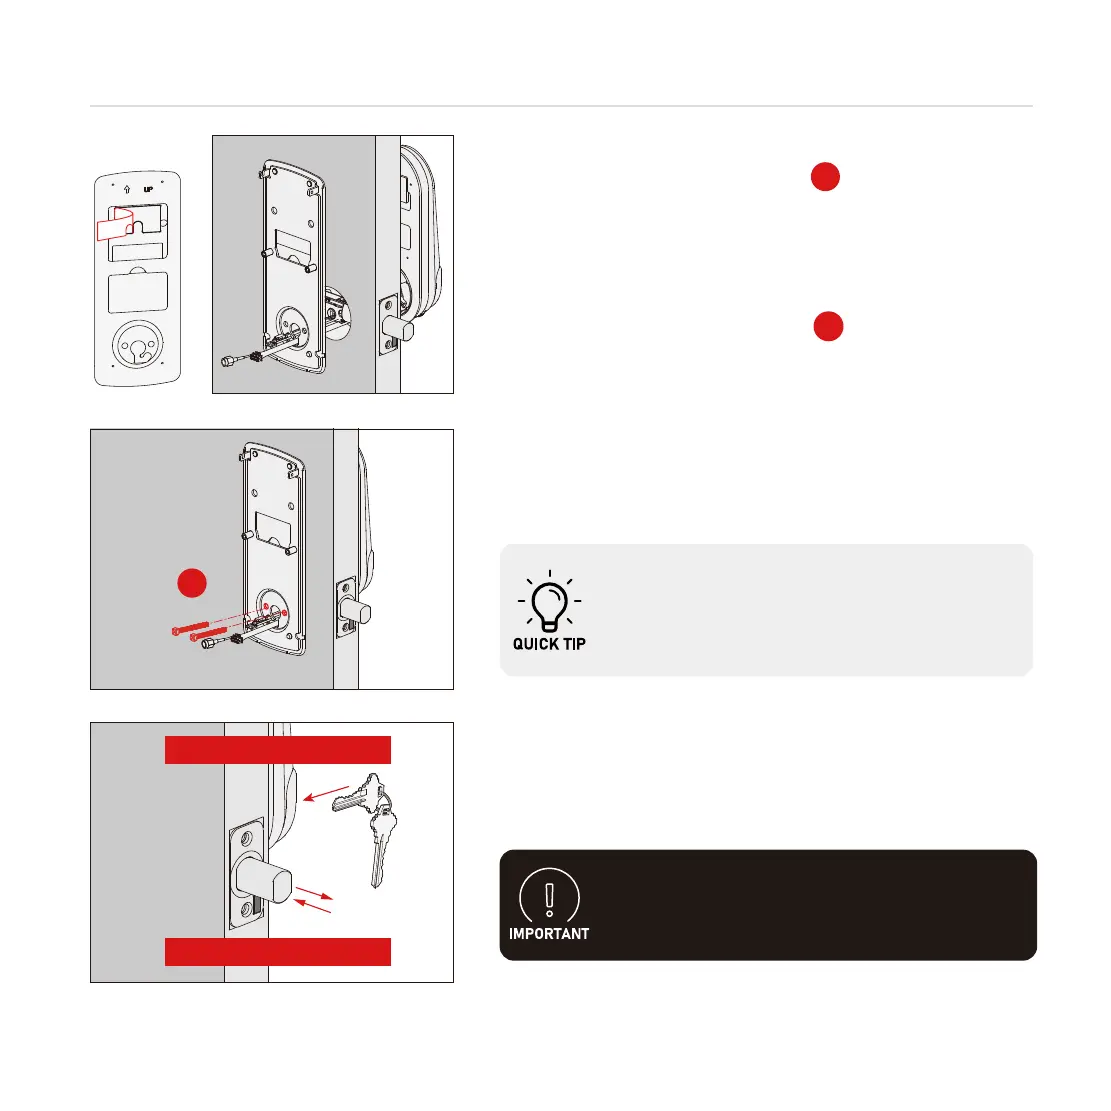
INSTALLING INTERIOR ASSEMBLY (G)
7
when installing screws by hand, turn screws
clockwise several turns then counterclockwise
one turn to ensure smooth threading and no
cross threading.
Step 3
F
2X
F
2. Insert and tighten by hand 2 screws located on
the left and right of the blade. Check the alignment
and insert screws through the circular holes on both
sides of the deadbolt torque blade, aligning them
with the screw holes on the exterior assembly. Ensure
that the screws do not compress or damage the
cable, and then tighten them with a screwdriver until
the mounting plate securely attaches to the door.
Remove key when finished
Leave deadbolt extended
D
1. Peel off protective film from the adhesive strips on
the back of the mounting plate . Guide connection
cables through the hole and secure to the notch on
the lower left corner. Align the mounting plate onto
door and firmly press to secure it in place.
3. Use the key to ensure deadbolt locks and unlocks
smoothly. Rapid beeping is an indication it cannot
close due to misalignment and/or excessive rubbing
or binding.
When finished, leave the deadbolt extended
and remove the key before proceeding to
the next step.
 Loading...