Do you have a question about the Lockly Vision and is the answer not in the manual?
Instructions for adjusting the deadbolt from 2-3/4" (70mm) to 2-3/8" (60mm).
How to extend the deadbolt and insert it into the door mortise, securing with screws.
Plug larger cable into interior assembly, tuck cable, and connect internal plugs securely.
Ensure thumb turn is vertical, align torque blade, and secure assembly with screws.
Insert initial batteries, hold program button, and install 4th battery for self-check.
Verify smooth operation, test keypad lock, and install remaining batteries and cover.
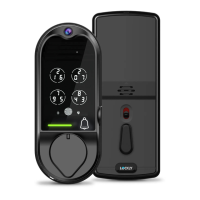
Download the Lockly app and use the activation code for setup and pairing.
Launch the Lockly app, scan the QR code from the activation card or hub to pair.
| Type | Smart Lock |
|---|---|
| Connectivity | Wi-Fi, Bluetooth |
| Fingerprint Sensor | Yes |
| Voice Assistant Compatibility | Amazon Alexa, Google Assistant |
| Material | Zinc Alloy |
| User Codes | Up to 99 |
| Keypad | Yes |
| Night Vision | Yes |
| Two-Way Audio | Yes |
| Lock Type | Deadbolt |
| Power Source | 4 AA Batteries |
| Door Thickness | 1 3/8" to 2" |
| Security Features | PIN Genie |
| Camera Resolution | 1080p |