8
Lockly Vision
™
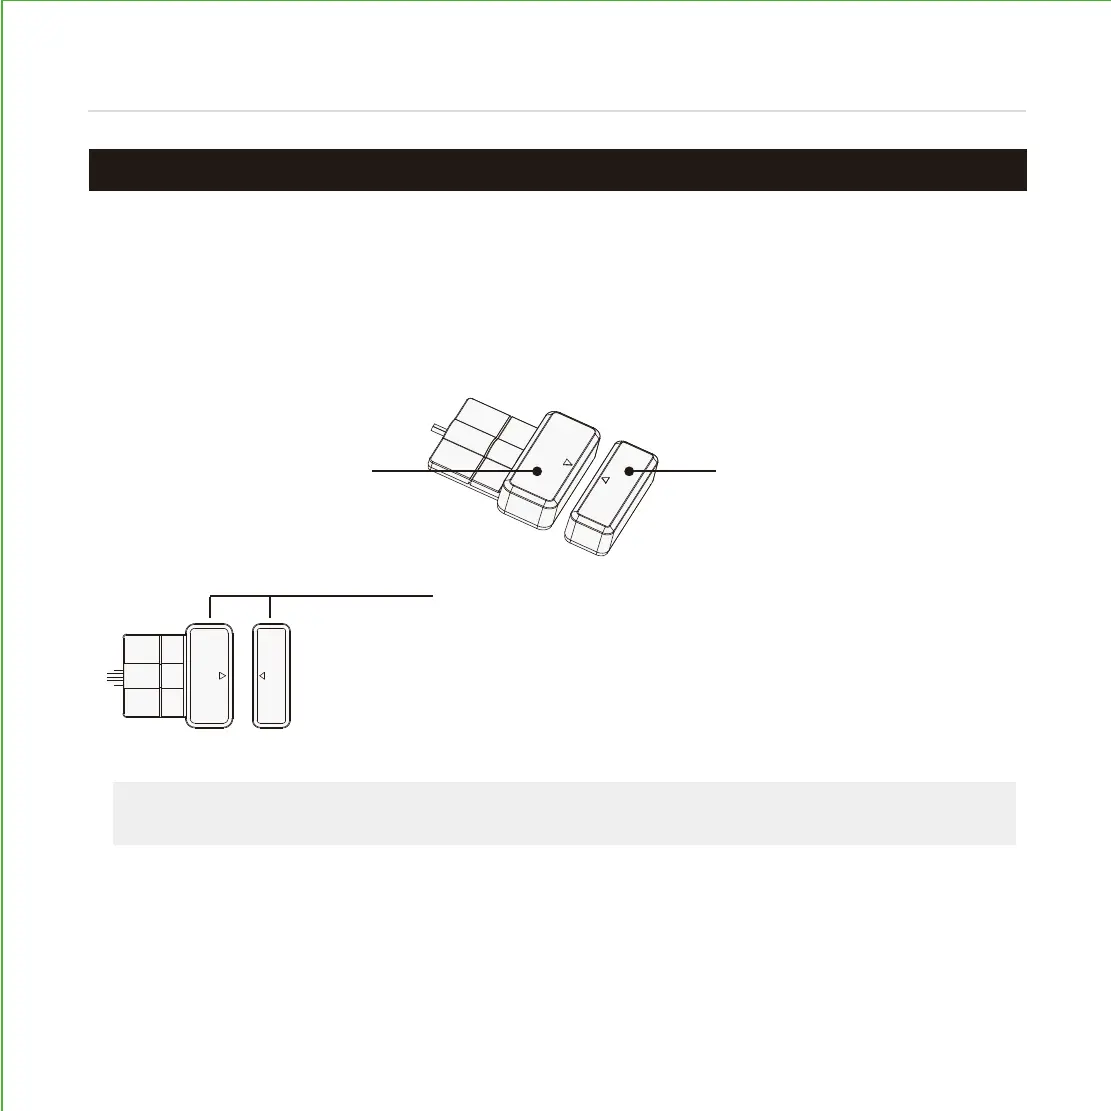
comes with a pre-wired door sensors consisting of two parts:
Part (P) - Wired Sensor
Part (Q) - Sensor Magnet
About door sensors
Door sensors provide real-time door condition status, such as the ability to verify if
the door is securely closed. It also sends push notifications to your phone whenever
your door opens and enables voice control with Amazon Alexa or Google assistant.
Removal of Sensor (optional)
There may be circumstances where the sensor cannot be installed because of
molding/door limitations or is not aesthetically desirable. The sensor wired to the lock is
removable by carefully pulling its connector from the circuit board. If removed, some
features and functionality will not be available, such as real-time condition status.
TIP:
Lockly offers both brown and black sensor covers that can be ordered through
our customer care hot line: (669) 500-8835 or by email: help@lockly.com.
IMPORTANT: Gap must be less than 3/4” when installed.
When installed on door, the distance between the wired sensor and
sensor magnet must be less than 3/4” in order for the sensor to work.
If door frame is higher than door, add included foam pads to level
parts (P) and (Q) with each other as much as possible.
PREPARING DOOR SENSORS FOR INSTALLATION
Step 4
Do not mount (install) door sensors yet. You will install in step 7.