Art. ELEV36
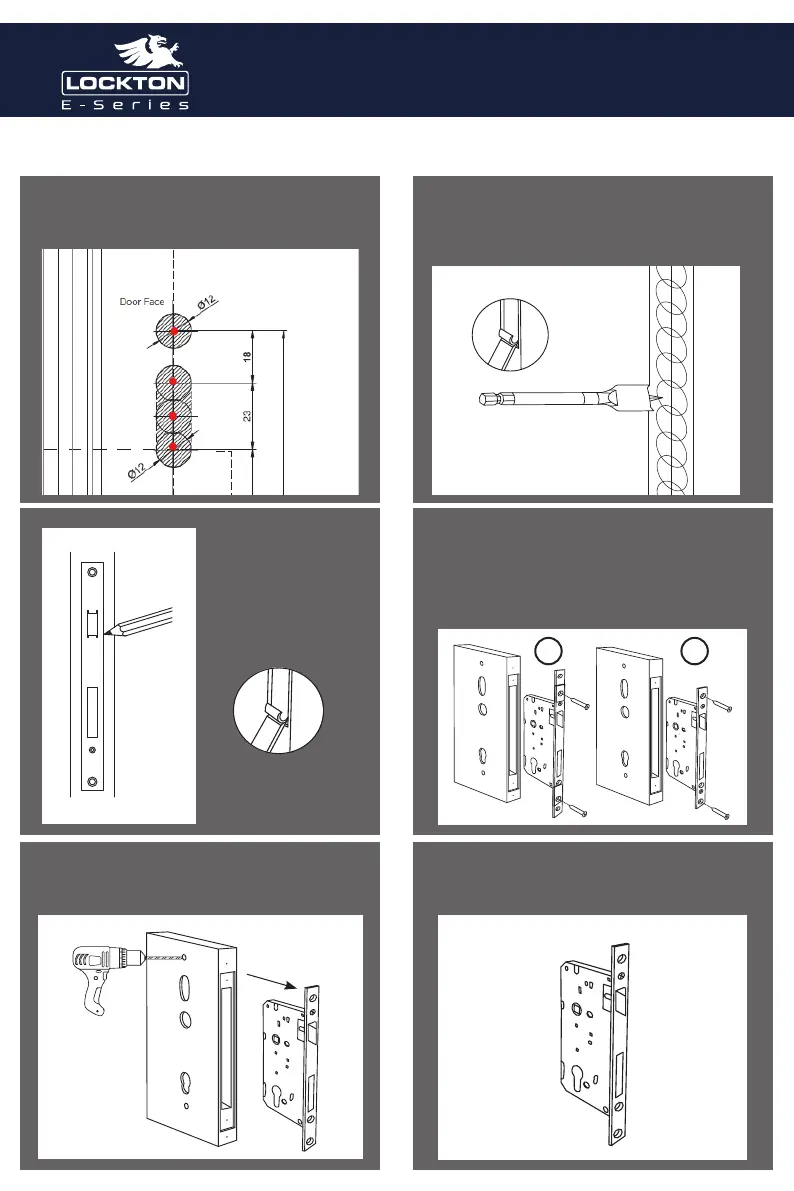
STEP 7. Use the marked Horizontal line to align the
template & mark the 8 x holes on the front of the
door. Repeat steps 6-7 on rear of door.
STEP 8. Drill the 14 x 19 mm holes in the edge of
the door using a speed bore. set the depth to 25mm
deeper then your selected backset.
NOTE: Chisel out the sides to create a neat rectangle
mortice.
STEP 9. Place the Mortice
lock in the doors edge,
Mark the faceplate and cut
it in so that the mortice
lock sits flush on the doors
edge.
STEP 10. (A) For metal doors install a tab on the
top and bottom of the mortice lock & mark the
screw holes centre. Drill the 2x holes for the fixing
points & install the mortice lock into the door using
the tabs & screws provided.
(B) For timber doors install the 2 x 4.2mm x 20mm
screws.
STEP 11. Remove the Mortice lock & Drill the holes
on the rear of the door slightly, Then drill the holes
completely all the way through from the front of the
door.
STEP 12. Before installing the mortice lock into the
door adjust the latching direction as shown on next
page.
A B
Art. ELEV36