The LOCO Crawfish Boiler (models LCBR90 and LCBR150) is an outdoor cooking appliance designed exclusively for heating water and boiling food, specifically crawfish, crab, shrimp, peanuts, corn on the cob, potatoes, lobster, and tamales. It is not intended for frying turkeys or for use with oil or grease, nor is it designed for commercial use or as a heater. The appliance operates on propane gas and is certified under ANSI Z21.89 - CSA 1.18-2017 as an Outdoor Cooking Specialty Gas Appliance.
Technical Specifications:
- Models: LCBR90 and LCBR150
- Main Max. Input Rating:
- LCBR90: 73,000 BTU/H
- LCBR150: 146,000 BTU/H
- Capacities:
- LCBR90: 90 Quarts
- LCBR150: 150 Quarts
- Dimensions (Width x Length x Height):
- LCBR90: 23.81" x 36.61" x 37.20" (605 mm x 930 mm x 945 mm)
- LCBR150: 36.22" x 36.61" x 37.20" (920 mm x 930 mm x 945 mm)
- Minimum Outside Operating Temperature: 21°F (-6°C). Do not use below this temperature.
- Regulator Model: GYK (replacement regulators and hose assemblies must be those specified by the manufacturer).
- LP Tank Requirements:
- Dimensions: 12" (30.5 cm) diameter x 18" (45.7 cm) high with 20 lb (9.1 kg) maximum capacity.
- Construction: Must be built and marked in accordance with DOT specifications or CAN/CSA-B339.
- Features: QCC Type 1 outlet compatible with regulator, safety relief valve, UL Listed Overfill Protection Device (OPD) with triangular hand wheel, and a collar to protect the LP tank valve.
- Clearances: Minimum 10 ft (3.0 m) from any structure, combustible material, or other gas cylinder to the sides and back of the appliance. Do not operate within 25 ft (7.5 m) of any flammable liquid. Do not operate under overhead combustible construction.
Usage Features:
- Assembly: Adult assembly is required. Keep screws and parts out of reach of children. Tools required include a Phillips head screwdriver and an adjustable wrench (not included).
- LP Tank Connection: Place the LP tank on a secure, level, stable surface. Turn the regulator control knob and LP tank valve to OFF. Remove the protective cap from the LP tank valve. Insert the regulator nipple into the LP tank valve and hand-tighten the coupling nut. Do not use tools.
- Leak Testing: A leak test must be performed each time the LP tank is exchanged or refilled. Use a 50/50 soap and water solution and a clean paintbrush. Brush the solution onto all metal seams and the entire valve area. "Growing" bubbles indicate a gas leak. If a leak is detected, immediately turn off the LP tank valve and contact a propane dealer or fire department. Do not smoke or use open flames during the leak test.
- Lighting the Burner:
- Ensure the regulator control knob and LP tank valve are completely closed (OFF).
- Open the LP tank valve fully by turning counterclockwise.
- Turn the regulator control knob one rotation clockwise.
- Electronic Ignitor Lighting: Press and hold the ignition button until the burner is lit. Do not stand with your head or arms over the burner.
- Match Lighting: Use a long lit match (fireplace match) and place the flame directly over the burner. If using a short match, place it unlit into the match holder (attached by a chain to the front leg), then light the match.
- Once the burner is lit, turn the regulator control knob to the maximum position.
- Burner Flame Check: A good flame is blue with little to no yellow. If ignition does not occur within 5 seconds, turn the regulator control knob OFF, wait 5 minutes, and repeat the lighting procedure.
- Accidental Burner Shut-off: If the burner flame goes out, turn the LP tank valve OFF, turn the regulator control knob to OFF, inspect the hose and connections, wait 5 minutes, then restart.
- Shut Down: Turn the LP tank valve OFF (clockwise to full stop), then turn the regulator control knob to OFF (counterclockwise to OFF position).
- Water Filling: For maximum food amounts (as per the cooking chart), fill the boiler to the MAX fill line inside the basket. For smaller amounts, place food in the basket and fill with water until covered. Never exceed the MAX fill line.
- Cooking: Once water reaches a rolling boil (approx. 28 minutes, varies by conditions), add food slowly to the basket while wearing protective gloves to prevent burns. Stir periodically for even seasoning absorption. Boiling times vary by food type (e.g., crawfish 5 min, crab 15 min, shrimp 3 min). Soaking times (e.g., crawfish/crab 15-30 min, shrimp 5-10 min) allow for flavor absorption.
- Safety Precautions:
- Never operate unattended.
- Keep children and pets away.
- Do not move the appliance while in use or hot.
- Allow liquids to cool to 115°F (45°C) or less before handling.
- Use insulated mitts/gloves and closed-toed shoes.
- Have a Type BC or ABC fire extinguisher readily available.
- In case of fire, call 911; do not use water.
- In case of precipitation, cover the cooking vessel, turn off burners and gas supply; do not move.
- Operate on a level, stable, noncombustible surface (brick, concrete, dirt).
- Do not place an empty cooking vessel on the appliance or allow a filled vessel to boil dry.
- Avoid bumping or impacting the appliance to prevent spills.
- Lower food slowly to prevent splashing.
- Do not overfill the cooking vessel.
- Keep the fuel supply hose away from heated surfaces.
- Ensure the LP tank is arranged so wind blows heat away from it.
- Check burner/venturi tubes for insects and nests.
- Do not use a cooking vessel larger than recommended.
- Do not connect to self-contained LP gas systems of campers, trailers, or motor homes.
- Do not operate under the influence of alcohol or drugs.
Maintenance Features:
- General Cleaning: Clean the entire appliance annually and tighten all hardware 1-2 times a year. Thoroughly clean after every use.
- Food Contact Parts: Hand-wash with warm soapy water and a nylon pad after each use.
- Soot Removal: If black soot is cooked onto the outside of the cooking vessel, scrub with steel wool. Do not use oven cleaner on aluminum vessels as it will dull the finish.
- Hard Water Stains: For darkening on the interior of the cooking vessel due to hard water, fill to the darkened level with a mixture of 1 quart water, 2 tablespoons cream of tartar, and 1/2 cup vinegar, then boil for 10 minutes.
- Burner Cleaning: Use a brush to loosen corrosion from the exterior. Clean clogged gas ports with a paper clip. Replace corroded or damaged burners.
- Burner Tube/Venturi Cleaning: Disconnect the regulator hose. Check for nests, webs, or mud inside the tube. Use a flexible brush or hooked wire to remove obstructions.
- Storage: Ensure all components are completely dry before storing in a clean, dry location.
- Safety Reminder: Allow the appliance to cool to 115°F (46°C) before cleaning. Keep the area clear of combustible materials. Do not obstruct combustion and ventilation air flow.
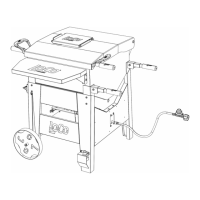
Included Components:
- Lid, Lid Hatch, Lid Handles
- Basket, Basket Handles
- Lid Support, Folding Front Shelf
- Cart Base with Legs, Wheels, Wheel Axle
- Bottle Opener, Match Holder, Cart Handles
- Regulator/Hose Assembly, AA Battery, SureSpark™ Ignitor, Ignitor Cover
- Jet Burner Assembly, Electrodes, Drain Valve
Warranty:
The appliance is warranted to the original consumer/purchaser for one (1) year from the date of purchase against defects in materials and workmanship. Defective parts will be replaced free of charge. Expedited shipping costs for warranty parts are the responsibility of the consumer/purchaser. The warranty does not cover defects or damage caused by the use of non-original parts, industrial/commercial use, shipping damage, alteration, abuse, or misuse. LOCO Cookers is not responsible for labor charges or incidental/consequential damages.