EasyManua.ls Logo

LOCO COOKERS SmartTemp LCG2ST2C26 - User Manual

LOCO COOKERS SmartTemp LCG2ST2C26
32 pages
Print Icon
To Next Page IconTo Next Page
Loading...
Owners Manual
Assembly Instructions
READ INSTRUCTION MANUAL BEFORE ATTEMPTING TO ASSEMBLE OR OPERATE THIS PRODUCT.
Adult assembly required. Keep screws and parts out of reach of children.
INSTALLER: Leave these instructions with consumer.
CONSUMER: Retain these instructions for future reference.
26” 2-Burner Patented SmartTemp™
Precision Griddle
Model: LCG2ST2C26
LCG2ST2C26 • IM • 051022
WARNING

Questions and Answers

  • C
    Cameron MckenzieAug 19, 2025
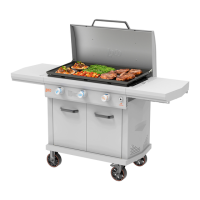
    How to fix LOCO COOKERS SmartTemp LCG2ST2C26 burner that won't light with ignitor?
    • A
      Ashley SotoAug 19, 2025
      To address a burner that won't light using the ignitor on your LOCO COOKERS Griddle, try these steps: * Ensure the LP tank valve is open by turning it counterclockwise. * Confirm the regulator is properly attached and the coupling nut is fully tightened to the LP tank valve. * Check that the LP tank isn't empty and refill if needed. * Verify the battery is correctly installed with the + end facing the ignitor button and replace it if weak or dead. * Reinstall the ignitor button, ensuring aligned threads. * Clean any cooking residue from wires or the electrode with rubbing alcohol and dry any wet components. * If the electrode is cracked or the ignitor is malfunctioning, contact customer service for replacement parts.
  • T
    Toni MooneyAug 21, 2025
    What to do if LOCO COOKERS Griddle has sudden drop in gas flow?
    • W
      william58Aug 21, 2025
      To troubleshoot a sudden drop in gas flow or reduced flame height in your LOCO COOKERS Griddle, first, refill the LP tank if it's empty. If the issue persists, the Overfill Protection Device (OPD) on the LP tank might have been activated. To reset it, turn all control knobs to OFF, wait 30 seconds, and then relight the griddle. If flames remain low, turn off all control knobs and the LP tank valve. Disconnect the regulator from the LP tank, wait at least one minute, then reconnect the regulator and fully open the LP tank valve.
  • M
    Melissa LinAug 25, 2025
    Why LOCO COOKERS SmartTemp LCG2ST2C26 burner won't light with a match?
    • S
      Sharon FischerAug 25, 2025
      To resolve a LOCO COOKERS Griddle burner that will not light with a match, ensure the LP tank valve is open by turning it counterclockwise and that the regulator is properly attached and fully tightened to the LP tank. If the tank is empty, refill it. Also, check for any obstructions in the gas flow by cleaning the burner tubes and inspecting the gas hose for bends or kinks. Make sure the burner is properly engaged with the valve and that the burner ports are clean.
  • D
    Danielle EllisAug 26, 2025
    Why is the flame yellow on my LOCO COOKERS SmartTemp LCG2ST2C26 Griddle?
    • D
      Diana BlackburnAug 26, 2025
      If the flame on your LOCO COOKERS Griddle is yellow or orange, it could be due to a few reasons. If it's a new burner, residual manufacturing oils might be present, so light the griddle and burn it on SEAR for 15 minutes. Another cause could be an obstruction of gas flow, so clean the burner tubes and check for any bent or kinked gas hoses. Grease or food residue on the burner can also cause this issue, so clean the burner thoroughly. Lastly, check the alignment of the burner to the valve and realign or re-engage if necessary.
  • X
    xbryanAug 28, 2025
    What to do if LOCO COOKERS SmartTemp LCG2ST2C26 Griddle flames go out?
    • L
      Linda SmithAug 28, 2025
      If the flames on your LOCO COOKERS Griddle go out, it could be due to high or gusting winds, so avoid using the griddle in such conditions. Another reason could be that the LP tank is empty, so refill it. Additionally, the Overfill Protection Device (OPD) on the LP tank might have been activated; in this case, refer to the instructions for 'Sudden drop in gas flow or reduced flame height'.
  • S
    Samuel HawkinsAug 30, 2025
    How to stop flare-ups on LOCO COOKERS SmartTemp LCG2ST2C26?
    • S
      Samantha FlemingAug 30, 2025
      If you experience a flare-up on your LOCO COOKERS Griddle, it's likely due to grease buildup. Clean all parts to remove excess grease. It could also be caused by excess fat in the meat, so trim excess fat before cooking. Additionally, the cooking temperature might be too high, so adjust to a lower temperature.
  • J
    Jamie FrazierSep 1, 2025
    How to manage excess grease on LOCO COOKERS SmartTemp LCG2ST2C26 surface?
    • C
      Colin StoneSep 1, 2025
      To address excess grease collecting on the surface of your LOCO COOKERS Griddle while cooking, adjust the cooktop for proper grease drainage. Use the included wrench to rotate the cooktop feet, raising or lowering the cooktop until grease flows toward the drain.
  • V
    Vanessa BennettSep 3, 2025
    Why does LOCO COOKERS SmartTemp LCG2ST2C26 Griddle have irregular flame pattern?
    • E
      Eric PhamSep 3, 2025
      An irregular flame pattern on your LOCO COOKERS Griddle, where the flame does not run the full length of the burner, is typically caused by clogged or blocked burner ports. To fix this, clean the burner ports.
  • S
    Shannon RamosSep 5, 2025
    What to do for persistent grease fire on LOCO COOKERS SmartTemp LCG2ST2C26 Griddle?
    • M
      middletonamandaSep 5, 2025
      If you experience a persistent grease fire on your LOCO COOKERS Griddle, turn all control knobs and the LP gas tank valve to OFF. Allow the grease fire to burn out and the griddle to cool. Then, clean all parts of excess grease and food buildup.
  • M
    Michael TuckerSep 7, 2025
    What does Error Code Err1 mean on LOCO COOKERS SmartTemp LCG2ST2C26 Griddle?
    • M
      Mr. Christopher Hoffman Jr.Sep 8, 2025
      If you are seeing Error Code Err1 on your LOCO COOKERS Griddle, it means the temperature sensor is disconnected. First, check the temperature sensor and its wiring for damage. Second, make sure the temperature sensor is securely attached to the controller. If the issue persists, contact Customer Service.

Summary

Safety Information and Symbols

Safety Symbols and Definitions

Defines hazard symbols like Danger, Warning, and Caution for user safety.

General Operational Warnings

Provides critical warnings about appliance use, fire hazards, and safe practices.

California Proposition 65 Warning

Alerts users to chemical exposure risks as per California law.

Comprehensive Warnings

Installation and Environmental Safety

Details safety guidelines for installation and environmental considerations.

Operational Safety Precautions

Outlines essential safety measures during appliance operation and potential hazards.

Additional Safety Warnings

Proximity and Usage Restrictions

Advises on safe proximity, appliance modifications, and user impairment.

Electrical Safety and Component Use

Specifies electrical safety requirements and proper component usage.

LP Gas Tank Safety and Handling

LP Tank Storage and Transportation

Provides critical safety instructions for LP tank storage, handling, and transportation.

LP Tank Specifications and Requirements

Details the required specifications and certifications for LP gas tanks.

LP Tank Valve Features and Safety

Essential LP Tank Valve Components

Lists essential features required for LP tanks, including safety relief and OPD.

LP Tank Valve Safety Precautions

Warns against inserting tools into the LP tank valve to prevent leaks and explosions.

Parts Diagram

Griddle Component Identification

Visual guide identifying all parts of the griddle assembly.

Parts List

Detailed Component Inventory

Comprehensive list of all griddle parts with quantities.

Hardware and Tools for Assembly

Required Hardware and Fasteners

Lists all necessary hardware components for assembly.

Assembly Tool Requirements

Specifies the tools needed for assembly, both included and not included.

Assembly Instructions - Base and Sides

Step 1: Attaching Wheels and Base Frame

Guides the user through attaching the wheels and assembling the cart base.

Step 2: Attaching Side Cart Panels

Instructs on how to attach the side panels to the cart base.

Assembly Instructions - Cart Body

Step 3: Attaching Rear Cart Panel

Details the process of attaching the rear panel to the griddle cart.

Step 4: Installing Front Brace and Door Magnets

Covers the installation of the front brace and door magnets.

Assembly Instructions - Door and Shelves

Step 5: Attaching the Door Handle

Guides on attaching the door handle to the cart door.

Step 6: Installing Left Side Shelf

Provides instructions for attaching the left side shelf.

Assembly Instructions - Accessories

Step 7: Installing Grease Chute Assembly

Explains how to install the grease chute assembly.

Step 8: Connecting Power Port and Ignitor

Covers the connection of the power port and ignitor system.

Assembly Instructions - Cooktop and Storage

Step 9: Mounting the Griddle Cooktop

Details the process of mounting the cooktop onto the cart.

Step 10: Installing Storage Tray and Grease Tray

Guides on installing the power cord storage tray and grease tray.

Assembly Instructions - Side Shelves

Step 11: Attaching Side Shelf Brackets

Instructs on attaching the necessary brackets for the side shelves.

Step 12: Installing Side Shelves

Details the installation of the side shelves onto the griddle cart.

Assembly Instructions - Racks and Shelves

Step 13: Attaching Trash Bag Racks

Explains how to attach the trash bag racks to the cart.

Step 14: Installing Right Side Shelf

Guides the user to install the right side shelf.

Assembly Instructions - Final Connections

Step 15: Connecting LP Tank and Regulator

Provides instructions for connecting the LP tank and regulator.

Step 16: Installing the Ignition Button

Details the installation of the ignition button assembly.

Leak Testing Procedure

Connecting Regulator to LP Tank

Step-by-step guide for safely connecting the regulator to the LP tank.

Gas Leak Testing Recommendations

Outlines the procedure and recommendations for testing gas leaks.

Operation - Initial Setup

Plugging In Your Griddle to Power

Instructions on how to correctly plug the griddle into a power source.

Performing the Leak Test

Provides detailed steps for performing a soap-and-water leak test.

Operation - Lighting and Temperature

Griddle Lighting Methods

Guides on lighting the griddle using either match or the SureSpark ignitor.

SmartTemp Control and Presets

Explains temperature control settings and available presets.

Operation - Safety and Shutdown

Managing Flare-Ups and Grease Fires

Advises on how to manage flare-ups and grease fires safely.

Flame Extinguishment and Shutdown Procedures

Details procedures for accidental flame extinguishment and normal shutdown.

Disconnecting LP Tank Regulator

Step-by-step instructions for safely disconnecting the regulator from the LP tank.

Special Features

Dual Cooking Zones Overview

Highlights the feature of having two distinct cooking zones.

Integrated Grease Management System

Explains the system for managing and directing grease flow.

Special Features - Racks and Storage

Paper Towel Rack Functionality

Describes the operation and mounting of the paper towel rack.

Trash Bag Rack and Power Cord Storage

Details the trash bag rack functionality and power cord storage.

Care and Maintenance - Seasoning

Initial Griddle Seasoning Process

Guides on seasoning the griddle for protection and non-stick properties.

Refurbishing a Rusty Griddle Surface

Provides steps to remove rust and re-season the griddle surface.

Care and Maintenance - Cleaning

General Cleaning and Burner Flame Check

Covers thorough cleaning after each use and burner flame inspection.

Cleaning Specific Griddle Components

Details cleaning instructions for the cart, shelves, lid, and cooking surface.

Care and Maintenance - Burners

Burner Tube Inspection and Cleaning

Emphasizes inspecting burner tubes for obstructions and cleaning them.

Burner Removal and Cleaning Procedure

Provides a step-by-step guide for removing and cleaning the burners.

Care and Maintenance - Storage

Burner Reassembly and Alignment

Guides on reassembling burners and ensuring proper alignment with valve orifices.

Griddle Storage Guidelines

Details the correct procedures for storing the griddle indoors or outdoors.

Troubleshooting - Ignition and Flame

Burner Ignition Failure Issues

Addresses common problems with ignitor and match lighting for burners.

Irregular Flame and Gas Flow Problems

Helps diagnose and resolve issues with irregular flame patterns or reduced gas flow.

Troubleshooting - Operational Issues

Flame Color, Flame-Out, and Fire Issues

Solves problems related to yellow flames, flames going out, and grease fires.

Surface Rust and Dullness Troubleshooting

Provides solutions for rust and dullness on the griddle surface.

Troubleshooting - Advanced Issues

Grease Collection and Error Code Resolution

Addresses excess grease collection and troubleshooting specific error codes.

Warranty and Compliance Information

Product Warranty Terms and Conditions

Outlines the terms and conditions of the product warranty.

FCC Compliance and Contact Information

Details FCC compliance statements and importer contact information.

LOCO COOKERS SmartTemp LCG2ST2C26 Specifications

General IconGeneral
BrandLOCO COOKERS
ModelSmartTemp LCG2ST2C26
CategoryGriddle
LanguageEnglish

Related product manuals