EasyManua.ls Logo

Lodar 92 Series User Manual

Lodar 92 Series
5 pages
To Next Page IconTo Next Page
Page #1 background imageLoading...
Page #1 background image
TAKE TIME TO LOCATE THE BEST POSITION
If necessary power the Receiver and move it around
the vehicle until the required performance is achieved
Operate the Transmitter and observe the Receiver
internal LED’s.
Mount as HIGH as possible
AVOID surfaces with HEAVY VIBRATION
AVOID DIRECT SPRAY from wheels
In a HOT CLIMATE fit in a SHADED position
Cable gland should face DOWN or BACK
3
!
CAUTION
2
or Disconnect Battery
IDENTIFY POWER CONNECTION POINT
AND ISOLATE SUPPLY
Fuse
Remove fuse
Vehicle batteries contain gasses
which are flammable and explosive.
Wear eye protection and do not lean
over battery while disconnecting. Do
not wear metal jewellery.
!
WARNING
Wiring Instructions 92 and 93 Series
20 Function Receivers
9220RX.01E
Identify the components
1
Parts included in your kit.
1 x Receiver
1 x Transmitter complete with
1 x Lo-Cover
1 x Lanyard
Items not shown
2 x Cable Glands
1 x 9863 External Aerial
These instructions
(6 pages)
Indicator LED’s 1 through 20
Indicator LED - Master
5 Volts LED
Set LED
Fault LED
LED’s indicate the following
LED marked “5V” indicates
power supply for control circuits
is OK
LED marked “SET” indicates the
system active.
LED marked “Fault” indicates an
overload is present; the system
cannot be reset until overload is
removed.
This LED blinks for 20 seconds
when the system is initially
powered. A replacement
Transmitter (or Keypad or Wired
Remote) has to be registered
during this 20 second period.
LED’s marked F1 to F16 and M
(and optional MC) when ON
indicate an output to that function
(MC is an extra Continuous
Master output)
Question and Answer IconNeed help?

Do you have a question about the Lodar 92 Series and is the answer not in the manual?

Lodar 92 Series Specifications

General IconGeneral
BrandLodar
Model92 Series
CategoryReceiver
LanguageEnglish

Summary

Identify the Components

Identify Power Connection Point and Isolate Supply

Locate the Best Position

Receiver Internal LED Indicators

Explains the function of Master, 5V, SET, Fault, and Function LEDs for operational status.

Identify Connecting Plugs on the PCB

Connection Detail and MOSFET

Details the connection points on the PCB, highlighting the MOSFET for connections.

Make Your Connections

Power and Output Connections

Details wiring for power (Plug 1) and output functions (Plugs 2-8).

Stop and Limit Input Connections

Details wiring for STOP input (Plug 9) and LIMIT inputs (Plug 2).

Jumper Configuration

Explains jumper settings for Master output mode and jumper necessity for operation.

Final Check and Reconnection

Pre-Power Reconnection Checks

Covers checking locknut, gland, screws, wire security, and fuse/battery before reconnecting power.

Receiver and Transmitter Status LEDs

Explains LED blinking, ON, and FLASHES states for operational status.

Safety Feature - Automatic Stop

Transmitter automatically transmits a STOP signal after 30 minutes of inactivity.

Transmitter Overview

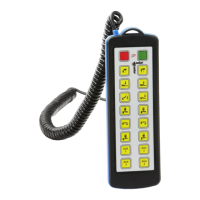
Details transmitter part number, reset button, battery, and working range.

Transmitter Registration

Registering Transmitter to Receiver

Step-by-step process to re-establish communication between transmitter and receiver.