463-0620-01 Rev A. June-20159
620 Operation and Troubleshooting Guide
plus
CAN
®
button 5 changes to . Pressing button 5 opens a new button bar identifying the gauge adjustment
functions.
Top left
gauge
Top right
gauge
Bottom
left gauge
Bottom
right gauge
Exit menu
Successive button presses selects a different gauge for the corresponding gauge. Pressing the exit button
closes the Quad Adjust menu and saves the page configuration. Selecting a different page allows
changes on that page.
Note: A gauge selection can only appear once per page. The existing gauge must be moved first
to change the location on a page. Gauge selections are limited to the data being received and
parameters monitored. All possible gauges can be configured in Demo Mode.
Single Analog Gauge
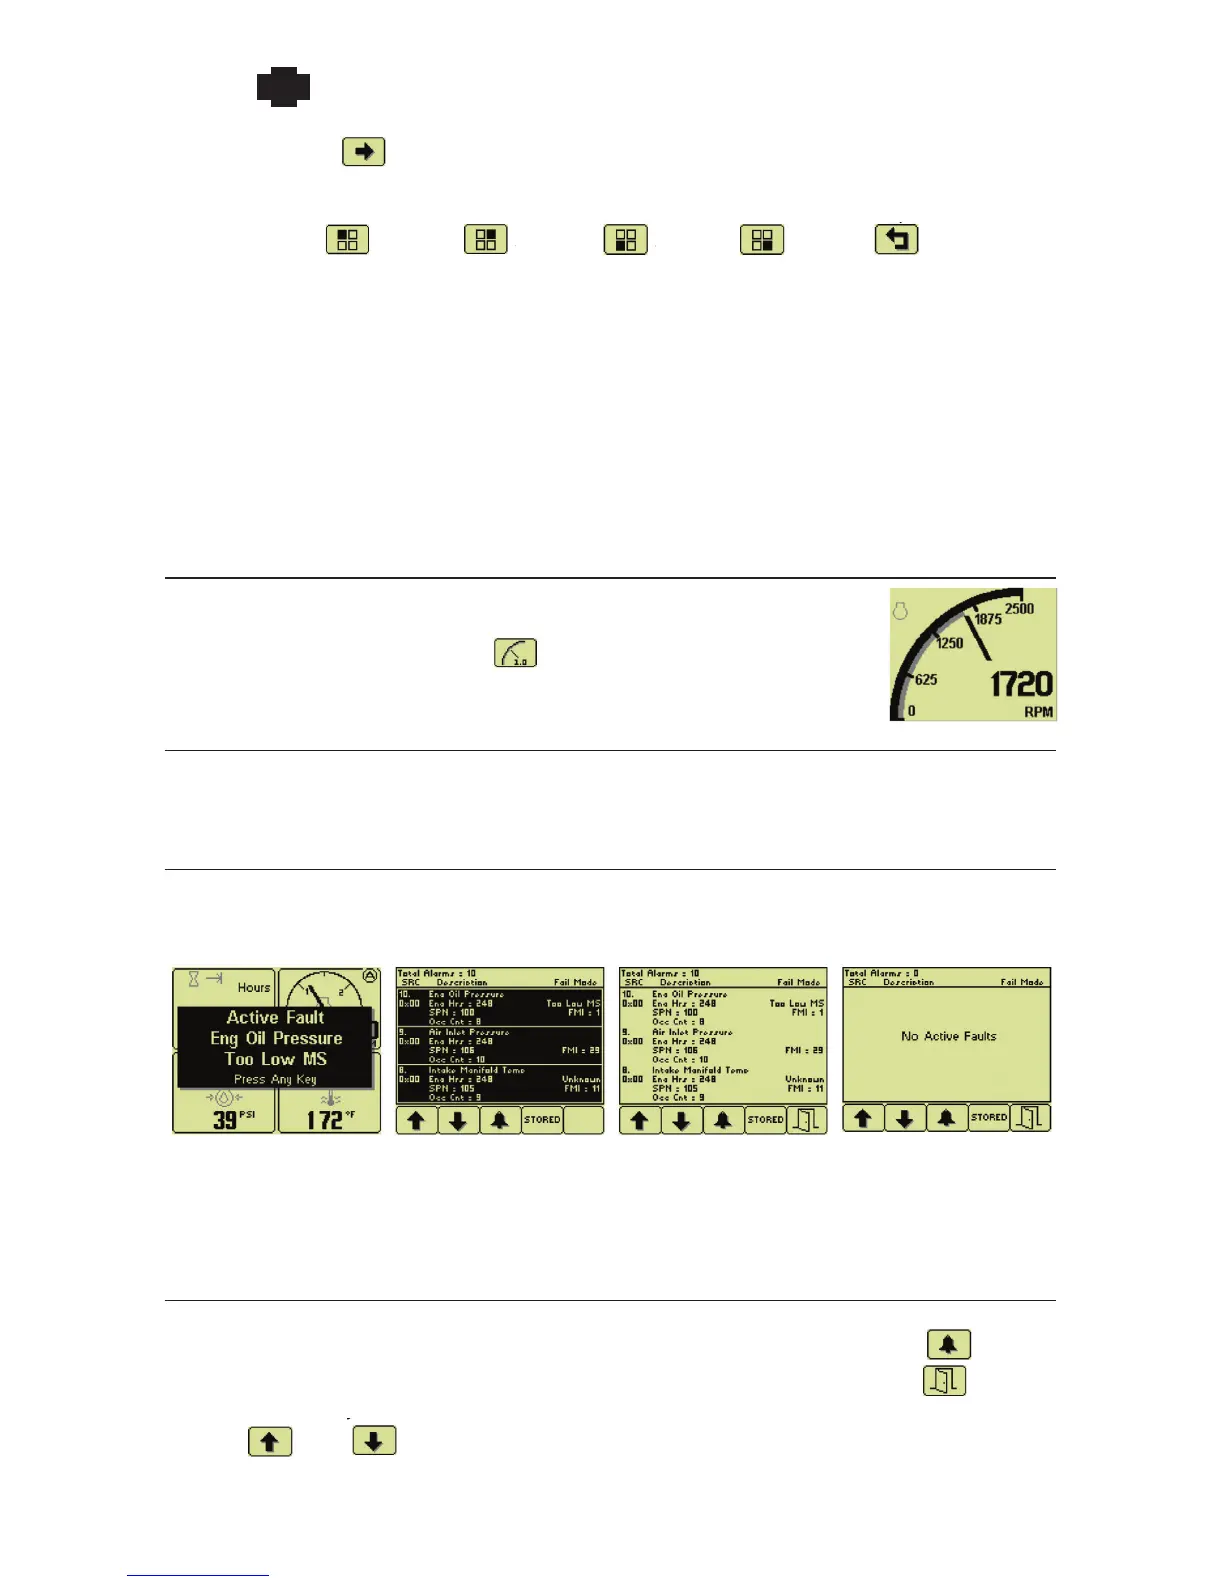
Single Analog Gauge uses the entire display for a single large analog gauge.
This mode is enabled by pressing any of the first 4 buttons to show the top level
button bar and then pressing button 3 . The available gauges are selected by
repeatedly pressing button 3.
Last Screen Store
The display automatically remembers the selected screen after a few seconds. The display uses the
same screen on subsequent power-ups.
Active Faults
When a diagnostic message is received from the CANbus, a flashing popup shows the fault description
and the beeper sounds. The fault description along with the SPN-FMI pair, source address, engine
hours and the occurrence count are also added to the Active Fault List.
Fault Popup Unacknowledged
Fault List
Acknowledged
Fault List
No Active Faults
Note: Standard J1939 abbreviations are used for faults. MS = Most Severe, MOD= Moderately
Severe, LS = Least Severe.
Active Fault List
The Active Fault List is accessed by pressing any button while a fault popup is displayed. The fault list is
highlighted and the beeper continues until faults are acknowledged by pressing button 3 . Once
acknowledged, the fault list changes to normal text, the beeper is silenced and button 5 becomes
available. The most recent fault is displayed at the top of the list. Fault changes may be viewed using
buttons 1 and 2 if needed.
 Loading...