8
Setting of Working Modes:
1. Momentary Mode:
Pressing the learning key button on the receiver board once (g.A) and the LED indicator on
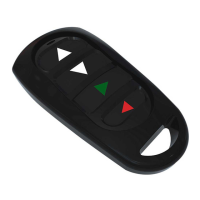
receiver board will signaling simultaneously. Then press any of the remote control button
(g.B)asaresulttheLEDonthecontrolboardashes3timesinsuccessionmeaningthatthe
setting of the Momentary Mode is successfully.
The corresponding output is ON by pressing a remote control button and only when you
release the remote control button the output turns o. If the remote button key is not
released, the relay is always on.
2. Toggle Mode (Self-locking):
Pressing the learning key button on the receiver board twice (g.A) and the LED indicator
on receiver board will signaling simultaneously. Then press any of the remote control button
(g.B)asaresulttheLEDonthecontrolboardashes3timesinsuccessionmeaningthatthe
setting of the Toggle Mode is successfully.
All outputs work as self-locking. Pressing a remote control button once, the relay is on and the
corresponding output is activated. By pressing the same button again, the output turns o.
3. Latched Mode (Interlocking):
Pressing the learning key button on the receiver board three times (g.A) and the LED
indicator on receiver board will signaling simultaneously. Then press any of the remote control
button(g.B)asaresulttheLEDonthecontrolboardashes3timesinsuccessionmeaning
that the setting of the Latched Mode is successfully.
All outputs work as interlocking. Press the ‘’Down’’ button on the remote control button to
activate the rst output which stays on. By pressing the ‘’Up’’ button on the remote control
Figure A Figure B