Framer’s Edge Elite Mat Cutter
Instruction Manual
Model 650-1 / 655-1 / 660-1
7
Logan Graphic Products Inc., 1100 Brown St, Wauconda, IL 60084 847-526-5515 cs@logangraphic.com
LoganGraphic.com
Using Production Stops
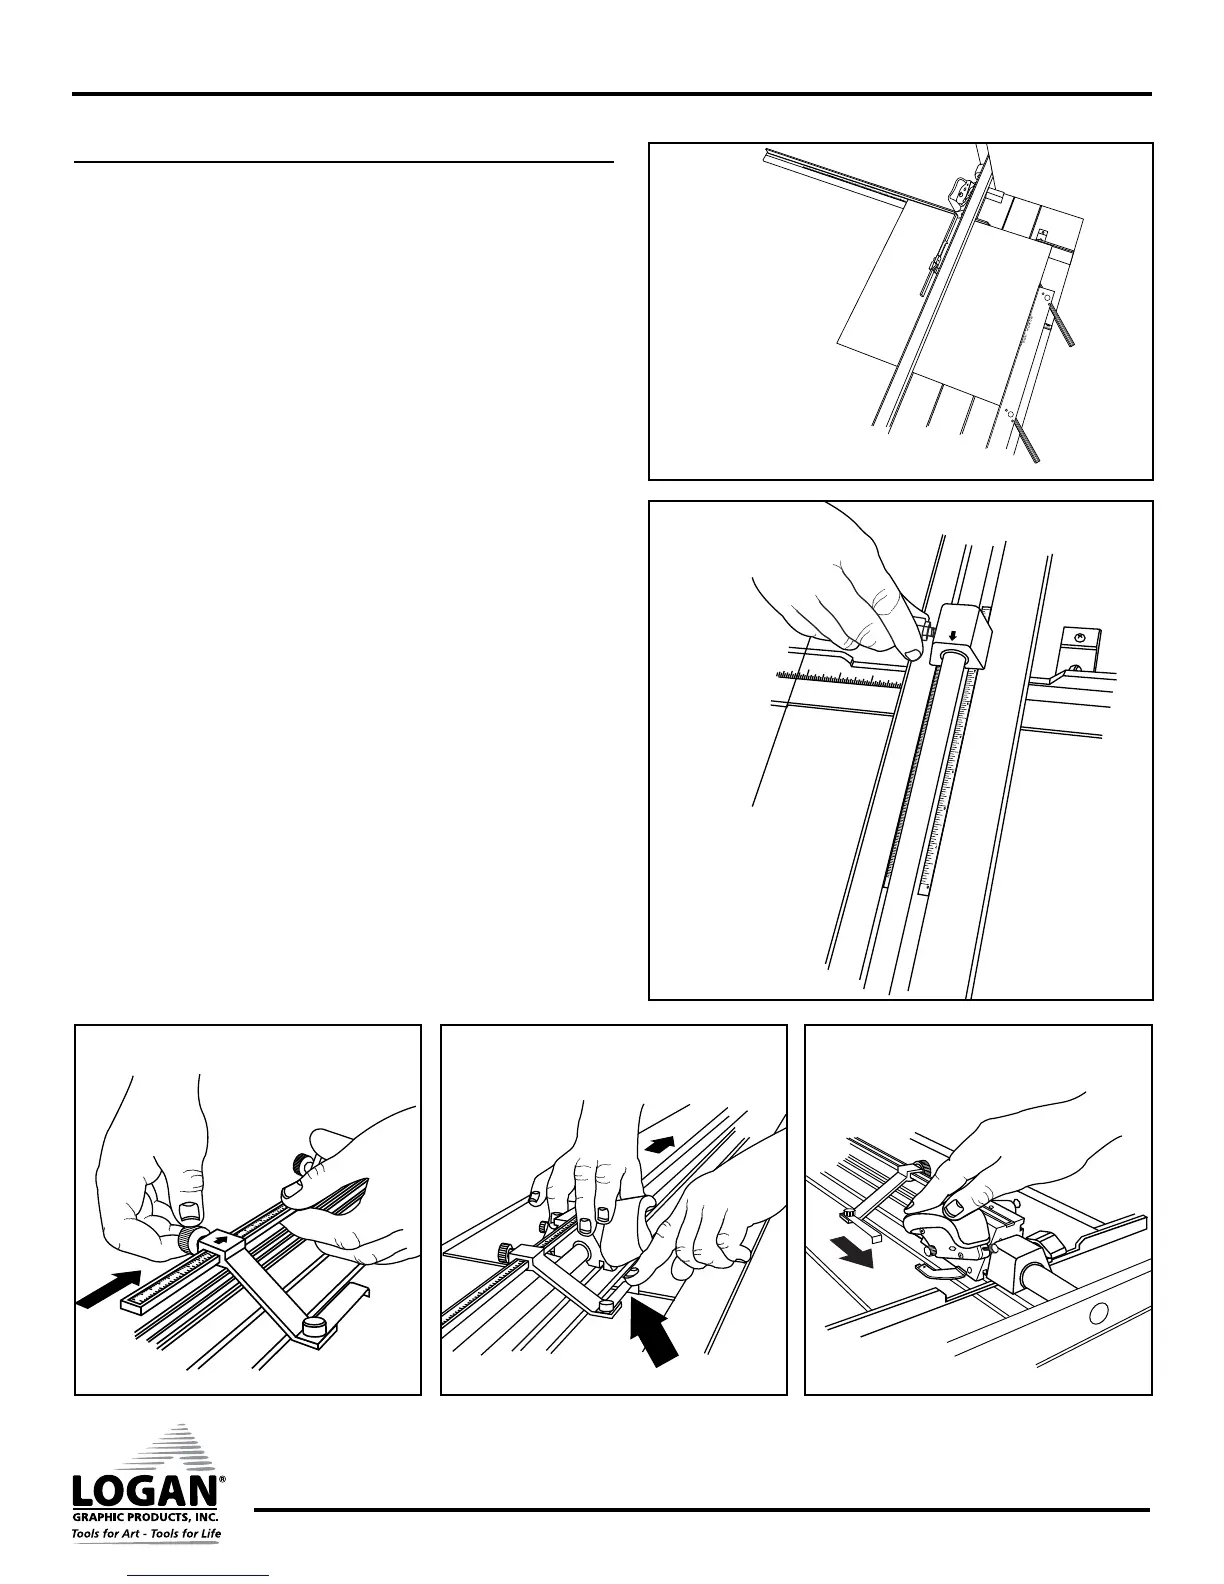
1. Install mat guide and set to desired border width. Tighten black knobs.
2. Lift handle bar and replace/install slip sheet.
NOTE: For best results ALWAYS use a slip sheet when bevel cutting. A slip
sheet is a scrap piece of matboard which is at least as long as the mat you
are cutting and at least 4” wide. Your first slip sheet is included. The slip
sheet will need to be changed periodically. Move the slip sheet slightly after
each cut to avoid cutting into previous scores that may cause the blade to
flare out, causing a curve in your cut.
3. Place the mat (color side down) against the squaring arm and against
the mat guide. (Fig. 25)
4. Slide the bottom production stop up to the increment on the scale of
the border size you wish to cut. (Fig. 26)
5. Slide the top movable stop up to the increment on the scale of the
border size you wish to cut. (Fig. 27)
6. Slide the cutting head into position in front of the top edge of the
matboard. As the movable stop approaches the edge of the matboard,
press down on the stop foot with your left index finger until it gently
makes contact with the top edge of the mat. (Fig. 28)
7. Holding the stop foot in place with your finger, rotate the blade holder
down to enter the blade into the mat.
8. Release the stop foot with your finger, so that it raises above the edge
of the mat board and pull the cutting head towards yourself until it
makes gentle contact with the bottom production stop. (Fig. 29)
9. Turn the mat 1/4 turn to the right and make sure that the mat is down
against the squaring arm and against the mat guide on the left.
10. Continue steps 6 through 9 until all four sides are cut.
S
E
T
S
C
A
L
E
1
2
3
Fig. 25
Fig. 26
Fig. 28 Fig. 29
Fig. 27
 Loading...