GB-8
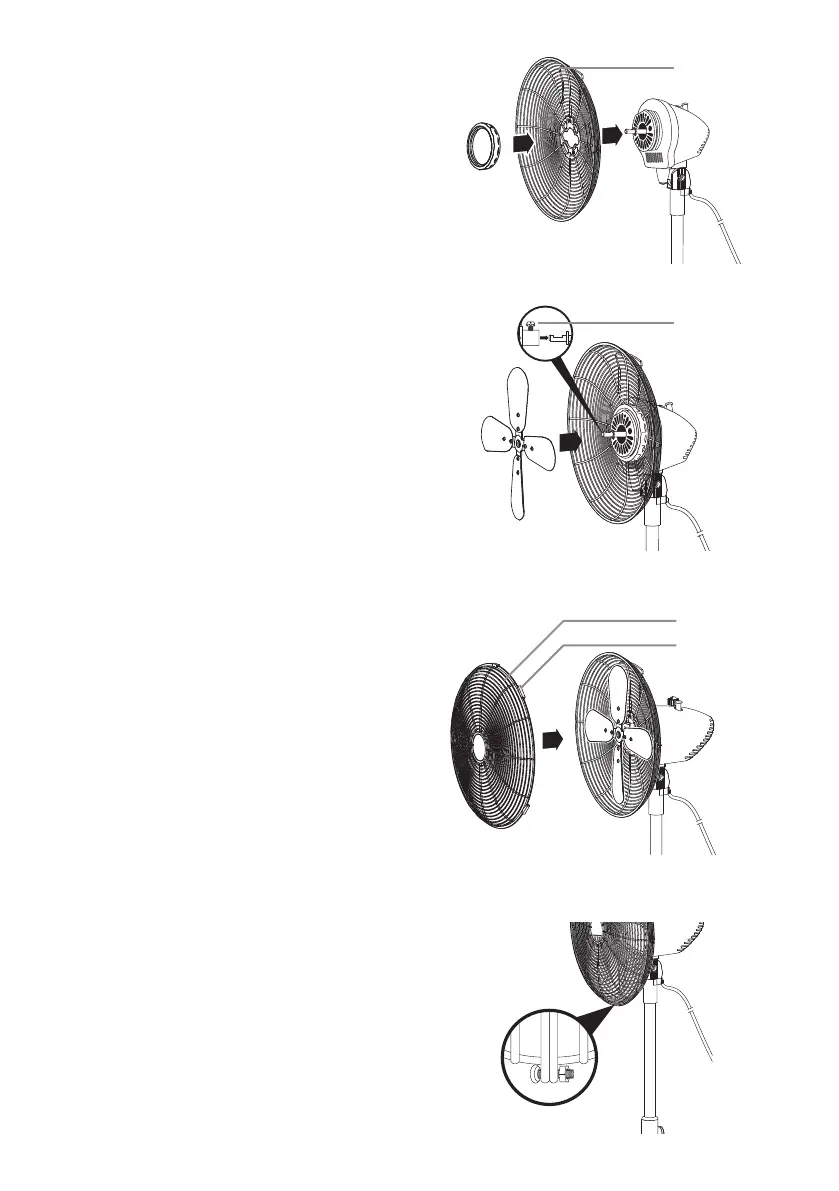
5. Set the Rear Guard in the proper position (handle
uppermost) and screw on the Guard Retaining Nut
until tight.
6. Install the Blade onto the shaft and screw on the Blade
Retaining Screw until tight
Clips
Front Guard
Rear Guard
Blade Retaining
Screw
7. Open the Clips on the Front Guard and place the Front
Guard onto the Rear Guard (align locking screw holes)
and close the Clips.
8. Secure both guards firmly by aligning the guard collar
correctly and tightening the locking screw and nut.
L16FANM11_IB_RC130125_Annie.indd 8 13年1月25日 下午5:47
 Loading...