GB-7
• Avoid using your fan in hazardous areas.
• Do not use your fan if it has not been fully assembled. Make sure that the screws that hold the base parts
and the main unit together are tightened securely.
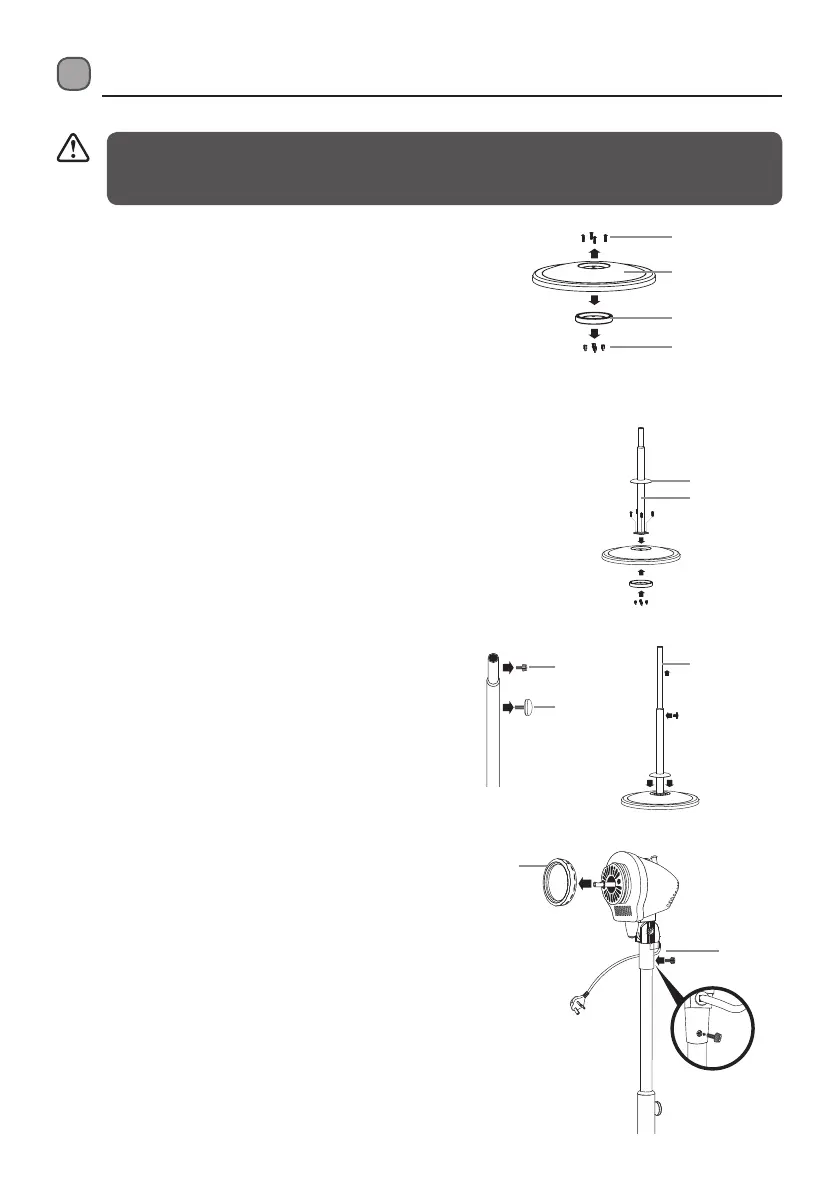
Assembling Your Fan
3. Unscrew and take off the Thumbscrew and Height
Adjustment Nut from the Stand. Slide the Stand Cover
down the column to rest on the Base. Pull out the
Extension Tube and refit the Height Adjustment Nut.
The Height Adjustment Nut must be fully tightened
before assembling the motor section to the stand.
1. Unscrew the 4 Screws, 4 Butterfly Screws and the
Underpan Weight from the Base.
4. Fit the Motor section to the Stand and tighten the
Thumbscrew. The thumbscrew must be fully tightened
before the fan is operated. Remove the fibre glass sleeve
from the shaft and unscrew the Guard Retaining Nut.
Thumbscrew
Thumbscrew
Guard
Retaining
Nut
Screws
Underpan
Weight
Round
Base
Butterfly
Screws
Height
Adjustment
Nut
Stand Cover
Stand
Extension Tube
2. Pass the Stand Cover through the Stand. Use the 4
Screws and 4 Butterfly Screws to attach the Stand, and
the Underpan Weight to the Base.
L16FANM11_IB_RC130125_Annie.indd 7 13年1月25日 下午5:47
 Loading...