57
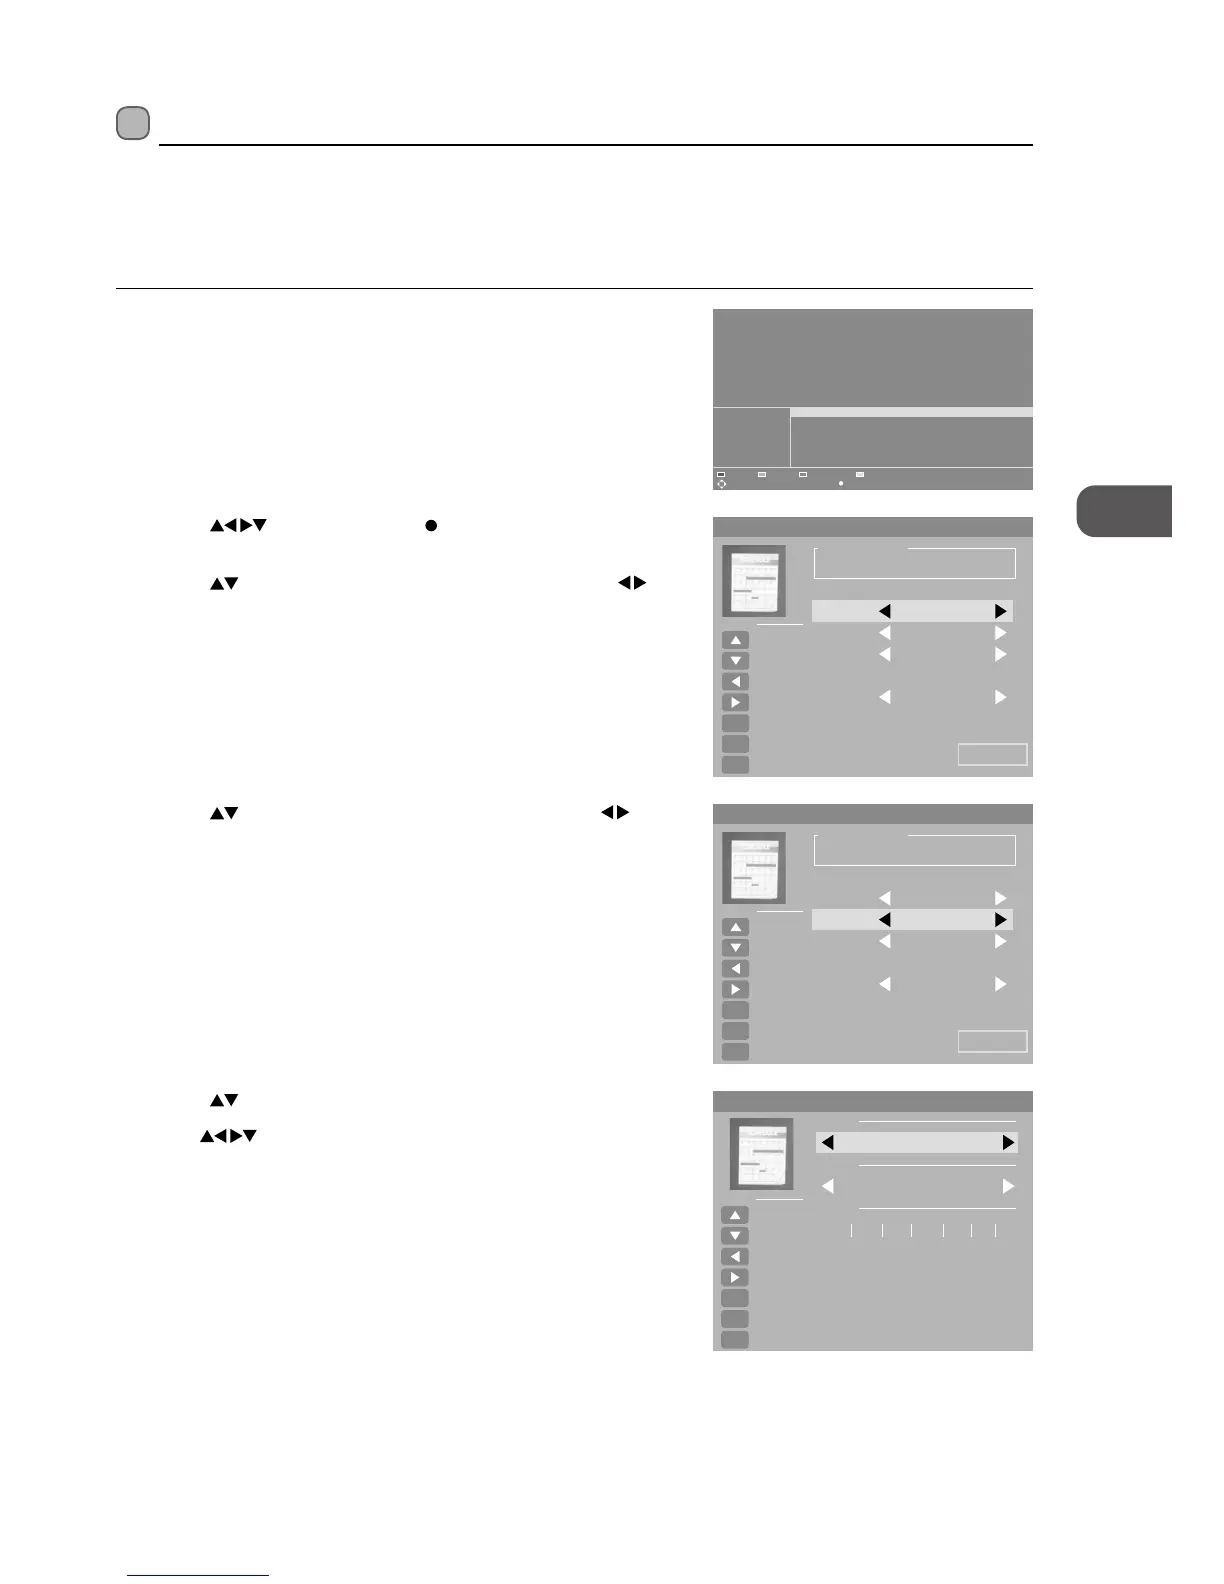
4. Press the
buttons to select the Channel. And then press the
buttons to select the channel that you want to record.
2. Press the
buttons and then the button to select the desired
programme you want to record. The Scheduled Record will be display.
3. Press the
buttons to select the Frequency. And then press the
buttons to select the Off / Once / Daily / Weekly.
Timer Programming (DTV Mode)
This function is used to perform scheduled recording.
The recording from timer programme or direct recording may have a little bit of delay when it starts to record the broadcast
programme.
Please make sure the USB device is inserted. If not, a warning message will pop up.
1. Press the GUIDE button on the remote control. The EPG menu will appear.
PROGRAM GUIDE
04 Apr 2015 18:15 - 04 Apr 2015 19:00
[Leisure hobbies]
Antiques experts travel across the UK as they complete to make the most money at auction. Anita Manning
and Mark Stacey travel from Wiston in South Lanarkshine to Edinburgh.
001 RED+MARKER 18:15 Antiques Road Trip
002 CVB
003 CROSS HATCH
004 4V3_MONOSCOPE
005 100%WHITE
006 BBE HD
PrevDate
Move Record
19:30 Francesco’s Mediterranean Voyage
20:00 Return of the Lost Boys of Sudan
21:00 Raymond Blanc’s Kitchen Secrets
21:30 MasterChef: The Professionals
19:00 Celebrity Eggheads
Antiques Road Trip
04 Apr 2015 18:40:04
NextDate Reminder List Reminder
INDEX: PVR Settings OK: Display EXIT: Exit
Scheduled Record - Group 1
Setting Status
Setting Is Not In Use
Frequency Once
Save
Hot Key
Move Up
Move Down
Adjust
Adjust
Select
OK
Return
MENU
Exit
EXIT
Channel 4Music
Start Time 2014-12-30
0 1 4 7:
End Time 2014-12-30
0 3 0 0:
Setting Status
Setting Is Not In Use
Frequency Once
Save
Hot Key
Move Up
Move Down
Adjust
Adjust
Select
OK
Return
MENU
Exit
EXIT
Channel 4Music
Start Time 2014-12-30
0 1 4 7:
End Time 2014-12-30
0 3 0 0:
Canlendar
Year
Hot Key
Move Up
Move Down
Adjust
Adjust
Select
OK
Return
MENU
Exit
EXIT
Month
Day
Sun.
2015
1
Mon. Tue. Wed. Thu. Fri. Sat.
1 2 3
4 5 6 7 8 9 10
11 12 13 14 15 16 17
18 19 20 21 22 23 24
25 26 27 28 29 30 31
5. Press the buttons to select the Start Time. The Calendar will be display.
6. Use the
buttons select the Year / Month / Day. And then press the
OK button to confirm.