24
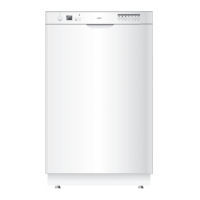
13. To secure the dishwasher under the table
top, tighten the screws as shown. Note
their positioning for the different types of
worktops.
439
395.4
36
56.2
100
Wooden Worktop
Synthetic / Ceramic
Worktop
ST3.5x16
Hole Cover
Installation Hook
ST4x14
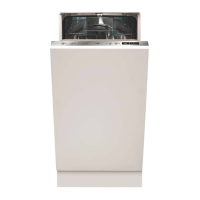
14. Cut out a 439 mm wide plinth for toe panel.
Tape the supplied toe panel mounting
brackets to the toe panel as shown. Drill the
required holes.
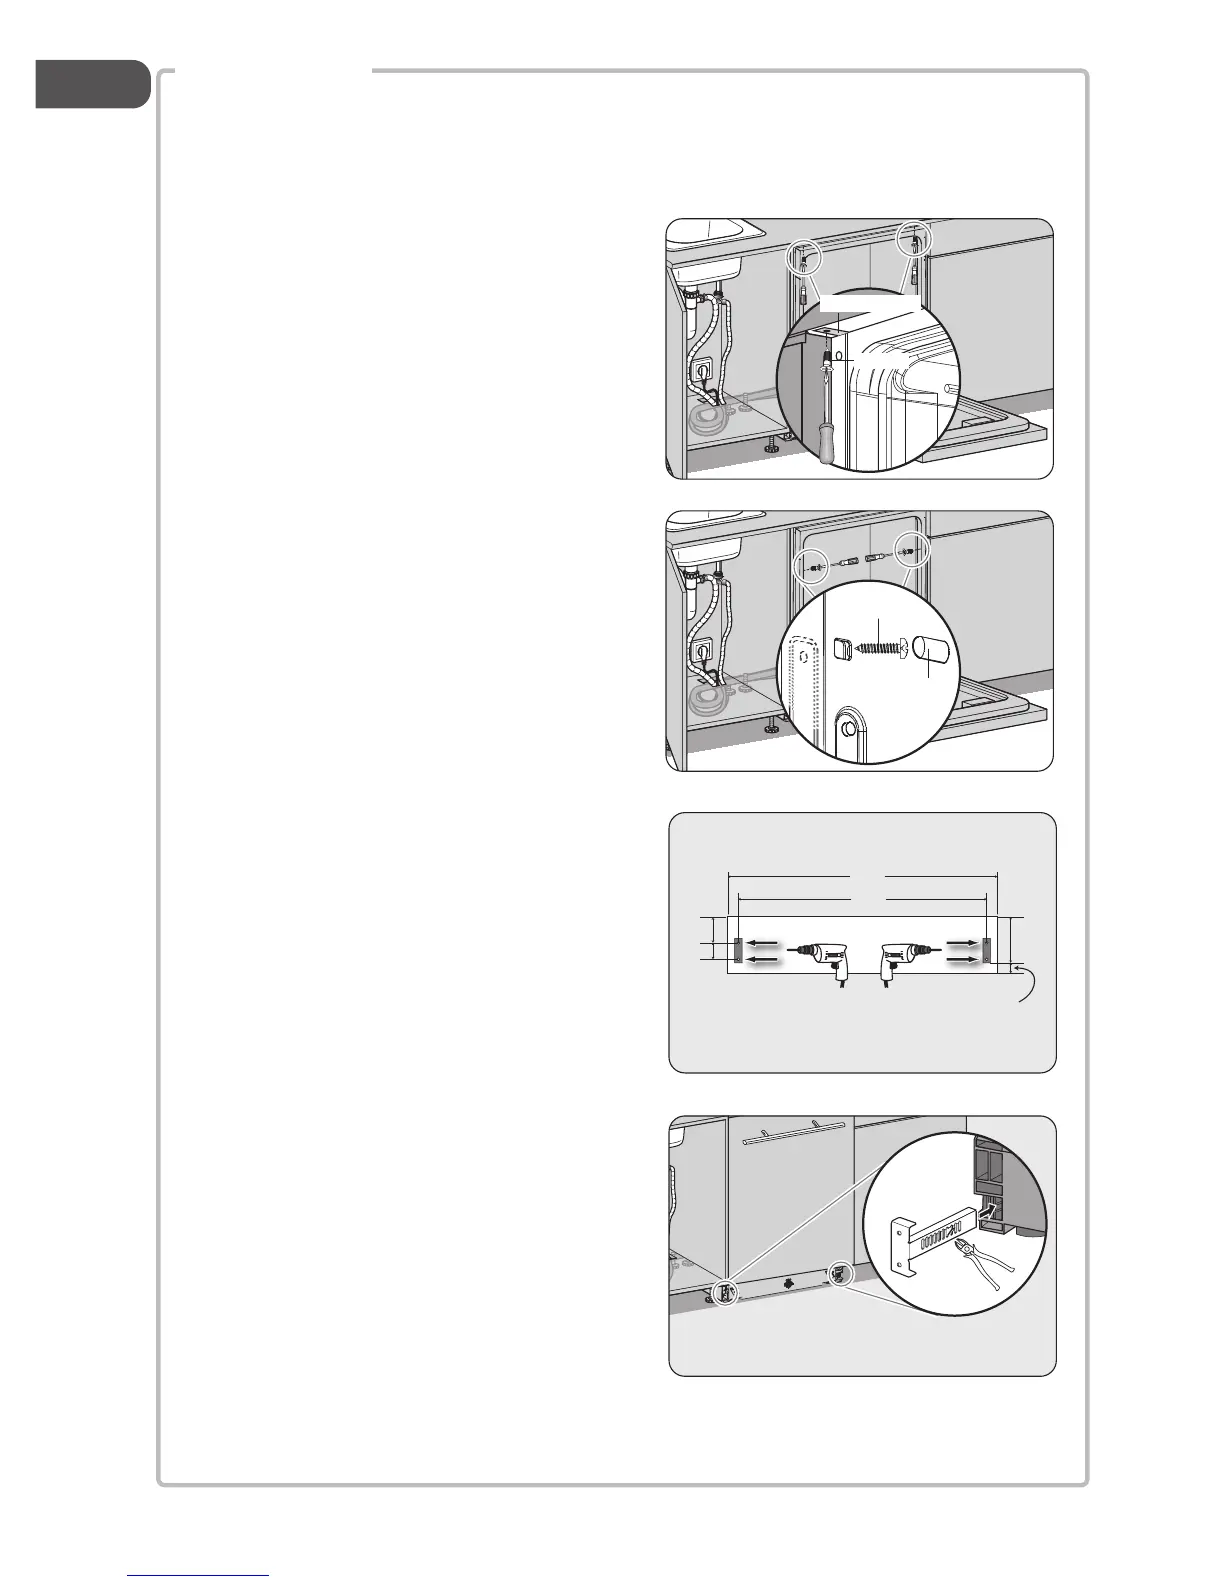
15. Determine the correct position for the
toe panel mounting bracket, remove
the bracket and bend the metal tab. This
ensures that the toe panel won’t slide in
further than you need.
Adjust Height
LID45W13N_IB_131028_Zell.indb 24 28/10/13 11:01 AM
 Loading...