11
Setting Up and Sharpening
seTTIng Up
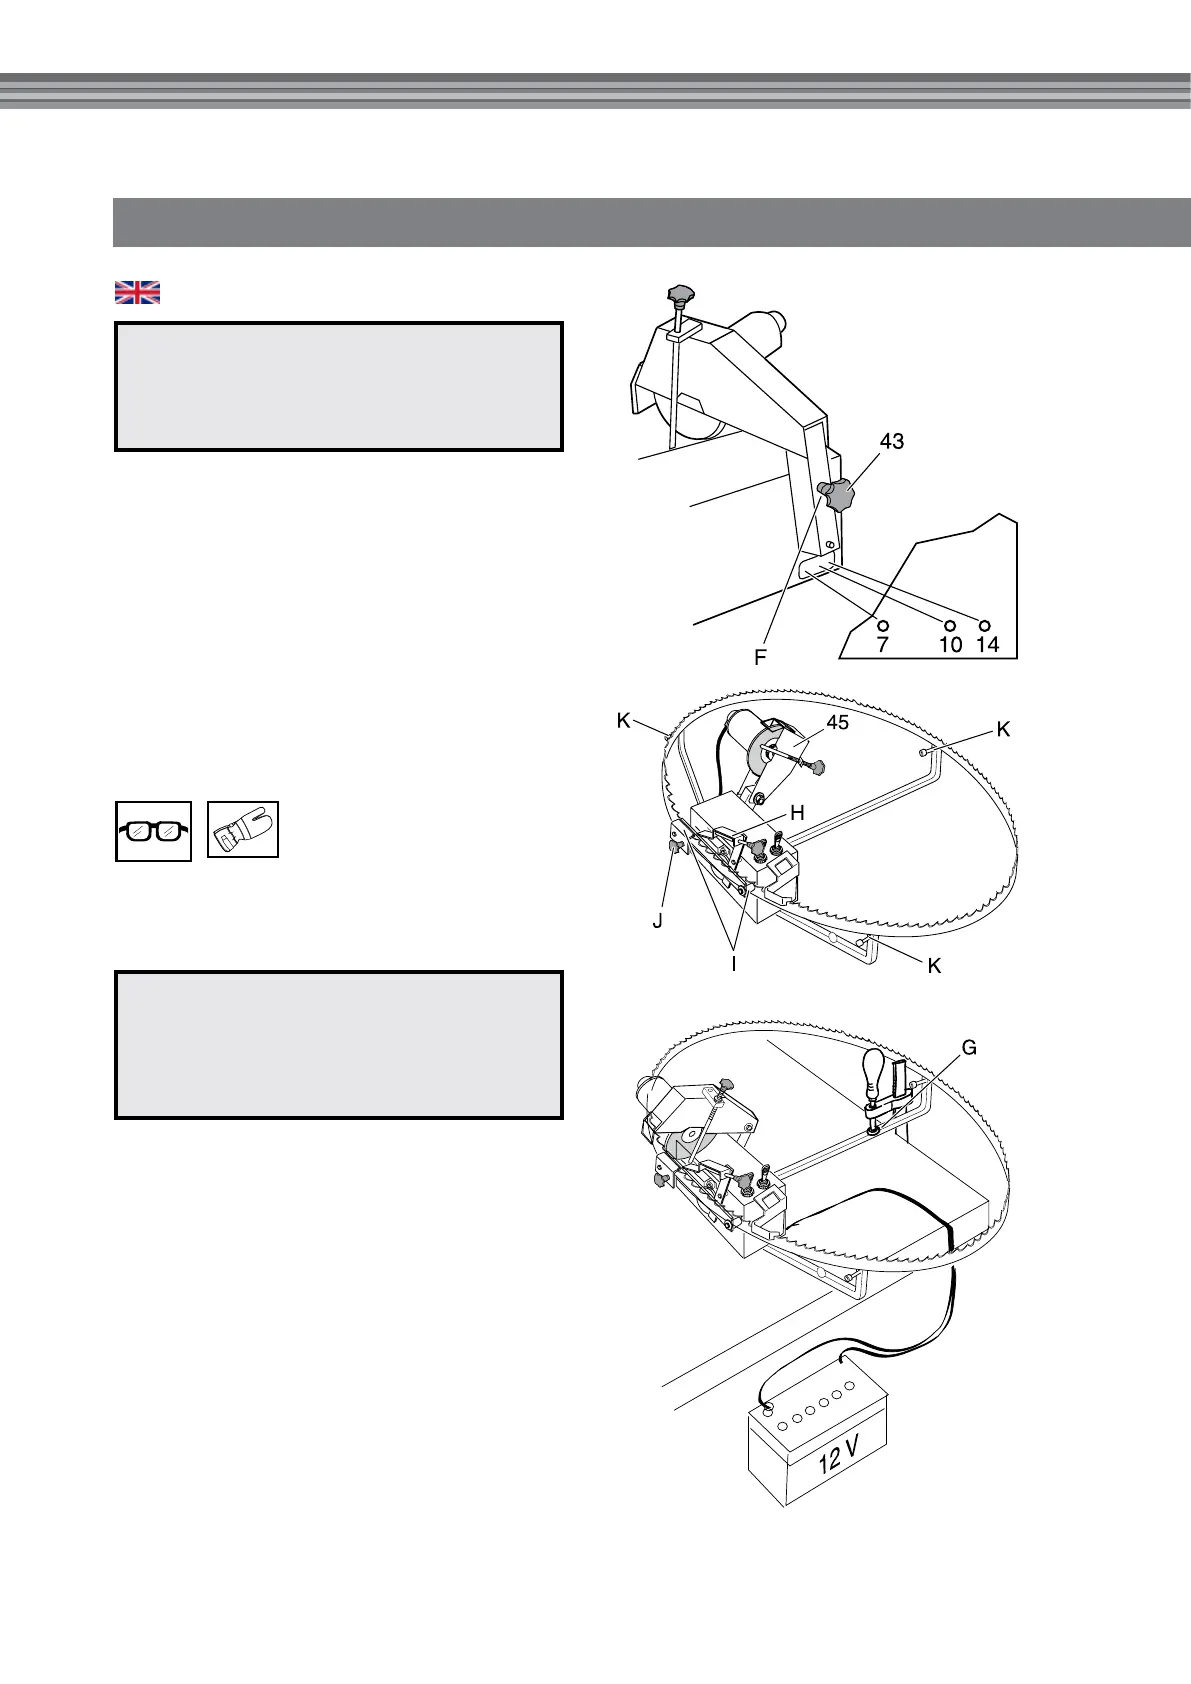
Place the grinder on a table and fold out the support
arms. The central support arm can be anchored to
the table at G to give a more stable set-up.
Connect the cables to a 12-volt power source. The
power source can be a battery or a battery charger.
The red cable is connected to + and the black to -.
If the cables are interchanged, the grinding disc and
feed motor will run in the wrong direction.
sharpenIng
The grinder can be used on bandsaw blades with a
pitch of 16 - 32 mm. The grinding disc may need to
be redressed for other tooth profiles.
WARNING!
Do not store petrol in the vicinity of the
grinder. Sparks from the grinding disc
or the electrical connection can ignite.
!
WARNING!
The bandsaw blade is sharp and can
cause cuts. Warning for personal injury.
Wear protective gloves whenever you
handle the bandsaw blade.
!
1. Loosen the knob (43) and set the correct cutting
angle (F). See FIG. 83.
2. Tighten the knob (43).
3. Check that the grinding disc has the correct
profile. See the templates at the rear of the
binder. The templates can be cut out and placed
against the grinding disc.
CAUTION! A new grinding disc must be shaped
before use. Use the supplied whetstone (52).
4. Fold up the grinding motor (45), hold up the feed
link (H), and insert the bandsaw blade. The
bandsaw blade should lie in the cut-outs in the
three support arms.
5. Check that the bandsaw blade rests on the
two supports (I). The support arms can be bent
if the bandsaw blade does not lie against both
the supports.
6. Adjust the bolt (J) so that the bandsaw blade runs
freely and at the same time is braced.
Fig. 83
Fig. 84
Fig. 85
 Loading...