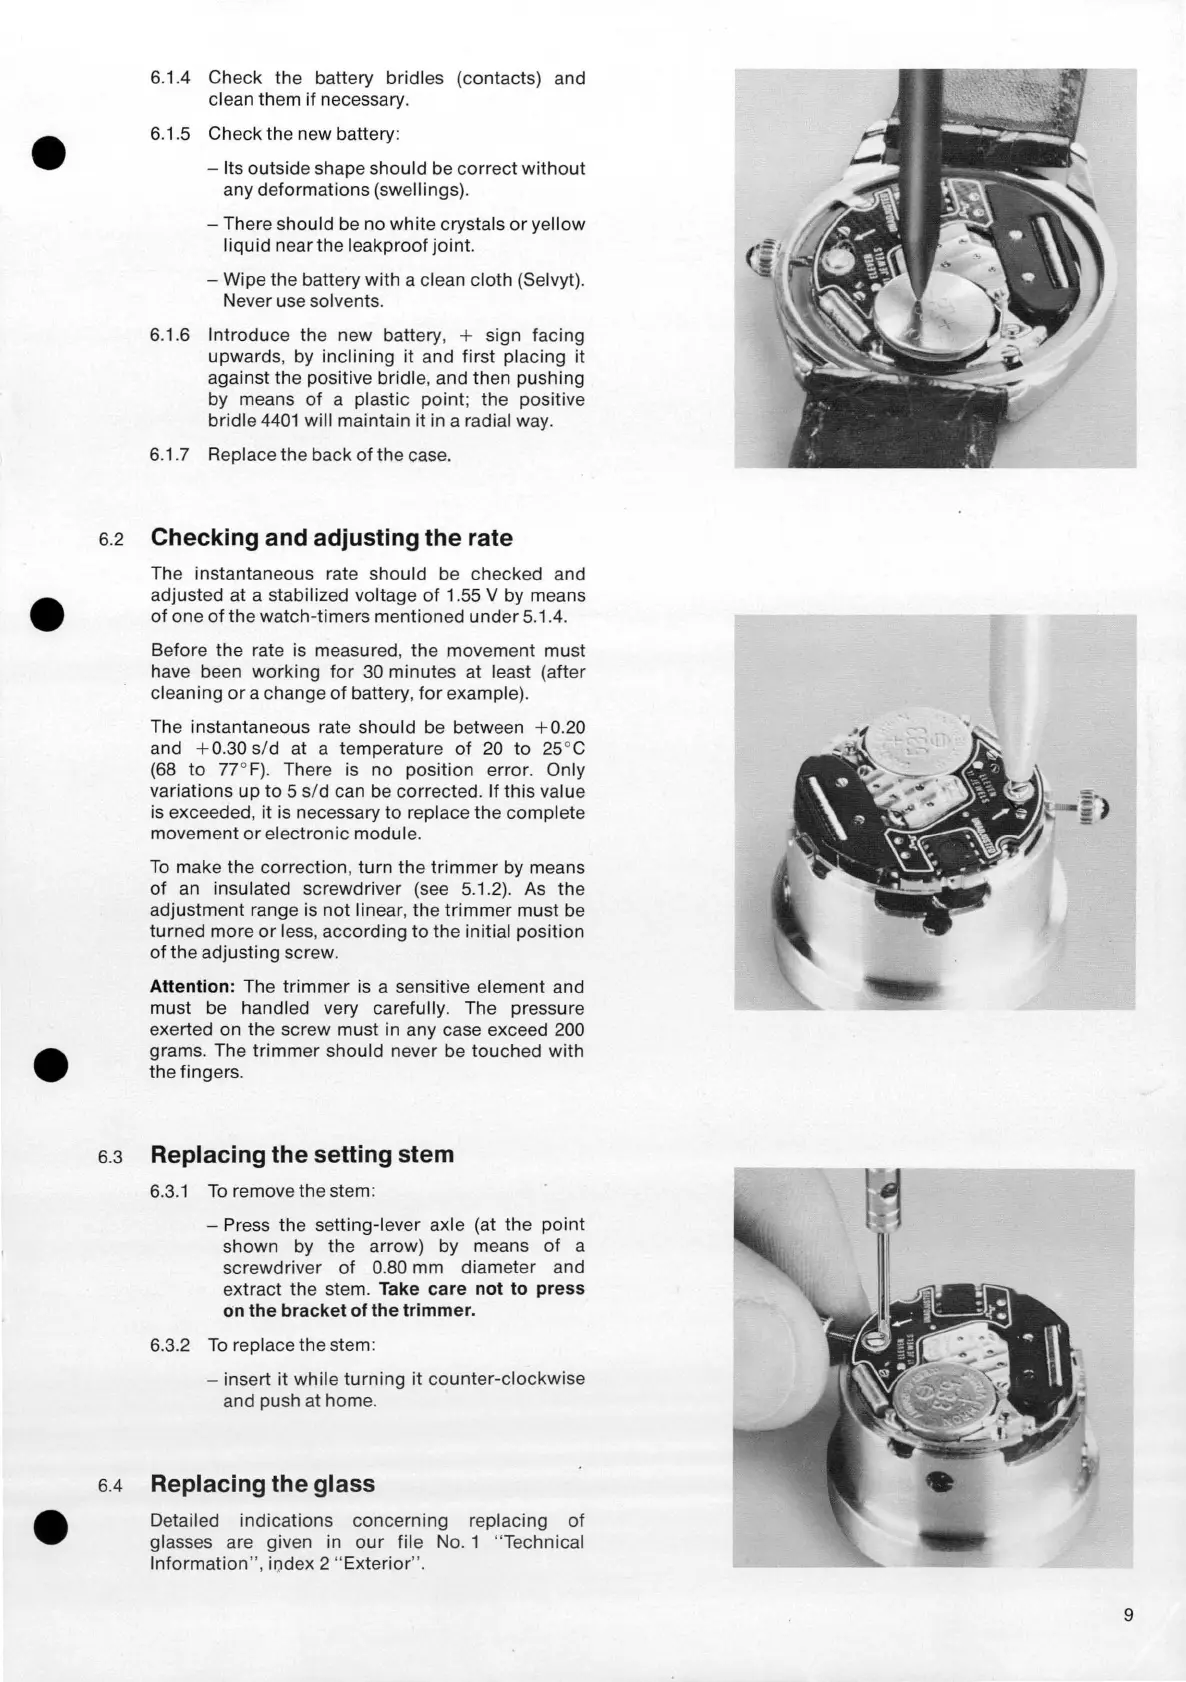
6.1.4 Check the battery bridles (contacts) and
clean them if necessary.
6.1
.5 Check the new battery:
-
Its outside shape
should
be
correct
without
any
deformations
(swellings).
-There
should be no
white
crystals
or
yellow
liquid
near the
leakproof
joint
.
-Wipe
the battery with a clean cloth (Selvyt).
Never use solvents.
6.1.6
Introduce
the new battery, + sign facing
upwards, by
inclining
it
and first
placing
it
against the positive bridle, and then pushing
by means
of
a plastic
point
;
the
positive
bridle
4401
will maintain it in a radial way.
6
.1
. 7 Replace the back
of
the case.
6.2
Checking and adjusting the rate
The instantaneous rate should be checked and
adjusted at a stabilized voltage
of
1.55 V by means
of
one
of
the
watch-timers mentioned
under
5.1.4.
Before
the
rate is measured,
the
movement must
have been
working
for
30 minutes at least (after
cleaning
or
a change
of
battery,
for
example).
The instantaneous rate
should
be between + 0.20
and
+0
.30
s/d
at a temperature
of
20
to
25
°C
(68
to
7rF).
There is no
position
error
. Only
variations
up
to
5
s/d
can be corrected. If
this
value
is exceeded, it is necessary to replace the complete
movement
or
electronic
module.
To
make the correction,
turn
the
trimmer
by means
of
an insulated screwdriver (see 5.1.2). As the
adjustment
range is
not
linear, the
trimmer
must be
turned
more
or
less,
according
to
the
initial
position
of
the adjusting screw.
Attention: The
trimmer
is a sensitive element and
must be handled very carefully. The pressure
exerted on the screw must in any case exceed
200
grams. The
trimmer
should never be
touched
with
the fingers.
6.3
Replacing the setting stem
6.
3.1
To
remove the stem:
6.4
- Press the
setting-lever axle (at the
point
shown by the arrow) by means
of
a
screwdriver
of
0.80 mm diameter and
extract the stem. Take care not to press
on
the bracket of the trimmer.
6.3.2
To
replace the stem:
-in
sert it while
turning
it
counter-clockwise
and push at home.
Replacing the glass
Detailed
indications
concerning
replacing
of
glasses are given in
our
file No. 1 "Technical
Information" , iQdex
2 " Exterior" .
9





 To Next Page