LRF-3000S Ultrasonic Transit-time Flow meter
- 6 -
2. Connection
2.1. Wire Connecting
2.1.1. Power supply option
Customers should pay special attention to specify the desired power supply when wiring.
Factory standard power supply is 10~36VDC/1A max.
To ensure the transmitter can work normally, please pay attention to the followings when wiring:
Ensure that power connections are made in accordance with the specifications shown on the transmitter.
2.1.2. Transmitter Wiring
Once the electronics enclosure has been installed, the flow meter wiring can be connected.
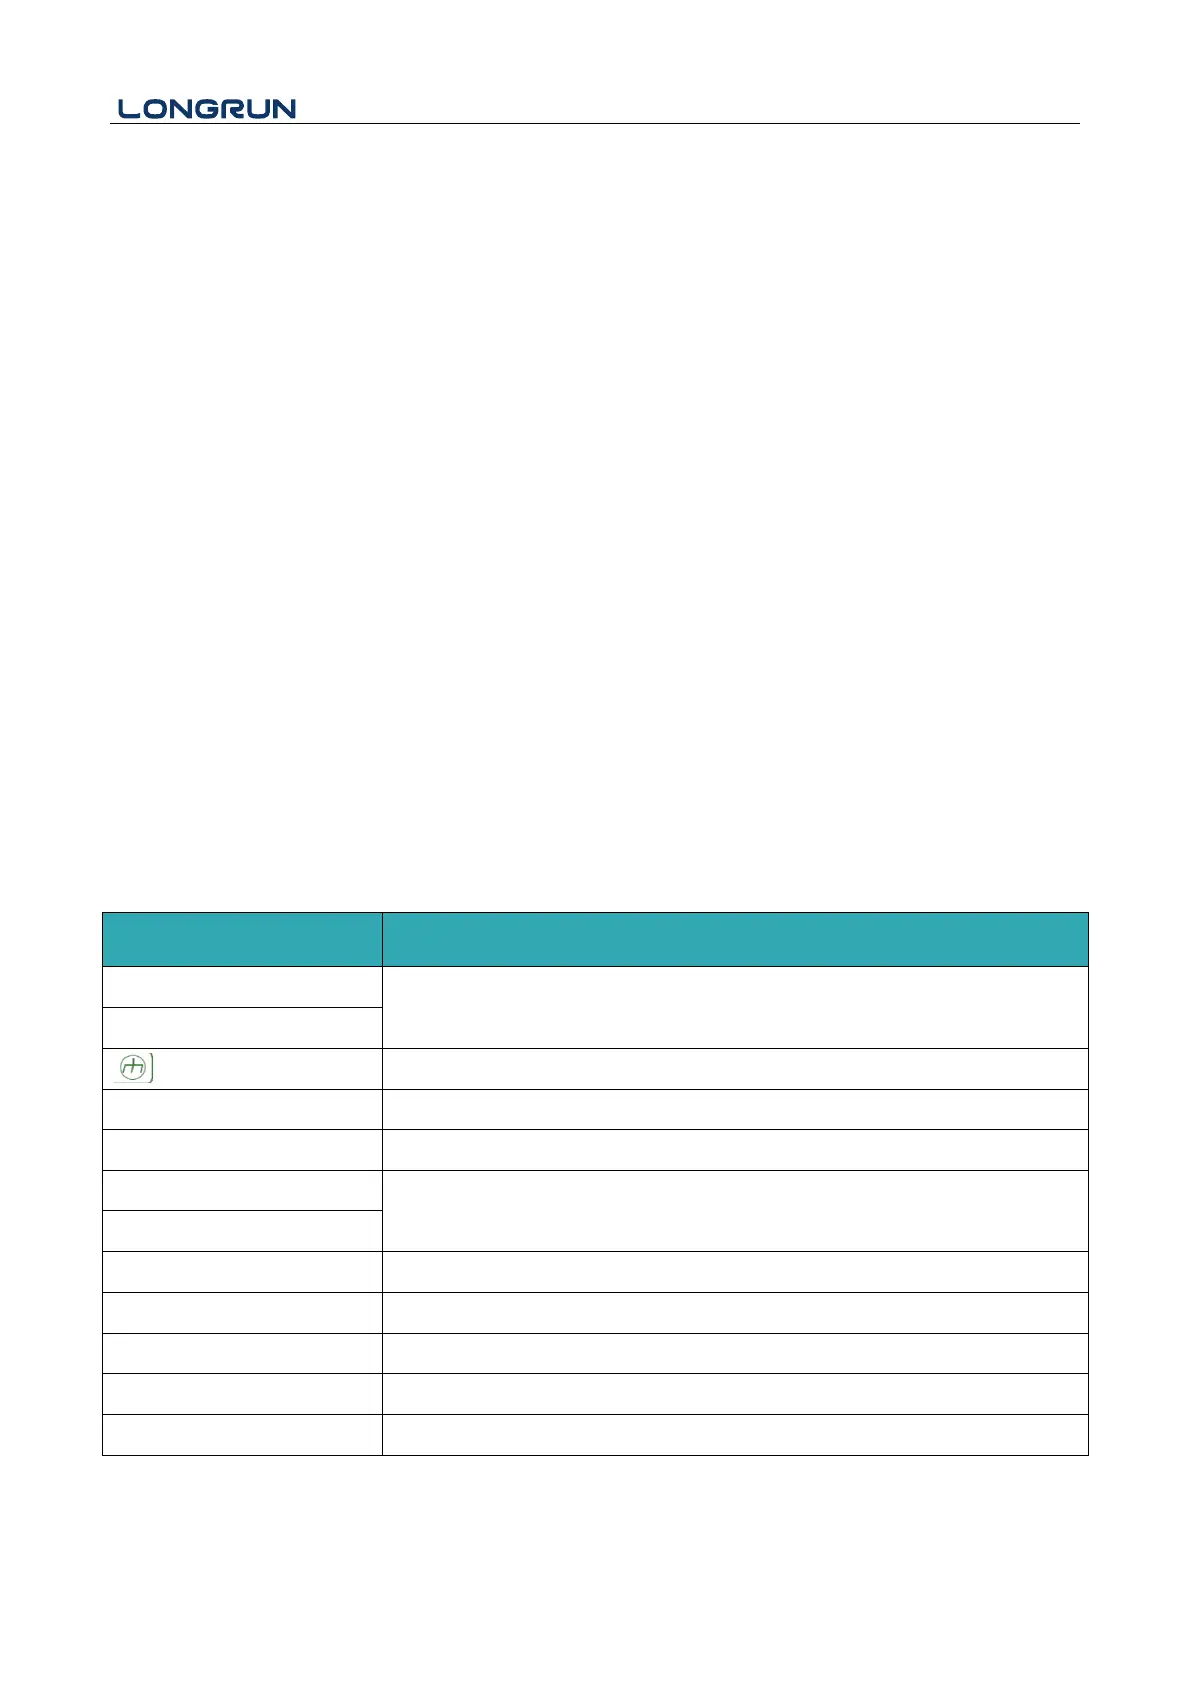
Open the case, you will find the Power board wiring ports, from left to right, are as follows;
Connect to power supplier, Relay Output, OCT Output, Transducer wiring, 4-20mA Output, RS232 Output,
RS485 Output, Analog Input.
For double-shielded transducer cable: "-" on the Blue wire, "+" on the Brown wire and "shield" on the Black
shield wire.
Refer to the below form for specific connection: