Time Tools Skills - Easy
Under 20 Minutes*
Hand Tools Plug & Play connections,
On screen set up
* Installation time may vary
based on application and
camera location
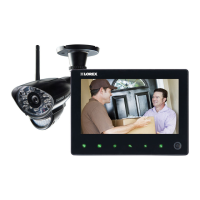
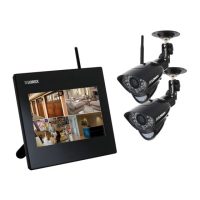
ULTRA DIGITAL WIRELESS QUAD LCD
VIDEO SURVEILLANCE SYSTEM
LW2700 SERIES - QUICK START GUIDE
NOTE: AVOID INSTALLING IN A LOCATION
WHICH REQUIRES THE WIRELESS SIGNAL
TO PASS THROUGH CEMENT, CONCRETE
AND METAL STRUCTURES. THIS WILL
REDUCE THE TRANSMISSION RANGE.
Getting Started
This Ultra Digital Wireless Video Recording
System comes with the following
components:
• Color Two-way Audio Outdoor Cameras*
• Camera Stand*
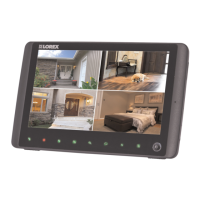
• 7” LCD Monitor/Wireless Receiver
• SD Memory Card
• Audio/Video Cable
• Remote Control
• Tabletop Stand
• Mounting Hardware Kits*
• Wireless Antennas (for camera)*
• Power Adapters (for receiver & camera)*
• Instruction Manual
*
* Number of cameras may vary by model.
Check your package for specific content
information.
A. Camera Setup
Connect power adaptor to local
120V AC power outlet.
4
Connect one end of the camera
Power Adapter to the camera
and the other end to an
electrical outlet.
3
Secure Camera to the mounting
stand. Adjust the angle of the camera
until the desired view is set. Tighten
the thumbscrews to secure the
desired camera position.
1
B. LCD Receiver Setup
Connect one end of the
Receiver Power Adaptor
to the receiver and the
other end to an electrical
outlet.
3
ATTENTION: Make sure to first connect and power on the
camera before powering on the receiver; this will ensure a
proper connection.
1
Attach the included
Antenna to the camera
by screwing it on to the
back as shown
below.
2
NOTE: When adding cameras that were not
included in the original box, you will need
to pair up the camera with the receiver.
Please refer to the Camera Pairing
Section of the User Manual.
The LCD Receiver can be setup for use on a tabletop, or mounted to a wall or underneath a counter or cupboard. See Receiver Mounting Options section below for more details.
2
Insert the included SD
card into the SD Card
slot on the LCD receiver
until you hear a “click.”
The card will not be
flush when completely
inserted.
NOTE: The receiver is
compatible with most
major brands of SD card
up to 16 GB.
Slide the power switch
on the rear panel to the
“ON” position.
4
Adjust the antenna on the
receiver as necessary to
provide the clearest
reception.
Receiver Mounting Options
1
2
3
1
Wall Mounting:
Screw the included screw and
drywall plug into the mounting
surface. Place the wall hanging
notch on the back of the receiver
over the screw to secure it.
3
Desk Mounting:
Plug the included stand into the
slot as shown below. Turn the
stand counter-clockwise until it
clicks into place. For different
viewing angles, rotate the stand
further.
2
Under-the-Counter/ Ceiling Mounting:
Install included mounting
bracket under the counter
/ on the ceiling using
included screws and drywall
plugs. Screw LCD receiver
clockwise onto the end of
the mounting bracket.
For detailed steps, please
refer to the user’s manual,
section “Under-the-Counter,
Wall, or Ceiling Mounting”.
NOTE: Keep the power
cable in mind when
mounting the LCD
receiver. You can drill an
additional hole in your
mounting surface to help
conceal the power cable.