Do you have a question about the Lovibond PFXi 195 and is the answer not in the manual?
Guidelines for environmentally sound disposal of electrical and electronic equipment.
Important safety notice regarding the power plug and its usage.
Explains typefaces, icons, and how to navigate the manual.
Defines symbols for caution, warning, and hot surfaces for user safety.
Outlines the user's obligations for correct instrument operation and warranty.
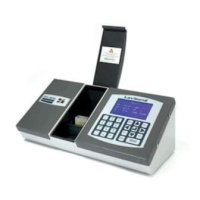
Provides a general overview of the PFXi instruments' capabilities and design.
Explains the instrument's ability to measure various industry-standard colour scales.
Instructions on properly placing and setting up the instrument.
Visual identification of key features on the front of the instrument.
Visual identification of connectivity ports on the rear of the instrument.
Procedure for powering on the instrument and initial display information.
Section for configuring instrument hardware settings.
Configuration of date, time, and regional display formats.
Instructions for selecting the instrument's display language.
Guide to configuring the instrument's real-time clock date.
Guide to configuring the instrument's 24-hour clock time.
How to set the date format for data output.
Configuration of the decimal separator character for data output.
Instructions for assigning an IP address using DHCP or static methods.
Detailed steps for entering static IP address, subnet mask, and gateway.
Procedure for configuring the subnet mask for network connection.
Steps to configure the default gateway for network access.
Configuration of the instrument's event logging feature.
Control for audible feedback when keys are pressed.
Adjusting the display backlight timeout for power saving.
Access point to various measurement configuration submenus.
Configuration for User ID and Sample ID requirements.
Setting whether User ID is required, optional, or disabled.
Setting whether Sample ID is required, optional, or disabled.
Selection of the standard observer angle for CIE measurements.
Selection of the light source for CIE measurements.
Choosing a pre-defined path length from a list.
Manually entering a custom path length for the sample cell.
Setting the units (metric/imperial) for user-defined path lengths.
Configuring the dilution factor for colour scales like EBC.
Setting a default value for the dilution factor.
Configuration of the Brix value, primarily for ICUMSA determination.
Setting a default value for the Brix measurement.
Enabling or disabling the measurement averaging function.
Defining how many measurements to average.
Choosing between manual or automatic averaging.
Setting the time interval between measurements for automatic averaging.
Configuration for recording measurement data.
Enabling or disabling the measurement logging function.
Configuration for the instrument's optional heating unit.
Enabling or disabling the heater function.
Setting the target temperature for the instrument's heater.
Customizing which colour scales are displayed and used.
Procedure for enabling additional colour scales.
Steps to calibrate the instrument with an empty sample chamber.
Guidelines for preparing samples for accurate measurement.
Step-by-step instructions for performing a sample measurement.
How to view measurement results in spectral or colour scale formats.
Displaying measurement results using various CIE colour scales (LAB, xyY).
Displaying results for non-CIE colour scales like ASTM, Gardner.
Instructions for printing measurement results via serial port.
Operating the instrument in compare mode for colour difference analysis.
Procedure to set a current sample measurement as a new standard.
Explains how the instrument reports colour deviation from standards.
Saving the current measurement data into the instrument's database.
Accessing and loading previously stored measurements from the database.
Modifying stored measurement data like sample ID.
Procedure for calibrating the instrument via a remote server.
Step-by-step guide for performing remote calibration.
Instructions for replacing the instrument's lamp.
Guidance on removing the sample chamber for cleaning or replacement.
Information on available glass cells and their specifications.
Details on reference materials for instrument calibration and verification.
Analysis of factors causing variations in readings between different instruments.
How poor maintenance affects visual instrument readings.
Common mistakes in using visual colorimeters that affect results.
Factors affecting automatic measurements, like sample turbidity and preparation.
Step-by-step guide to updating the instrument's firmware.
Instructions for registering the instrument online for warranty and support.
| Brand | Lovibond |
|---|---|
| Model | PFXi 195 |
| Category | Measuring Instruments |
| Language | English |