EasyManua.ls Logo

Lovibond SD 50 User Manual

Lovibond SD 50
2 pages
To Next Page IconTo Next Page
Page #1 background imageLoading...
Page #1 background image
SD %=
pH
SD 50
pH
7. Delete Stored Data
Recall Data (see 6.)
Press and hold (3 sec.)
CLEAR will flash
Confirm deletion of stored data
This erases all stored data
Automatic return to normal display
8. Select Buffer System
Power ON
Press and hold (3 sec.)
Press 1 x
Current pH system will flash
Press to confirm
Toggle to change / select (7.00
or 6.86)
Save and exit
9. Set Date/Time display
type
Power ON
Press and hold (3 sec.)
Press 4 x
Date is displayed
Confirm
Toggle to 12 hour clock (am/pm) or
24 hour clock
Save and exit
4. Preparation of buffer
solution
1. Fill a clean beaker with 20 ml distilled water.
2. Add one buffer tablet of the required value
and shake or crush with a clean stirring rod
until the tablet dissolves.
3. Allow to stand for about two minutes to
ensure that the buffer is completely dissolved
and to allow any insoluble particles to settle.
4. Immerse the electrode into the buf-
fer solution and carry out calibration
(see 3. Calibration)
5. Remove the electrode and rinse it tho-
roughly
6. Use the buffer solution only once
Accuracy
The maximum tolerance of fresh buffer solu-
tions is ±0.05 pH.
5. Selection of pH and mV
mode
Toggle to select mode
Note: mode mV does NOT show
ORP on the display, only millivolt.
6. Recall Data
Power ON
Press and hold (3 sec.)
Most recent memory setting will
flash
Press to recall
Most recent memory setting is
displayed
Toggle to other stored values
Press to exit
Press and hold (3 sec.) to start
calibration
CAL 1 will flash
Wait until
disappears
Press 1 sec.
Calibration will take place
CAL 2 will flash
Exit for 1 point calibration or go to
2nd point calibration
Rinse electrode with distilled
water and immerse into pH 4
L
buffer solution.
CAL 2 will flash
Wait until
disappears
Press and hold (1 sec.)
Calibration will take place
CAL 3 will flash
Exit for 2 point calibration or go to
3rd point calibration
Rinse electrode with distilled
water and immerse into pH 10
H
buffer solution
CAL 3 will flash
Wait until
disappears
Press and hold (1 sec.)
Calibration will take place
3 point calibration is finished
L
M
H
will appear on screen and
show type of calibration (1 point to
3 point calibration)
1. Power ON/OFF
Press briefly
If ! is displayed,
press to deactivate
Automatically turns off after
8 minutes of inactivity
Press and hold (3 sec.) to turn the
instrument off
Press to activate / de-activate
backlight
2. Taking a reading
Remove protective cap and immerse
the instrument into the sample to be
measured so that the instrument is
submersed to the sealing ring level.
Reading is displayed
Press briefly ! to freeze / unfreeze
Press and hold (3 sec.) to store data
While pressing button, memory
listing (e.g. 01) appears
3. Calibration
Rinse electrode thoroughly with
distilled water before using in each
buffer solution.
Re-calibrate according to individual
recommendations.
Use Lovibond
®
Standard Solutions or
pH buffer tablets in accordance with
the kit manual (see 4.)
Remove protective cap from the
probe. Turn ON, rinse electrode
with distilled water and immerse
the probe into pH 7
M
solution.
Question and Answer IconNeed help?

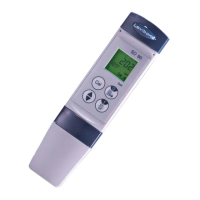
Do you have a question about the Lovibond SD 50 and is the answer not in the manual?

Lovibond SD 50 Specifications

General IconGeneral
ModelSD 50
CategoryMeasuring Instruments
DisplayLCD
Power Supply4 x 1.5V AAA batteries
pH Range0.00 to 14.00
pH Resolution0.01
pH Accuracy±0.01
mV Resolution1 mV
mV Accuracy±1 mV
Temperature Resolution0.1 °C
Temperature Accuracy±0.5 °C
Auto - OffYes
Operating Temperature0 to 50 °C
Protection classIP67
Light SourceLED
ResolutionpH: 0.01, mV: 1 mV
AccuracymV: ±1 mV
CalibrationAutomatic, 1 point
mV Range-1999 - 1999 mV

Summary

Power ON/OFF and Backlight

Turn Instrument Off

Press and hold the Power button for 3 seconds to turn the instrument off.

Activate/Deactivate Backlight

Press the Power button briefly to activate or deactivate the instrument's backlight.

Taking a Measurement

Immerse Electrode

Remove cap, immerse instrument into sample to sealing ring level for reading.

Freeze/Unfreeze Reading

Press the Cal button briefly to freeze or unfreeze the current reading displayed.

Store Data

Press and hold the Cal button for 3 seconds to store data; memory listing appears.

Calibration Procedure

Start Calibration

Press and hold the Cal button for 3 seconds to initiate the calibration process.

1-Point Calibration

Press Cal button for 1 sec after CAL 1 flashes to take the first calibration point.

2-Point Calibration

Rinse electrode, immerse in pH 4 buffer, press and hold Cal for 1 sec for 2nd point.

3-Point Calibration

Rinse electrode, immerse in pH 10 buffer, press and hold Cal for 1 sec for 3rd point.

Calibration Completion

Instrument shows completion message indicating the number of calibration points used.

Buffer Solution Preparation

Prepare Buffer

Dissolve one buffer tablet in 20ml distilled water, allow to stand for two minutes.

Buffer Accuracy

Maximum tolerance for fresh buffer solutions is ±0.05 pH.

Mode Selection and Data Recall

Select pH/mV Mode

Toggle to select between pH and mV modes. Note: mV mode shows millivolts only.

Recall Stored Data

Press and hold Cal for 3 seconds to recall the most recent memory setting.

Data Management and Settings

Delete Stored Data

Press and hold Cal for 3 seconds while in Recall mode to clear all stored data.

Select Buffer System

Press Cal once after power on to toggle between pH 7.00 and pH 6.86 buffer systems.

Set Date/Time Display

Press Cal button four times after power on to toggle between 12-hour and 24-hour clock.

Date, Time, and Temperature Settings

Set Date and Time

Follow steps to set date/time type, minutes, hours, day/month, and year.

Set Temperature System

Press Cal button three times after power on to select temperature display (°F/°C).

Troubleshooting and Maintenance

Error Code Explanations

Lists error codes, their descriptions, ranges, and recommended actions for troubleshooting.

Electrode Replacement

Step-by-step visual guide for replacing the pH electrode module.

Battery Replacement

Visual guide showing how to replace the batteries in the instrument.

Electrode Storage

Instructions for proper storage of the electrode, including moistening the cap sponge.

Product Information

pH Buffer Solutions

Lists article numbers and sizes for available pH buffer solutions and tablets.

Accessories

Lists required accessories like batteries and replacement electrodes.

Warranty Information

Details warranty period for the instrument (2 years) and electrode (6 months).

SD 50 Specifications

Outlines key specifications, operating ranges, resolution, accuracy, and features.

Related product manuals