8 Second Tier
5
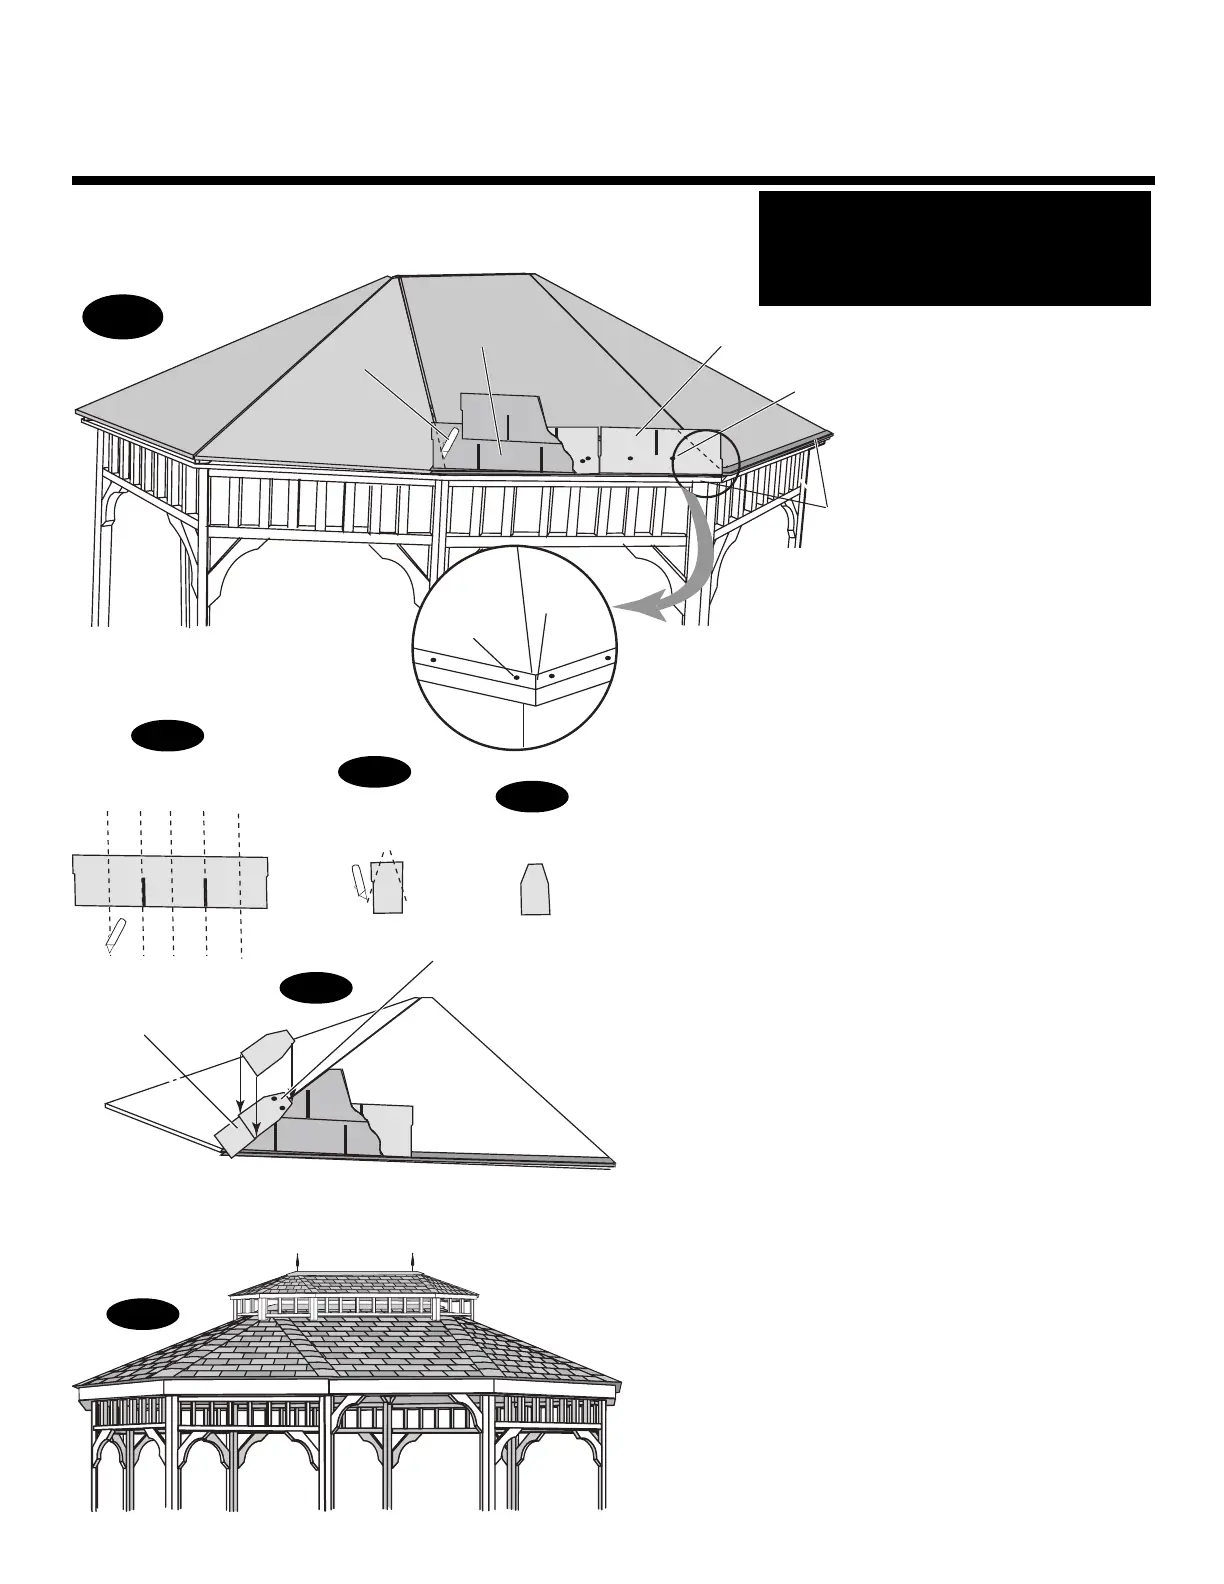
INSTALLING DRIP EDGE,
SHINGLES, METAL CAP
AND SPINDLE
❑ 1 Bundle Shingles (not included) for 10’ & 12’ Gazebo
❑ 2 Bundle Shingles (not included) for 14’ Gazebo
❑ 20 feet Drip Edge (not included) for 10’, 12’ & 14’
❑ 1 Pc. Metal Roof Cap from Gazebo
❑ 1 Pc. Roof Finial from Gazebo
Upside down
starter course
3/4" Roofing
Nail
First course
Utility Knife
Making Ridge
Cap
Cutting angle
on Ridge Cap
Ridge Cap
Installing Ridge Cap
1" Roofing Nail on
Ridge Cap
3/4"
Roof nails
Snip at
corner
Drip
Edge
5-A
Fig.1
Fig.2
Fig.3
Fig.4
Caulking the Roof Seams before
shingling will improve the water
resistance of your Gazebo.
5-A: Install the recommended Drip Edge
around the perimeter of the Roof Panels
before shingling the Roof. Snip the top of
the Drip Edge at corners and bend to
meet next Roof Panel.
Install a starter course of Shingles con-
sisting of a row of Shingles with tabs
facing up as shown in 5-A. Attach with
3/4” Roofing Nails supplied with kit. After
starter course is completed, cut excess
shingles off along seam of Roof Panels
with Utility Knife as shown in 5-A. Next,
place first course of shingles directly over
starter course in normal position and nail.
Cut excess material off in the same
manner as starter course. Continue up
Roof Panel, overlapping Shingles as you
go and cutting off excess.
To create Ridge Caps, take a shingle and
cut it into six equal pieces as shown in
Fig. 1. Cut about 1/3 of Shingle at top on
an angle as shown in Fig. 2. Install Ridge
Caps (Fig. 3) over seams where the
excess Shingle material was cut off,
making sure to cover each of the angled
cut ends of the Ridge Cap. Attach each
Ridge Cap with two 1” roof nails supplied
with kit (Fig. 4).
Place Metal Roof Cap from original
Gazebo on top of shingled Second Tier
and install Roof Finials for original Gazebo
through hole in cap and screw down
snugly (Fig. 5).
Fig.5
 Loading...