EasyManua.ls Logo

LOWES EUREKA Series User Manual

LOWES EUREKA Series
16 pages
To Next Page IconTo Next Page
Page #1 background imageLoading...
Page #1 background image
ITEM #1596997
1596998
EUREKA LED
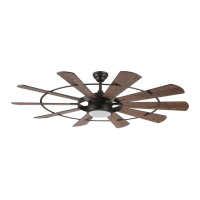
CEILING FAN
Español p. 17
MODEL #EUK60BNK10LRS
EUK60BZ10LRS
ATTACH YOUR RECEIPT HERE
Purchase Date
1
Questions, problems, missing parts? Before returning to your retailer, call our customer service
department at 1-800-527-1292, 8:30 a.m. - 5 p.m., CST, Monday - Friday.

Questions and Answers:

LOWES EUREKA Series Specifications

General IconGeneral
BrandLOWES
CategoryFan
Number of Blades5
ReversibleYes
Blade Span52 inches
Motor Speed3 speeds
WarrantyLifetime limited warranty

Summary

Safety Information

Read and Save Instructions

Keep fan carton for returns, follow electrical codes, ensure proper clearance and secure connections.

Warning: Outlet Box Support

Mount fan to a metal octagonal outlet box approved for fan support (35 lbs. or less).

Warning: Electrical and Blade Safety

Use correct wire connectors, avoid dimmer switches, do not bend blades, use provided parts.

Caution: Grounding and Assembly

Ensure outlet box is grounded, check screws, do not tamper with LED, seek assistance for heavy fixture.

Package Contents

Part Identification

Lists all included parts with their corresponding letters and quantities for assembly.

Hardware Contents

Hardware Identification

Details the screws, washers, and wire connectors included with the fan.

Initial Installation

Power Disconnection

Turn off circuit breakers and wall switch before starting installation to prevent electrical shock.

Mounting Methods

Describes standard and angle mounting, ensuring 19° max. ceiling angle for angle mounts.

Clearance Check

Verify blades are at least 30 inches from obstructions and 7 ft. from the floor.

Mounting Bracket Installation

Secure mounting bracket to outlet box using provided hardware, ensuring stability.

Downrod Assembly

Assemble downrod, canopy, and motor assembly, threading wires through the downrod.

Blade Attachment

Attach blades to motor assembly using screws and nuts, avoiding power tools.

Blade Bar Connection

Connect blades using blade bars and screws, ensuring smooth side faces the floor.

Lead Wire Preparation

Prepare lead wires by cutting excess length or stripping insulation for connection.

Hanging Ball Installation

Install hanging ball of downrod into mounting bracket, aligning slots with tab.

Wiring

Wire Connections

Connect fan wires (black, white, ground) to ceiling wires using wire connectors.

Secure Wiring

Wrap wire connectors with tape and ensure no bare wire is visible.

Final Installation

Shade Attachment

Align shade slots with motor protrusions and turn clockwise until secure.

Remote Control Bracket Mounting

Install bracket for remote control transmitter on wood or drywall surfaces.

Operating Instructions

FCC Compliance

Information regarding compliance with FCC rules for radio frequency energy.

Remote Control Setup

Install batteries in the remote control transmitter and pair with the fan.

Remote Control Functions

Details fan speeds, timer, light control, breeze mode, and reverse function.

Care and Maintenance

Regular Cleaning

Clean fan assembly annually with a soft brush or lint-free cloth, avoid water.

Troubleshooting

Fan Does Not Move

Check reverse switch, power, wiring, learning code, and blade installation.

Noisy Operation

Tighten blades, check for cracks, ensure no dimmer switch, allow break-in period.

Excessive Wobbling

Tighten blades, balance blades, secure mounting bracket, adjust downrod or location.

Fan Operates But Light Fails

Check canopy wiring and ensure wall switch is turned on.

Limited Lifetime Warranty

Warranty Coverage

Covers defects in workmanship and materials for the original purchaser.

Replacement Parts

Contact customer service for replacement parts using provided part numbers.

Related product manuals