20| ASSEMBLY INSTRUCTIONS
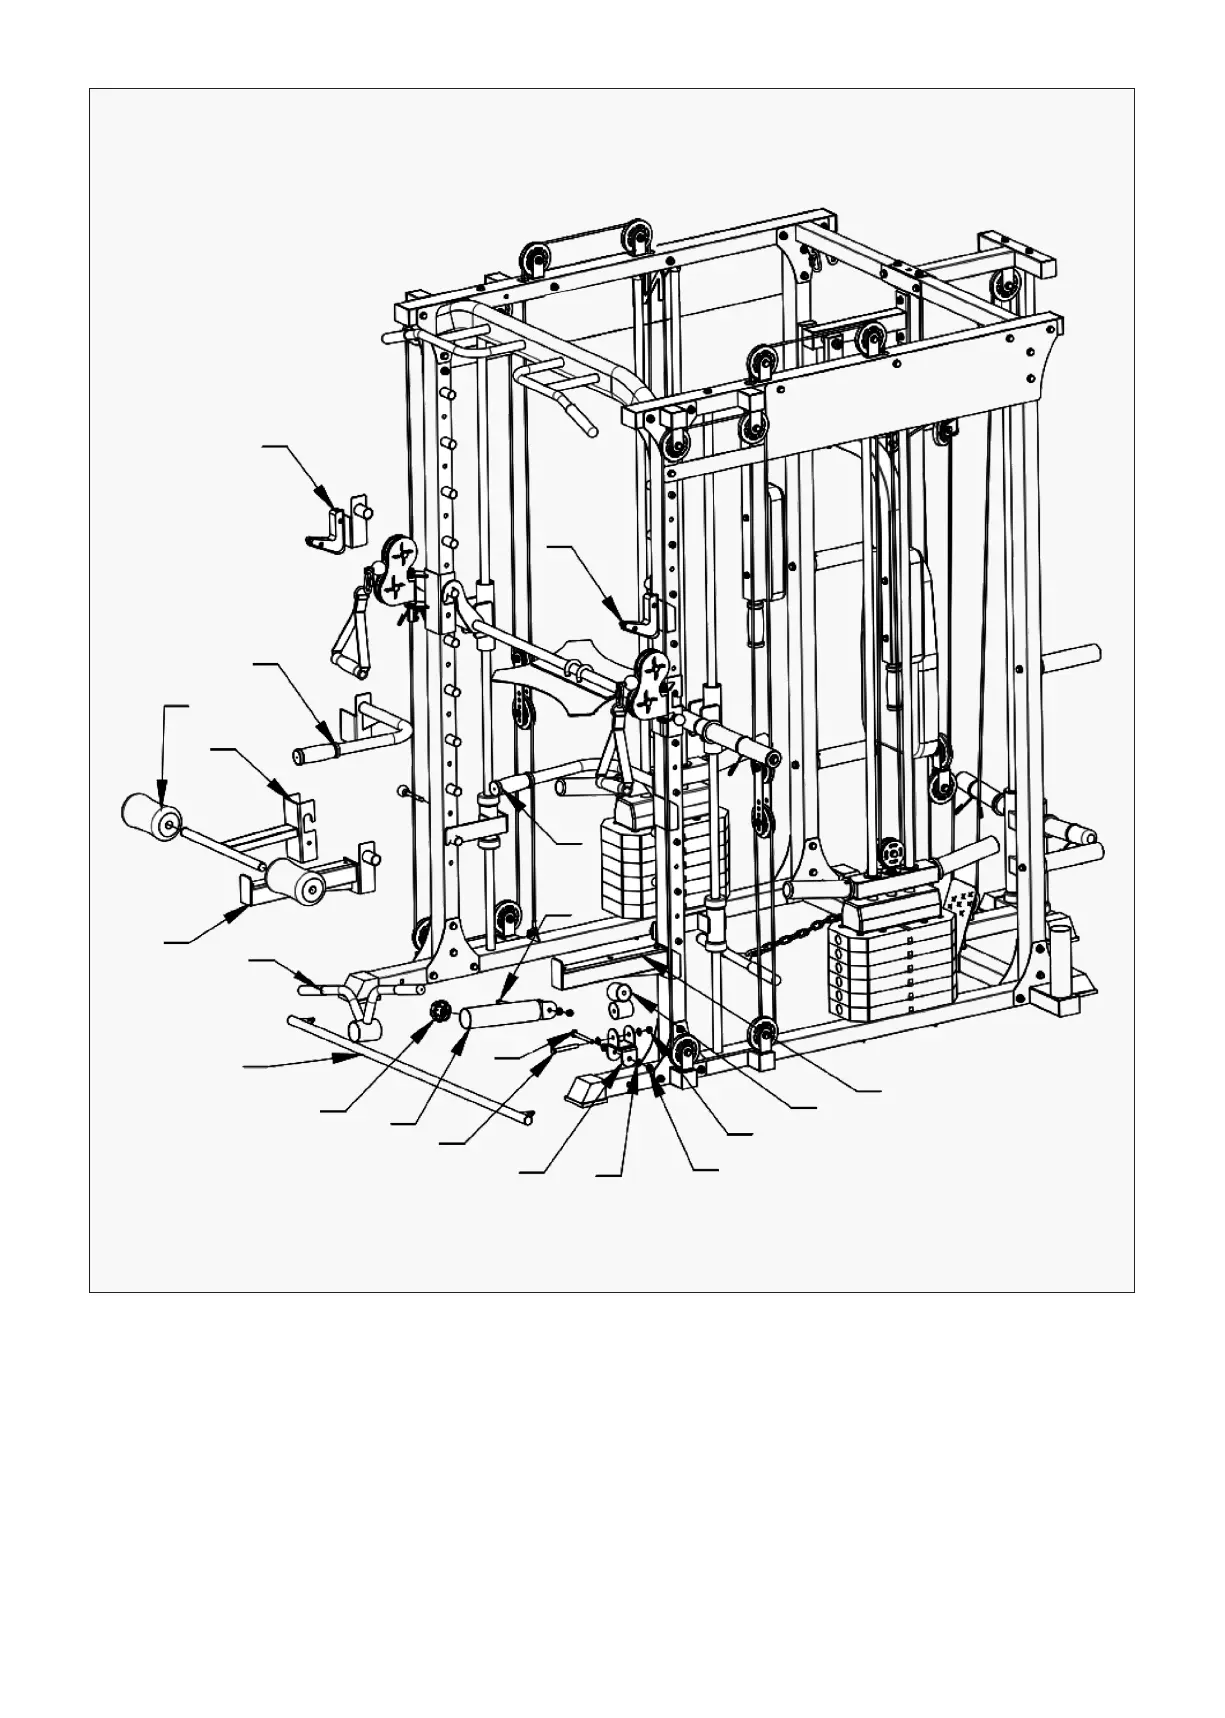
STEP 13
1. Place (#45) on (#3) and secure with bolts (#92), flat pads (#99), nuts (#100).
2. Then place (#44) on (#45) and (#43) on (#44) with bolts (#96), flat spacers (#99) and nut (#100).
Finally screw (#81) into (#43).
3. Attach (#46), (#49) and (#50) to (#9) and the same as on the other side. You can remove the (#46) dip
handles when not in use.
4. Attach (#52) to (#9), fix with (#76) ball pin and install (#70) on both sides. This can be removed when
not in use.
49
48
46
52
70
50
53
54
81
43
96
45
99
100
100
44
51
96
47