Quickstart – Smart Weather Sensors WSxxx Status 06/2016
G. Lufft Mess- und Regeltechnik GmbH, Fellbach, Germany 1
WSxxx Quickstart: Connection & First Check
Thank you for choosing our product. With this quickstart sheet, we would like to assist with connection,
installation and first check of the smart weather sensor WSxxx.
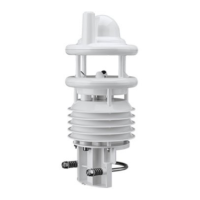
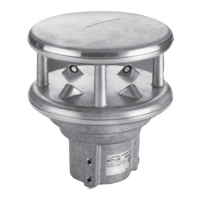
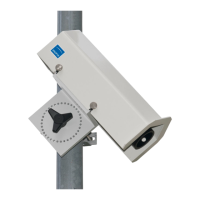
Mounting of the WSxxx on a pole:
- For mounting of the sensor on a pole, a combination wrench SW13 is required
- WSxxx with wind sensor: Every device with wind sensor must be aligned to the North in
order to ensure correct wind measurement, or automatic compass correction must be
activated – additional information to compass correction may be found in the WSxxx manual.
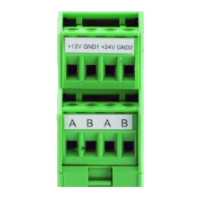
Connections & Pin assignment for using the UMB protocol:
(12-24V)
Note: If you do not
use the UMB protocol, the pin assignment is changing. More detailed
information on this subject may be found in the WSxxx manual.
Connection to ISOCON-UMB:
Warning: The heating voltage (red = positive
heating voltage; blue = heating voltage
ground) is not connected to the ISOCON-UMB but
wired direct to the power supply unit.
When using surge protection, please pay attention
to the connection example in the surge protection
operating instructions.
First check of WSxxx after installation via UMB-Config-Tool software:
1. Install UMB Config tool software on the PC or laptop
(Software available on the in the delivery included memory stick and on www.lufft.com/WSxxx /
)
2. Connect Com-Port PC/laptop with interface ISOCON-UMB (RS232-SUBD9 1:1)
3. Start program under: Start
programs
Lufft UMB-Config
start UMB-Config Tool
4. Choose used Com-port “Edit
connection settings”
5. Open sensor menu with „Edit
Sensors“, use „Type of sensor“ and add the WSxxx (click add
button) to the sensor list
6. Use „Verify“ to check the communication to the sensor
7. Click on „Active channels“ and activate the desired channels
(click on the channel)
8. Leave window with button„Save/Exit“
and start measurement using button „file -> start measurement“
Manual of the Lufft smart weather sensor WSxxx:
You can find the complete manual of the WSxxx on the memory stick, which is
included in the scope of delivery or as download under the following link:
www.lufft.com/WSxxx/