After Sales Support
Telephone: 1300 886 649
Email: info@tempoaustralia.com.au
After Sales Support
Telephone: 1300 886 649
Email: info@tempoaustralia.com.au
5 6
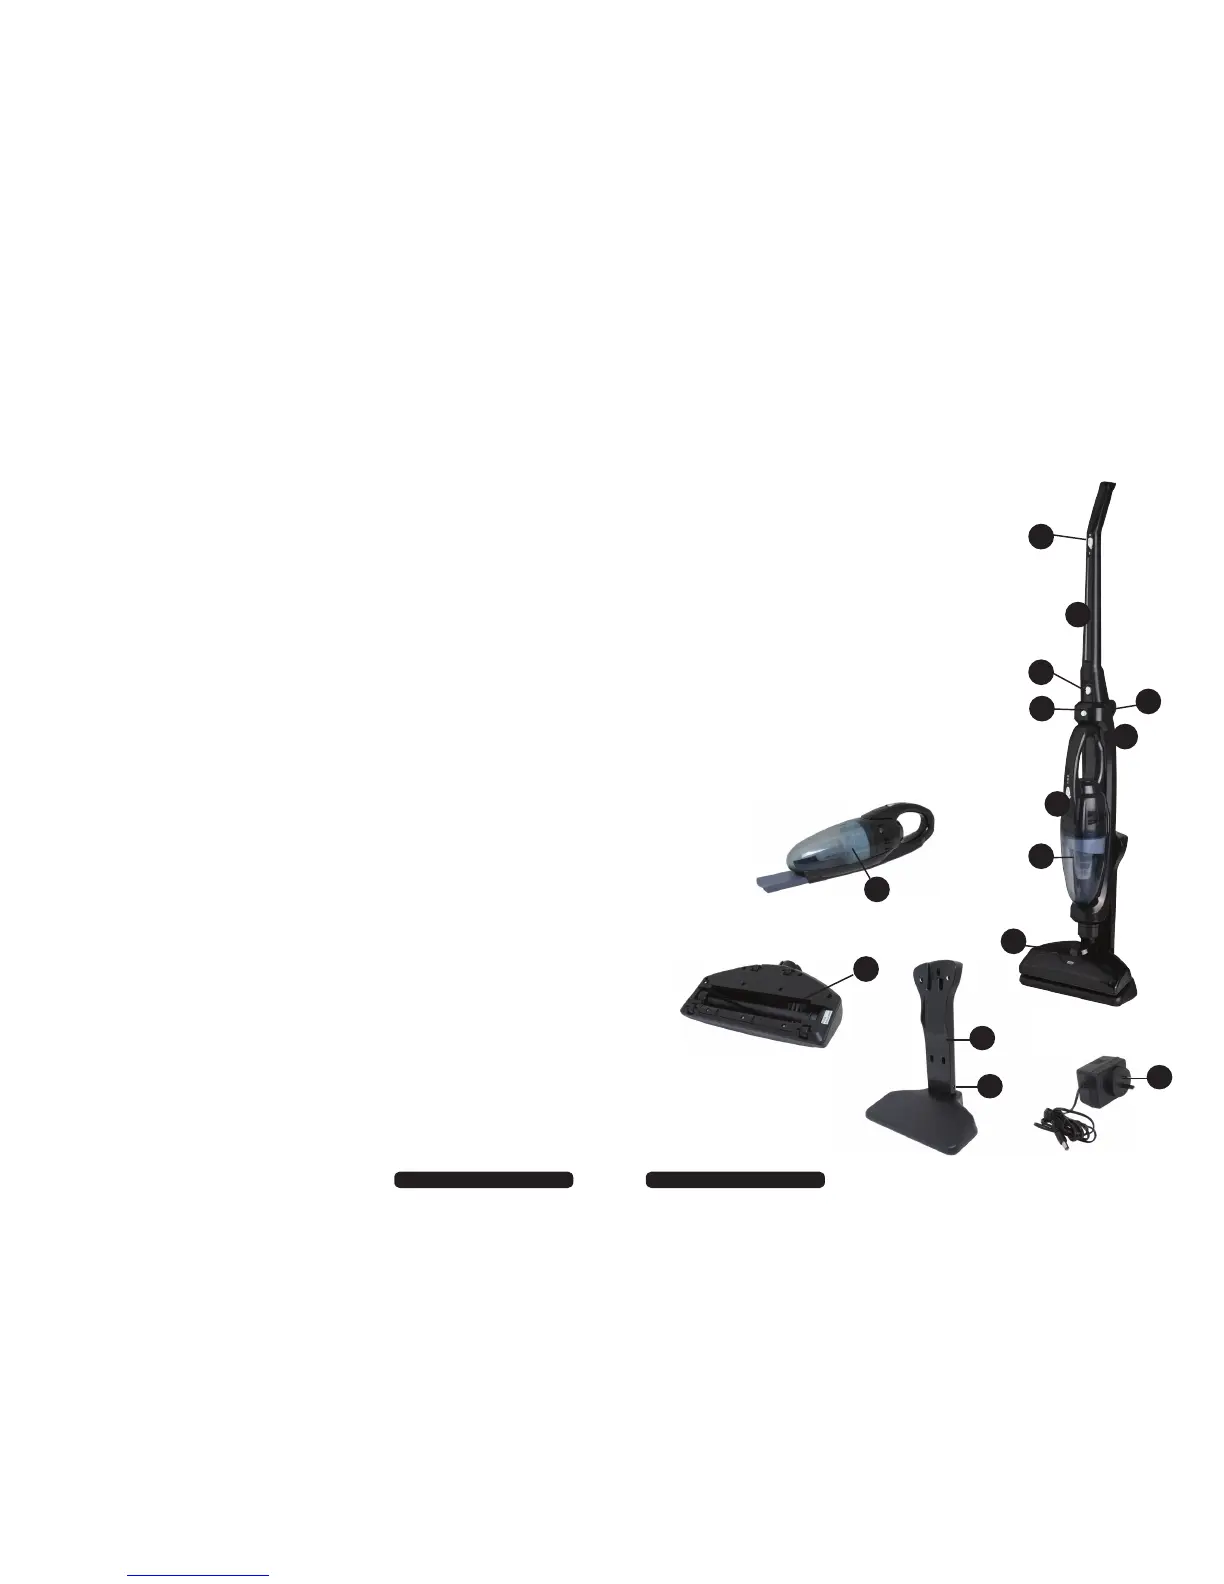
General Safety Instructions (Cont.) Parts List
1a
1b
3
4
5
2
6
7
8
9
13
• When charging the appliance, place the charger base:
• on a flat surface to avoid overturning,
• close to a power point so no one trips over the cord,
• away from heated surfaces, such as a stove or heater surface.
• Do not touch the battery charger or the power cord with wet hands.
• Do not leave the appliance unsupervised while the charger is connected.
Safe usage
• Only use the vacuum cleaner on dry surfaces.
• Do not point the vacuum cleaner at people or animals when in use.
• Take extra care when vacuuming on stairs.
• Do not put any objects into openings. Keep all openings free of dust, lint,
hair or anything that may reduce the airflow. Do not use the product with any
openings blocked or restricted airflow.
• Do not use the vacuum cleaner to pick up:
• flammable or combustible fluids (such as fuel or solvent), burning
substances (such ash, cigarettes or hot coals) or use it in the presence of
explosive liquids or vapours,
• hard or sharp objects such as shards of glass, nails, coins,
• harmful or toxic materials (such as chlorine bleach, ammonia, drain
cleaner).
Cleaning and care
• Before cleaning, servicing or moving the vacuum cleaner, make sure it
is disconnected from the charging station and the charging station is
disconnected from the power socket.
• The appliance has no user-serviceable parts contained within. Do not
attempt to repair, disassemble or modify it.
• Never attempt to open the device or the battery charger yourself, or to
replace the power cord. Only have the appliance repaired by an authorised
technician, or contact the after sales support line for advice.
1 a) On/Off switch (on the upper handle)
b) On/Off switch (on the handheld unit)
2 Upper handle
3 Release button (for the handle)
4 Release button (for the handheld unit)
5 Foldable handle axis
6 Main body frame
7 Filter assembly (inside the handheld unit)
8 Handheld vacuum cleaner
9 Turbo brush
10 Charging station
11 Charger socket
12 Battery charger
13 Rotating brush assembly
10
11
12
 Loading...