Emptying and cleaning the dust canister
After using the vacuum cleaner, take off the dust canister, empty it and clean the
filters so the unit is ready for your next use.
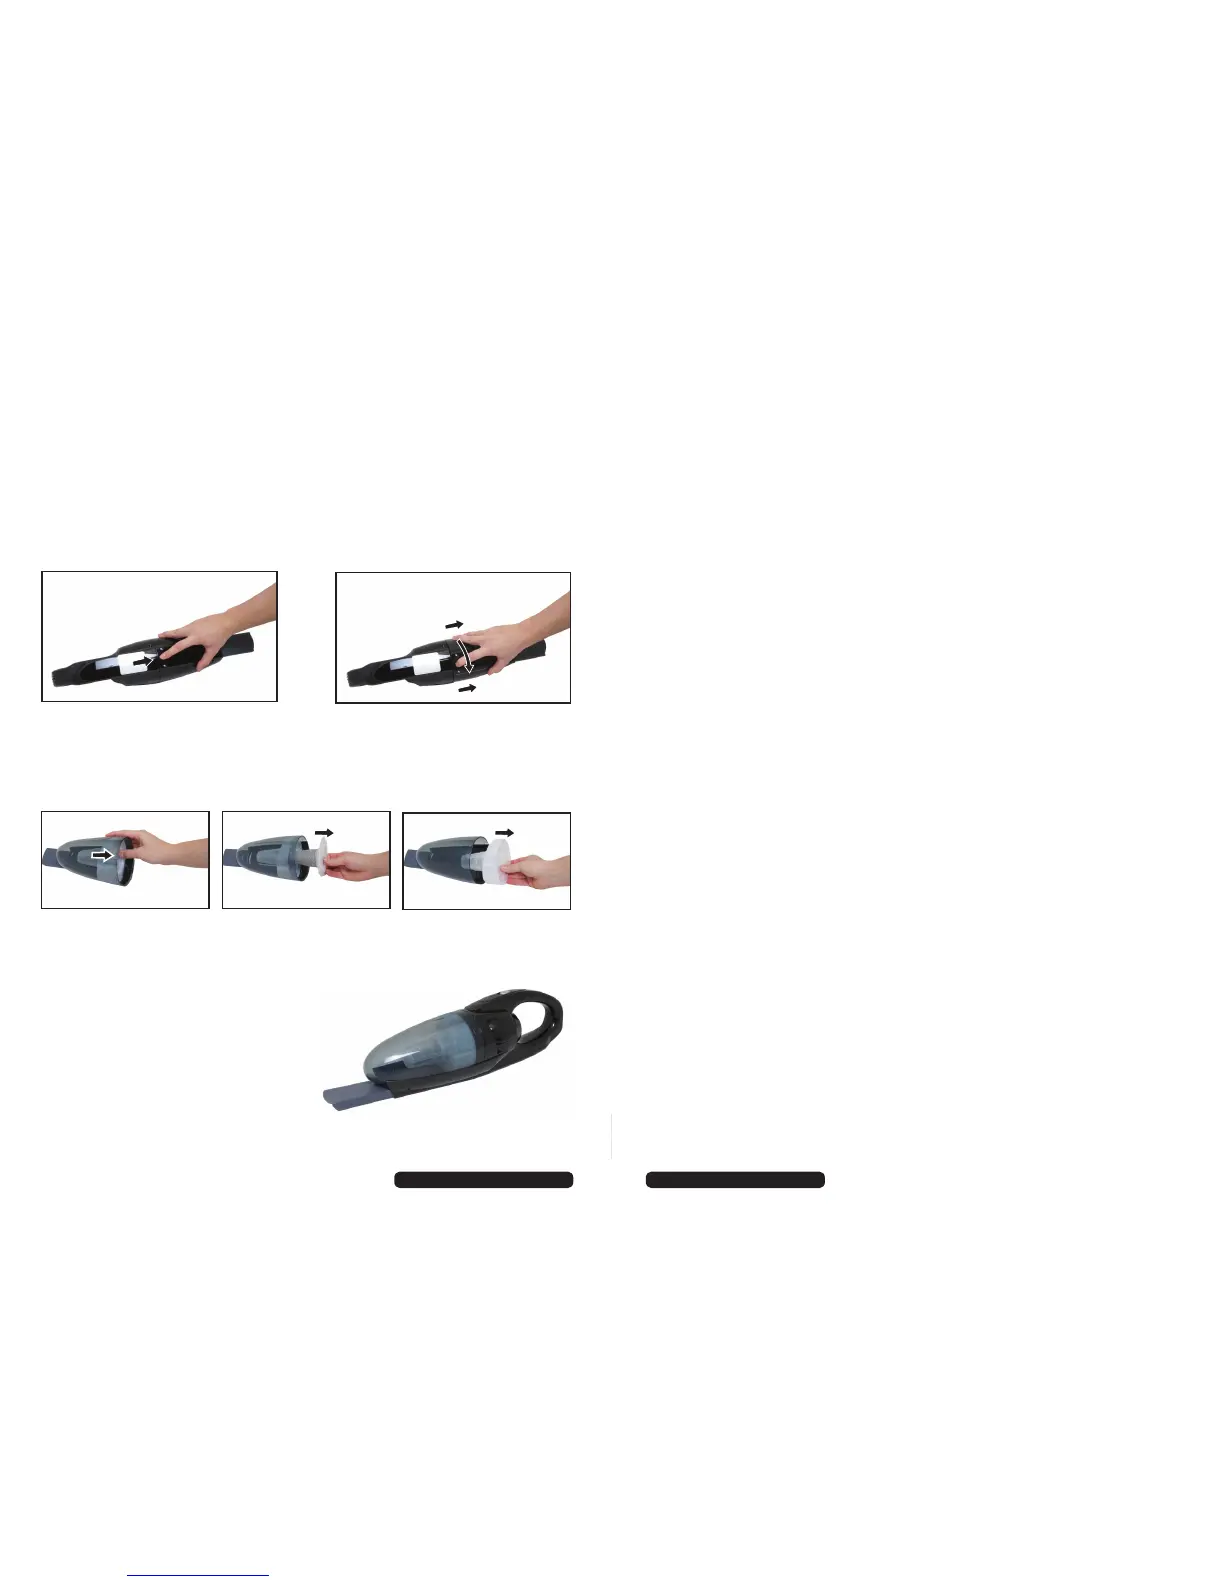
1. To remove the dust canister, push the release button at the back of the unit
forward and twist the dust canister off the motor unit, as illustrated below:
2. Pull out the filters as illustrated below. Empty the contents of the dust
canister into a waste bin or bag. You can shake out the filters until they are
clean or wash and rinse them in warm water, if necessary.
3. Make sure all parts are dry before re-assembly.
Reassembling the components
1. To reassemble the unit, put the cloth
filter inside the plastic frame with the
mesh filter.
2. Push the filter assembly back into the
dust canister.
3. Twist the dust canister back onto the
motor unit until it clicks into place.
After Sales Support
Telephone: 1300 886 649
Email: info@tempoaustralia.com.au
After Sales Support
Telephone: 1300 886 649
Email: info@tempoaustralia.com.au
9 10
Other Useful Information (Cont.)Other Useful Information
Responsible disposal
At the end of its working life, do not throw this appliance out with your household
rubbish. Electrical and electronic products contain substances that can have
a detrimental effect on the environment and human health if disposed of
inappropriately. Observe any local regulations regarding the disposal of electrical
consumer goods and dispose of it appropriately for recycling. Contact your local
authorities for advice on recycling facilities in your area.
Cleaning the rotating brush assembly
If the rotating brush assembly (part 13 on page 6) becomes blocked or jammed
for any reason, the effective power will be lowered and the rotating brush may
need to be cleaned.
1. Turn off the device and carefully remove any items such as threads that may
have become entangled.
2. If the rotating brush needs to be lifted out, unscrew the hatch cover with a
Phillips head screwdriver, take the hatch off and gently lift the rotating brush
off the belt and out of the housing.
3. Clean the rotating brush.
4. Replace the rotating brush, making sure it fits into its guiding tracks, with the
belt around the corrugated end so it can spin freely.
5. Screw the hatch cover back into place.
Cleaning the wheel axles
6. If a wheel is jammed by threads or dirt that you cannot remove without
removing the wheel:
7. Carefully prise the wheels loose with a screwdriver inserted into the cavity.
8. Remove threads or any other objects that may have become jammed in the
wheel axles.
9. Reassemble the wheels by pressing them tightly together back into their
position.
 Loading...