4
Model No.: SR400/SR401
Remote Control Operation
5
luminancebrands.com
Please contact 1-800-777-4440 for further assistance
Model No.: SR400/SR401
Receiver Installation (Continued)
2.3:
(Figure 4)
8. Position the Antenna Wire on top of the Receiver.
9. Slide the Receiver completely onto the Hanger
Ball, nestled in the Hanger Bracket.
10. While inserting the Receiver fully into the Hanger
Bracket, turn Wires upward and carefully push
Wires into the Outlet Box, with the White and
Green Wires on one side of the Outlet Box and
position the Black and Blue Wires on the other
side of the Outlet Box.
11. Reinstall the Ceiling Cover taking care not to
pinch any Wires.
12. Reinstall the electrical power to the circuit.
To avoid possible fire or shock, make sure
that the electrical wires are completely inside
the outlet box and not pinched between the
ceiling cover and the ceiling.
WARNING
!
WIRE
CONNECTORS
(Tucked Inside
Outlet Box)
ANTENNA
RECEIVER
HANGER
BRACKET
Figure 4
Refer to the Ceiling Fan Owner’s Manual to complete
this installation.
Figure 5
LIGHT
FAN OFF
BUTTON
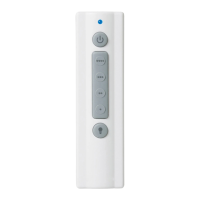
3.1
1. When power is restored, push and hold the Fan
OFF Button ( ) for 3 to 5 Seconds to set the
Code in the Receiver (Figure 5).
NOTE: The Ceiling Fan Lights (if installed) will Blink
to indicate the Transmitter has been paired with the
Receiver.
2.
To turn the Ceiling Fan OFF, press and release the
Fan OFF Button ( ).
3.2
3.
The Remote Control is designed to separately
control your Ceiling Fan Speed and Light Intensity
(Figure 6).
4. There are Four Push Buttons (
.
,
..
,
...
,
....
)
to set the Fan Speed.
Figure 6
BUTTONS
POWER INDICATOR
LIGHT
3.3
5.
The Light Push Button ( ) turns the Light
ON and OFF and controls the Light Intensity
(Figure 7).
6.
To vary the Intensity of the Light, hold the
Light Button (
) down until the desired Light
Intensity is reached, then release the Button
(Figure 7).
NOTE: When turning the light on, light will turn on at
the light intensity previously selected.
7.
Your Remote Control has full control of your
Fan and Light.
8.
The Power Indicator Light (blue glow) will
Illuminate while any Button is pressed,
indicating that the Battery is good.
Figure 7
POWER INDICATOR
LIGHT
LIGHT BUTTON
FOR FANS WITH PULL CHAINS: For your Fan/Light
Control to operate properly, the Fan Pull Chain Switch
must be set to operate the Fan at HIGH Speed, and the
Light Kit must be switched to ON position. To avoid
accidental Pull Chain use, shorten Chains.
 Loading...