Do you have a question about the Luminance Brands SR400 and is the answer not in the manual?
Details what the limited warranty includes for ceiling fan products against defects.
Outlines the duration of warranty coverage for different fan components and accessories.
Explains the process for obtaining warranty service, including proof of purchase.
Lists exclusions from the limited warranty, such as normal wear and tear or improper installation.
Defines the extent of Luminance Brands' liability for damages related to the product.
Describes the process for resolving disputes, including arbitration and class action waivers.
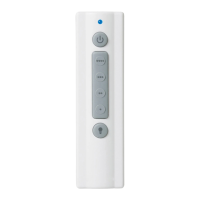
Advises on safe usage, handling, and installation of the remote control unit.
Emphasizes electrical safety during installation and use, referencing codes and licensed electricians.
Warns about using the control only with specific types of ceiling fans to prevent hazards.
Explains the memory function of the remote control receiver for retaining settings.
Guides on how to install and handle batteries for the remote transmitter, including precautions.
Details how to set the code switches for communication between remote and receiver.
Provides steps to diagnose and fix issues where the fan or light does not work.
Offers solutions for problems with the remote's operating range, such as antenna placement.
Highlights essential safety warnings before starting receiver wiring, including turning off power.
Provides detailed steps and diagrams for connecting the receiver wires to the fan and power supply.
Explains the process to pair the remote transmitter with the receiver unit using a button sequence.
Details how to use the remote buttons to adjust the ceiling fan speed settings.
Guides on using the remote to turn the light on/off and adjust its brightness level.
This document provides comprehensive information regarding the Luminance Brands Ceiling Fan/Light Remote Control, including its limited warranty, installation procedures, operational instructions, and troubleshooting tips. It is designed to assist users in understanding, installing, and maintaining their remote control system effectively.
The Luminance Brands Ceiling Fan/Light Remote Control is designed to provide convenient wireless control over your ceiling fan's speed and light intensity. It consists of a hand-held transmitter and a receiver unit that mounts under the fan's ceiling cover. The system allows for separate control of fan speed and light, offering a versatile solution for managing your ceiling fan's functions from a distance. The remote control features a preset memory function, which remembers the last selected light intensity and fan speed, resuming those settings when power is restored. This feature is particularly useful if the fan's power supply is controlled by a wall switch. The remote also includes a light dimming selection switch, allowing users to enable or disable the dimming functionality for their lights.
The hand-held transmitter is powered by two AAA alkaline batteries. To install batteries, users need to press firmly below an arrow and slide off the battery cover, then insert the batteries according to the placement printed on the compartment. It is crucial to avoid mixing old and new batteries. For extended periods of non-use, batteries should be removed to prevent leakage damage.
The remote control offers 32 possible code combinations through five adjustable levers (numbered 1-5) on its code switches. These levers are factory-set in the ON (up) position but can be changed to ON (up) or down positions using a ball-point pen or small screwdriver. This feature helps prevent interference from other remote units like garage door openers or security systems. If the fan and light operate without using your control, changing the combination code in the transmitter is recommended.
For fans with pull chains, it is essential to set the fan pull chain switch to operate at HIGH speed and the light kit to the ON position for the remote control to function properly. Shortening the chains can prevent accidental pull chain use.
When power is restored, the remote control needs to be paired with the receiver. This is done by pushing and holding the Fan OFF button for 3 to 5 seconds. The ceiling fan lights (if installed) will blink to indicate successful pairing. The remote control features four push buttons for setting fan speed, allowing users to select their desired fan speed. The light push button turns the light ON and OFF and controls its intensity. To vary the light intensity, users hold down the light button until the desired intensity is reached. When the light is turned on, it will resume the intensity previously selected. A power indicator light (blue glow) illuminates when any button is pressed, indicating that the battery is good.
A storage bracket is provided for holding the remote control when not in use. To install it, slide the wall bracket cover up to expose the screw holes, position the bracket on the wall in a desired location away from excess heat or humidity, install the two provided screws, and then slide the cover back down.
The limited warranty covers defects in workmanship and materials for the fan motor, LED drivers, LED arrays, and other components. The warranty period for consumer fan motors is for the lifetime of the original purchaser, while industrial fan motors are covered for five years. LED drivers and arrays are covered for five years. Other ENERGY STAR® certified components are covered for three years, and all other components and accessories are covered for one year. All warranty periods begin on the date of original purchase.
To receive warranty service, the original purchaser must have proof of purchase from an authorized Luminance Brands Dealer. Users can return the product to the dealer or call customer service to obtain a return authorization and service identification tag. It is important to retain the receipt or other proof of purchase and have model numbers ready when contacting customer service. If a defect is covered, Luminance Brands will repair or replace the product at no charge. If repair or replacement is not practical, a refund of the actual purchase price will be provided. Shipping of the repaired or replacement product is free, but costs for removal and reinstallation are the user's responsibility.
The warranty does not cover glass globes, light bulbs, labor costs (including electrician's fees), normal wear and tear, damage from conditions beyond reasonable control (e.g., unforeseeable environmental conditions, unauthorized repairs, mishandling, misuse, abuse, modifications), improper installation, or purchases from unauthorized dealers. The warranty becomes null and void if the original purchaser ceases to own the product or if it is moved from its original installation point. The warranty is valid only within the 50 United States, the District of Columbia, and Canada.
In case of troubleshooting, if the fan/light fails to operate, users should check that the speed control switch (if pull chain) on the fan is set to HIGH speed, the light switch (if pull chain) on the fan is ON, the battery is good (power indicator light should illuminate when any button is pressed), and that the receiver is wired properly. If the remote control has a short range (operates when close but not at 40 feet), try placing the antenna wire outside the ceiling cover.
For installation of the receiver, it is crucial to turn off electricity at the main fuse box before wiring to avoid electrical shock. All wiring connections must be made using supplied wire connectors, ensuring they are tight and no bare wires are exposed, except for the ground wire. The receiver's white wire (AC IN N) connects to the supply white wire (neutral), the black wire (AC IN L) to the supply black wire (HOT), the receiver white wire (TO MOTOR N) to the fan motor white wire, the receiver black wire (TO MOTOR L) to the fan motor black wire, and the receiver blue wire (TO LIGHT) to the fan motor blue wire. If no light exists on the ceiling fan, the blue wire on the receiver should be capped with a wire connector. Failure to properly connect the receiver wires will damage the device and render it non-operable. After wiring, the antenna wire should be positioned on top of the receiver, and the receiver slid completely onto the hanger ball, nestled in the hanger bracket. Wires should be pushed carefully into the outlet box, with white and green wires on one side and black and blue wires on the other. Finally, the ceiling cover should be reinstalled, ensuring no wires are pinched. Electrical power can then be restored to the circuit.
| Brand | Luminance Brands |
|---|---|
| Model | SR400 |
| Category | Remote Control |
| Compatibility | Universal |
| Number of Devices Supported | 4 |
| Backlight | No |
| Connectivity | Infrared (IR) |
| Color | Black |
| Power Source | Battery |