Page 6 For technical questions, please call 1-888-866-5797. Item 62565
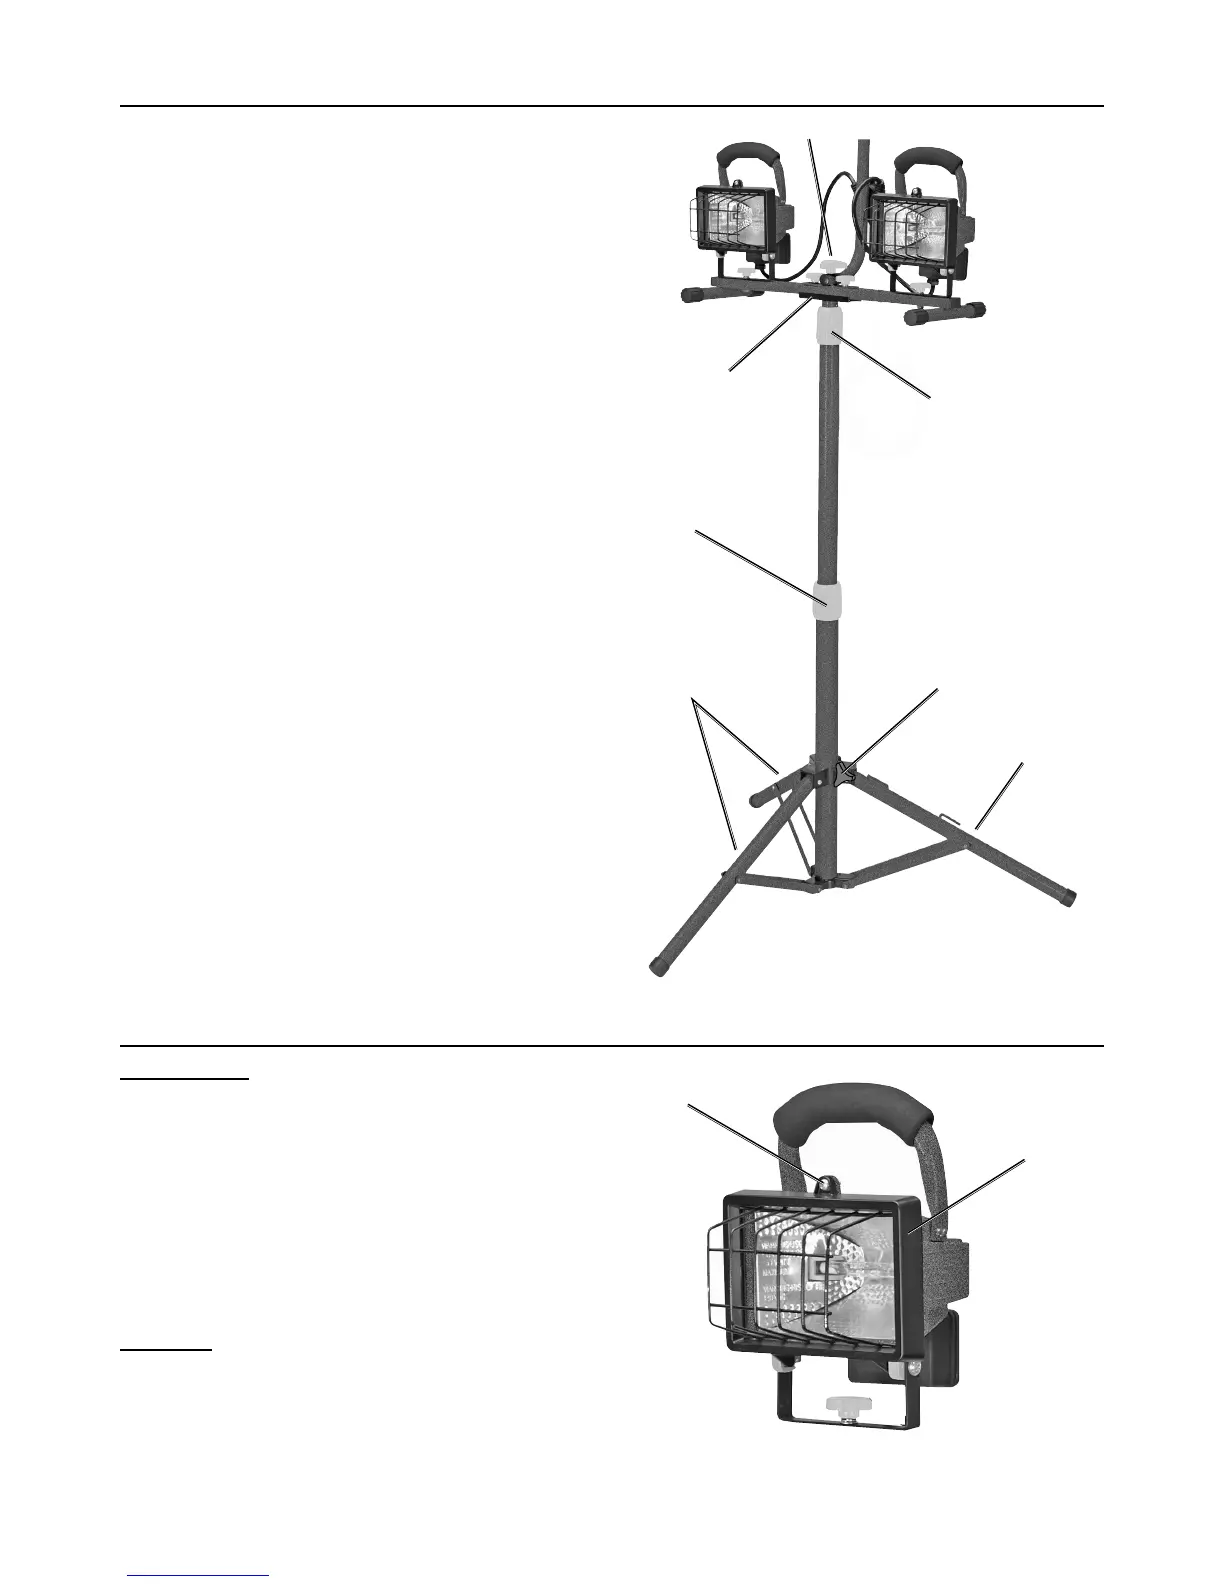
Tripod Setup
1. Loosen the Support Knob located at the top
of the Tripod leg assembly where the three
tripod legs meet. Refer to Figure B.
2. Move the support legs away from the center
tube of the Tripod and push down on the center
leg connector to extend the three legs.
3. Retighten Support Knob.
4. To adjust Tripod height, loosen one of
the Height Adjusting Knobs and raise the
pole section to the desired height.
5. Firmly tighten the Height Adjusting
Knob after adjustment.
6. To attach the Lamp Head assembly to the Tripod,
place the assembled Portable Stand onto the stand
bracket on the upper end of the Tripod tube. Thread
the Stand Attachment Knob through the hole on
the Center Handle/Portable Stand and into the
top of the stand bracket. Firmly tighten the Stand
Attachment Knob to secure. Refer to Figure B.
Height
Adjusting Knob
Height
Adjusting Knob
Support
Knob
Legs
Leg
Stand Attachment Knob
Stand Bracket
Figure B
Light Assembly
For each light:
1. Remove the Bolt at the top of the housing and
open the Lamp Cover. Refer to Figure C.
2. The bulb is shipped in a protective
box inside the light.
3. One of the lamp holder sockets is spring-loaded
and is marked “ENGAGE LAMP THIS SIDE
FIRST.” Insert the Bulb into that side of the Bulb
Socket first, then pivot it over to the other side.
CAUTION! Do not touch the Bulb with your bare
hands; oil from skin will drastically shorten the life
span of the bulb if not cleaned with rubbing alcohol
and allowed to dry before use. Handle the bulb with
a soft, clean cloth or clean work gloves instead.
4. Close the Lamp Cover and secure with the Bolt.
Bolt
Lamp
Cover
Figure C
 Loading...