Disconnect your PhotonMaster from any USB connections before starting cleaning procedure.
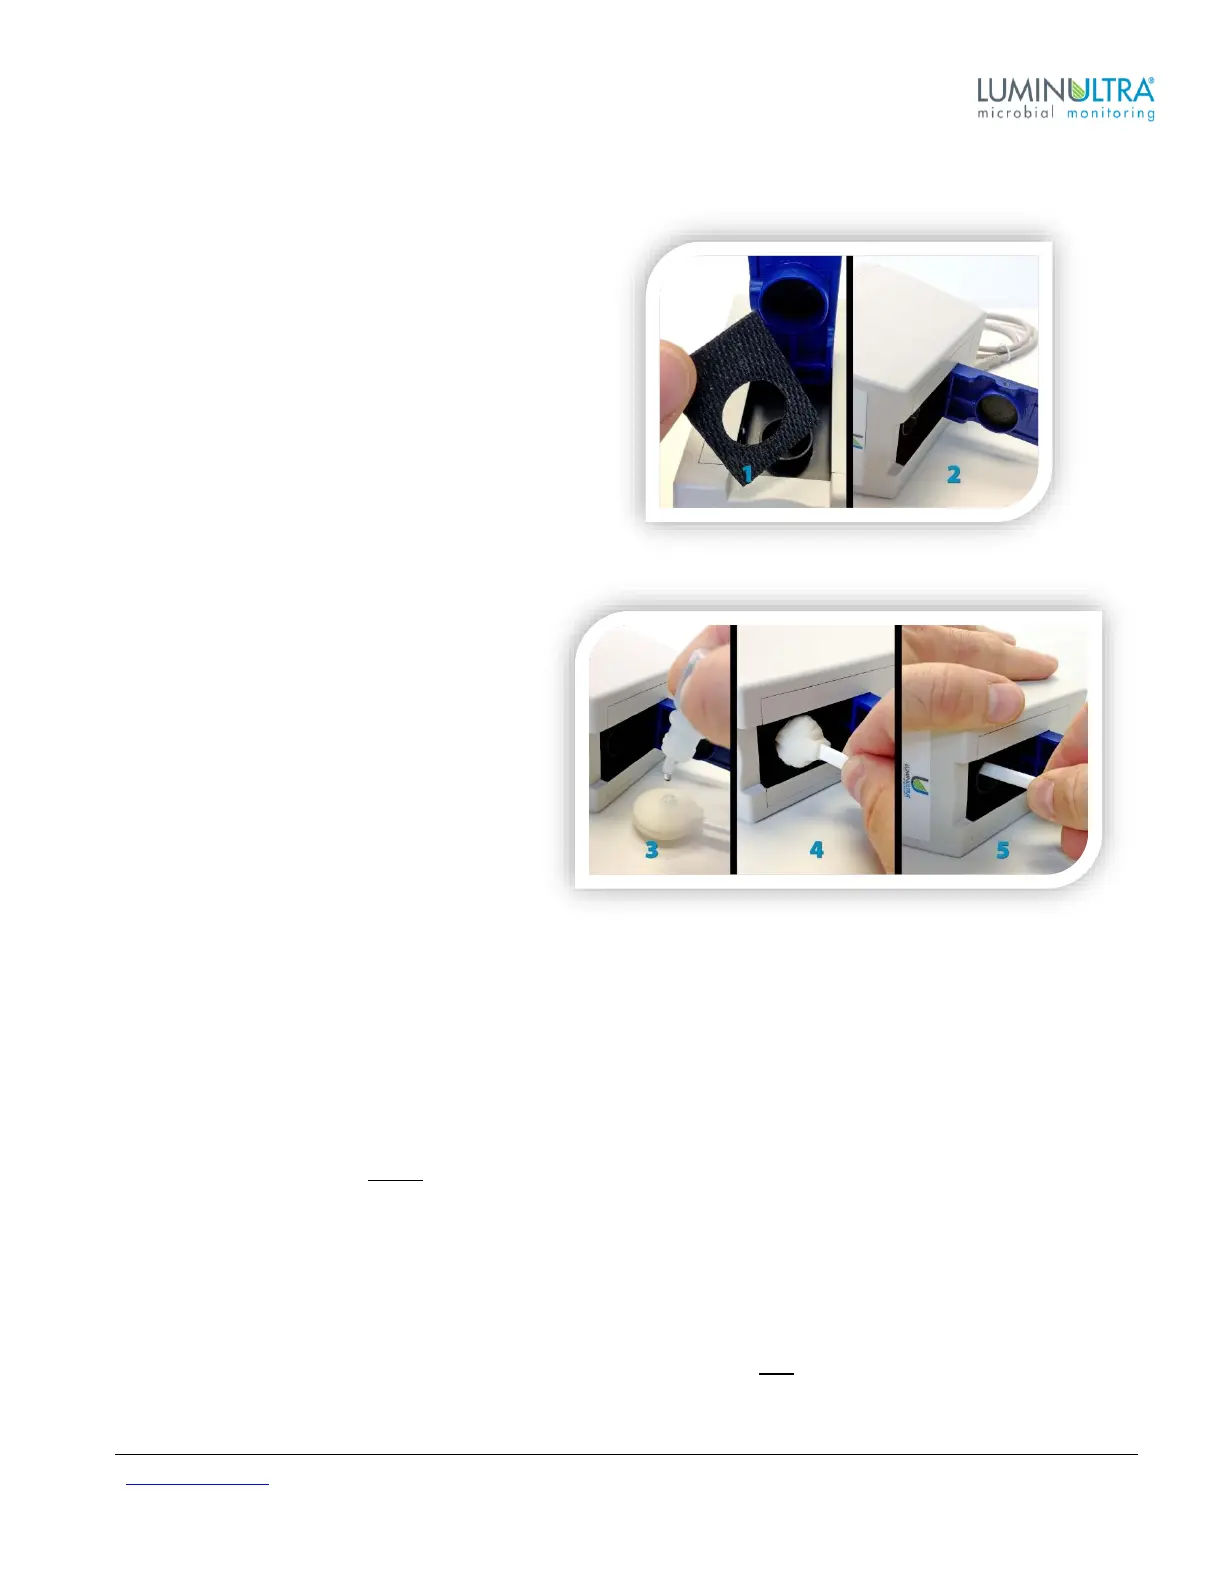
1. Remove the rubber gasket from around the
Counting Chamber.
2. Carefully lay the unit on its side with the lid open.
3. Using provided cleaning solution only; apply 6-8
drops to the swab. Using the dropper tip to
spread the fluid around the swab to aid in
absorption. Before inserting into the chamber.
4. Once cleaning fluid has thoroughly been
absorbed by the swab, slowly insert into
the chamber. Some fluid may be
squeezed from the swab.
5. Insert the swab fully into the chamber
until it stops. Turn the swab 6x clockwise
while lifting the swab up and down within
the chamber. Repeat 6x counter
clockwise, lifting the swab up and down
within the chamber to ensure complete
coverage. If heavily soiled, apply more
fluid and repeat steps.
DRYING: Using a new dry swab, repeat the 6x clockwise / counter clockwise motion. Pull the swab and feel for
dampness. If damp, use a new swab and repeat twisting steps. Continue to use new clean swabs until the swab
comes out dry. This usually requires three swabs.
Verify that cleaning was successful by testing the travel of the piston in the chamber (it should be smooth) and
through visual inspection. If there is still visible debris in the chamber, perform cleaning again.
NOTE: To prevent damage, do not reuse swabs after cleaning
Luminometer Linearity and Calibration Instructions
The PhotonMaster does not require re-calibration, but LuminUltra does recommend that you verify linearity on an
annual basis using our Luminometer Standardization Kit (LSK) or Luminometer Maintenance Kit (LMK).
For the best protection, we recommend that you clean your luminometer and verify linearity on an annual basis.
Contact LuminUltra for details.