1
FOR USE IN SOIL ONLY. DO NOT USE IN LIQUIDS.
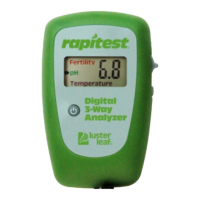
IMPORTANT INFORMATION REGARDING YOUR NEW METER
These instructions cover all aspects related to the analyzer’s function and will help guide you to experiencing the proper temperature, pH and
fertility range for the plants you intend to grow.
BEFORE TESTING THE SOIL
If you are preparing to plant a bed of plants or shrubs, or to plant a crop of fruits and vegetables, or to put out grass seed, you will find it
beneficial to sample and test the soil in a number of locations in the area to confirm that the soil is warm enough for what you want to plant,
that the soil‘s pH is generally consistent over the entire area and that it is within the plant‘s pH range.
BASIC OPERATING INSTRUCTIONS
1. Press the power button to turn the meter on and off.
2. When the meter is turned on for the first time it defaults to fertility.
3. After using for the first time, the meter will default to the function last used.
4. The toggle switch is located on the right side of the meter.
5. Move the toggle switch up or down to change test function.
6. The test function in use is indicated by the blinking arrow on the meter face.
7. When not in active use, the meter will turn off after about four (4) minutes,
to preserve battery life.
HOW TO USE YOUR METER TO MEASURE SOIL TEMPERATURE
1. With the unit turned on, and in temperature mode, insert the probe to a minimum depth of 2” to 3” (5-8 cm) into the soil.
2. Wait 60 seconds to acclimatize the probe and note the LCD reading. Remove the probe from the soil.
HOW TO USE YOUR METER TO MEASURE pH
1. Remove the top 2” of the surface soil. Break up & crumble the soil underneath to a depth of 5”. Remove any stones or organic debris
such as leaves and twigs because they can affect the final result.
2. Thoroughly wet the soil with water (ideally rain or distilled water) to a mud consistency.
3. Use the toggle switch to move the indicator arrow to point to pH.