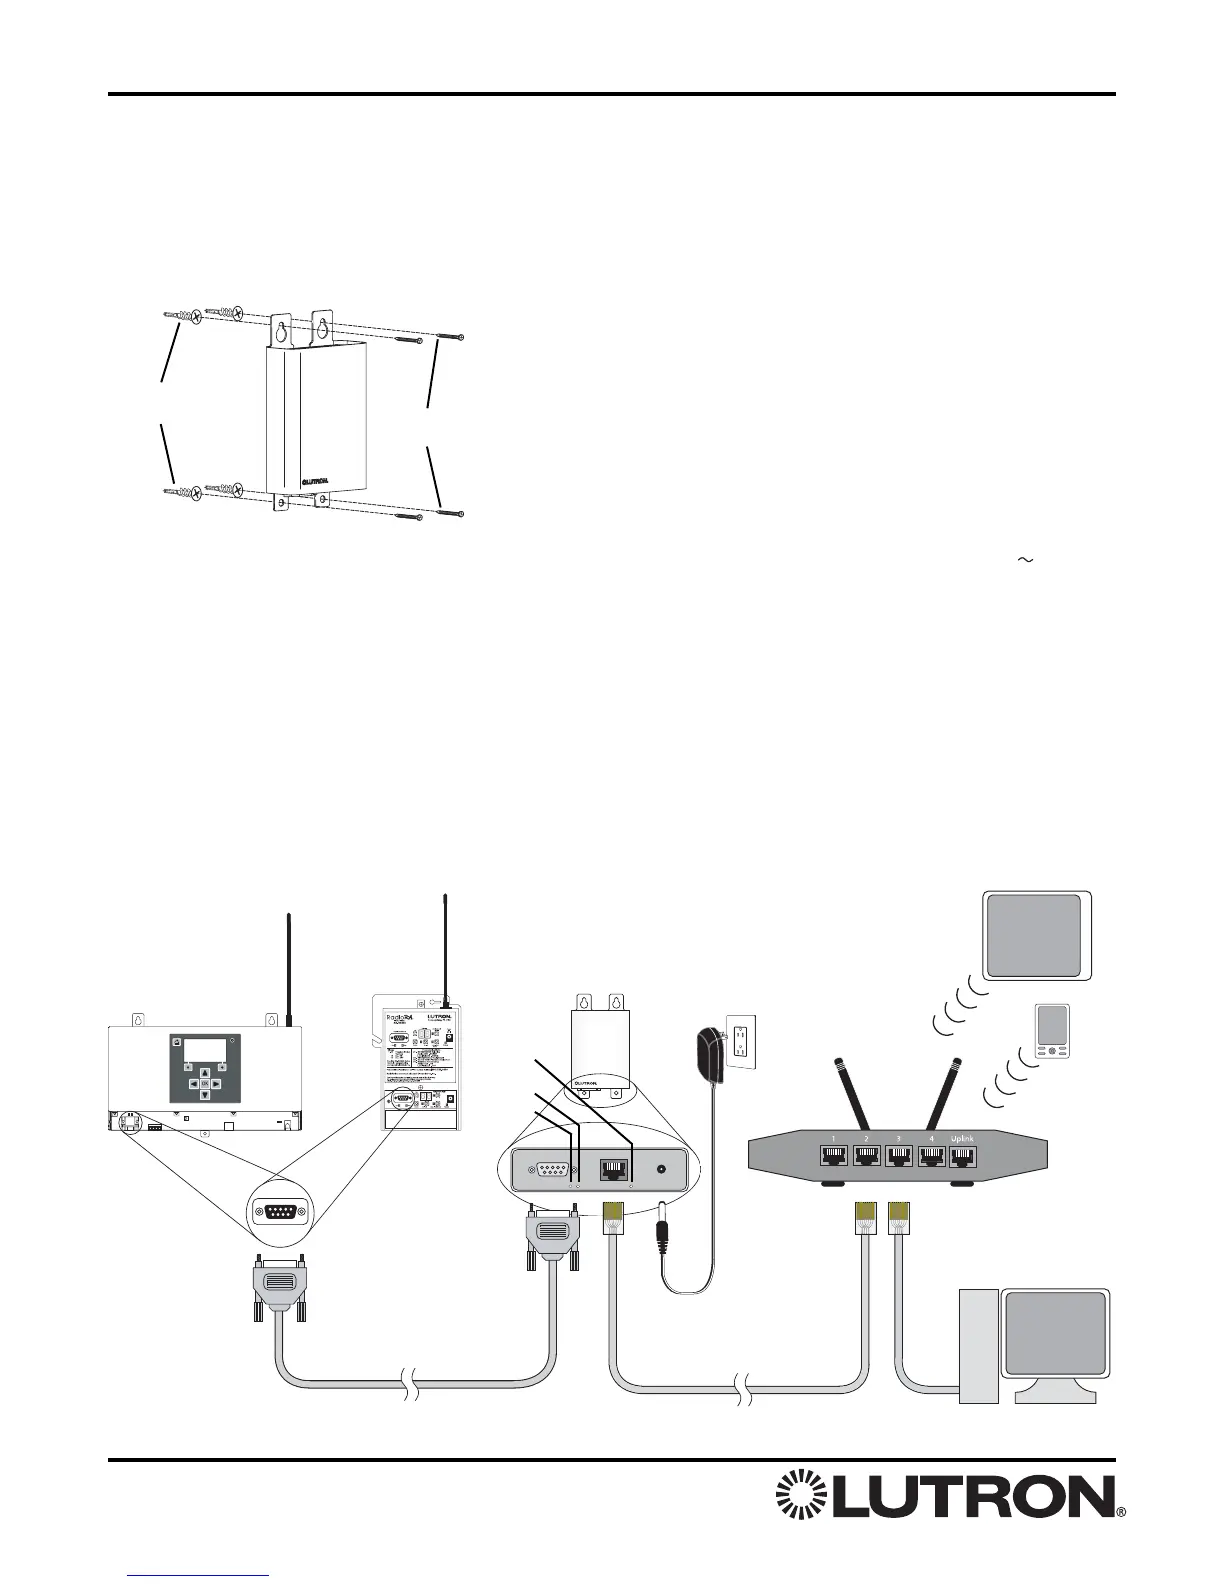
NCI Connections
2
Chronos
OR
Power LED
Ethernet
Activity LED
User LED
Ethernet
Router
Web
Tablet,
Tablet PC
PDA
Personal
Computer
Serial Cable
50 feet maximum
Ethernet Cable
328 feet maximum
RA-NET-120
Power
Adapter
Standard
Receptacle
RS232
Interface
Setup and Installation
1. Mount the NCI. Place the NCI in a suitable clean,
dry, ventilated indoor location, near the RS232
Interface or Chronos
TM
System Bridge and
Timeclock. Using the screws and anchors
provided, mount the interface in a convenient
location.
Note: The NCI is not designed to be installed in an
attic, crawl space, or an outdoor location.
2. Connect RS232 Cable. Connect a standard 9-
pin serial cable to the serial port on the
NCI. Connect the other end of the cable to the
serial port on the RS232 Interface (RA-RS232) or
Chronos System Bridge and Timeclock (RA-SBT-
CHR). See NCI Connections (below).
3. Connect Ethernet Cable. Connect a
standard Ethernet cable to the RJ-45 jack on the
NCI. Connect the other end of the cable to the
Ethernet hub/switch/router.
Note: Do not connect the NCI directly to a PC.
See NCI Connections (below).
4. Connect Power. Insert the power adapter’s barrel
plug into the power jack on the RA-NET-120. Plug
the power adapter into a standard 120 V 60 Hz
wall receptacle. The Power LED (see NCI
Connections, below) should illuminate when the
NCI has power.
Wall
Anchors
Mounting
Screws
 Loading...